

背景
从2017年12月Kubeflow在Kubecon USA宣布开源至今,已经经过2年多的时间。在过去的两年里Kubeflow已经成长为一个拥有数百名贡献者的优秀开源项目。Kubeflow的目标是让机器学习工程师或者数据科学家可以利用本地或者共有的云资源构建属于自己的ML的工作负载。2020年3月,Kubeflow正式发布1.0版本。在Kubeflow 1.0的版本中, 有多项重要的核心应用毕业,这些应用帮助用户在Kubernetes的平台上高效的开发、构建、训练和部署模型。毕业的应用有:
- Kubeflow's UI, the central dashboard
- Jupyter notebook controller and web app
- Tensorflow Operator (TFJob) and PyTorch Operator for distributed training
- kfctl for deployment and upgrades
- Profile controller and UI for multiuser management
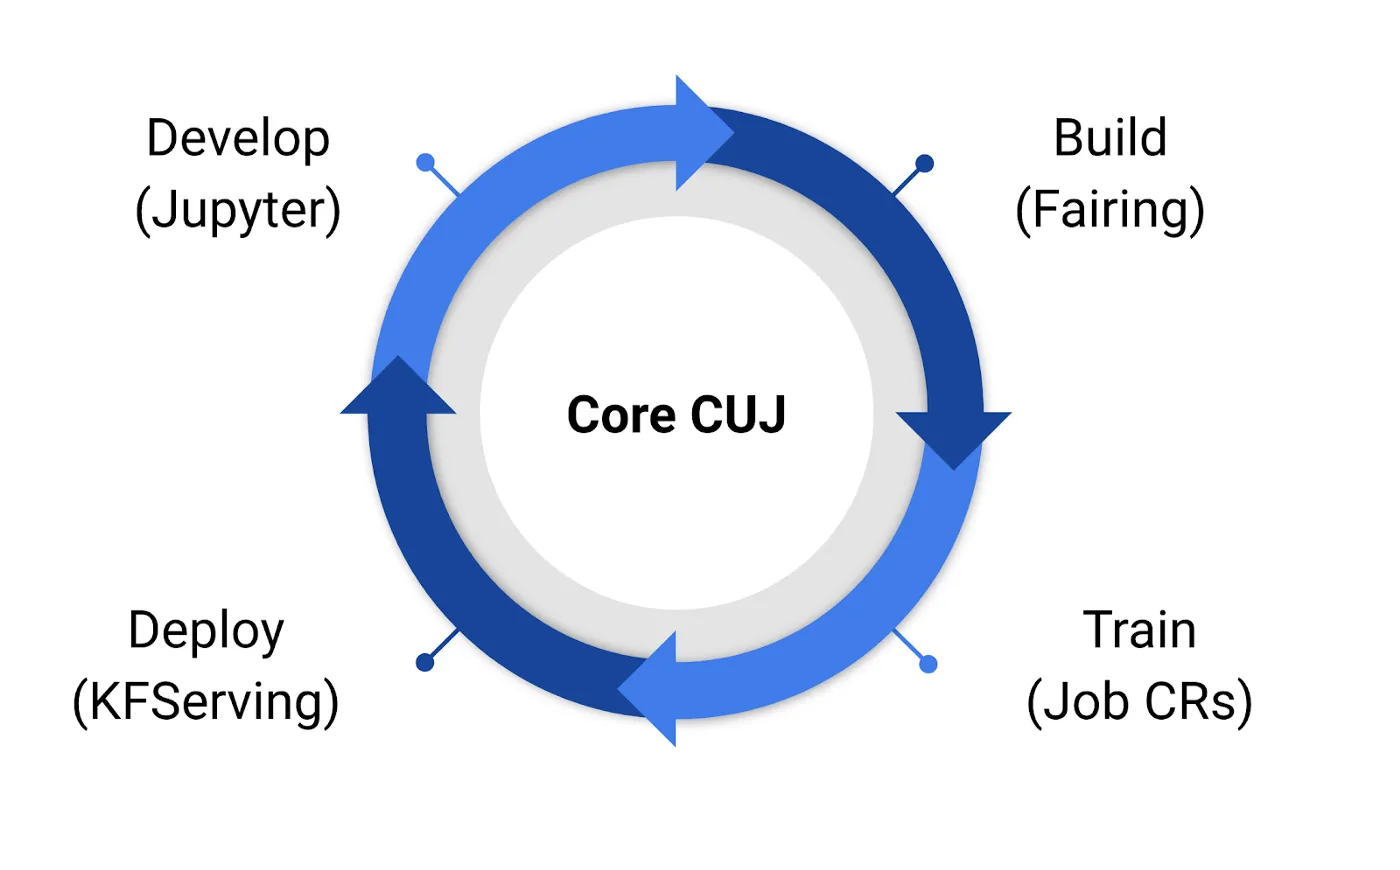
通过使用Kubeflow1.0, 用户可以通过Jupyter开发模型,然后利用Kubeflow提供的工具fairing(Kubeflow’s python SDK)来构建镜像,最后通过Kubernetes调度资源来训练模型。一旦他们有了训练好的模型,他们可以使用KFServing来创建部署推理服务。
在阿里云上部署Kubeflow1.0
环境检查
1.需要Kubernetes集群1.14及以上
2.有些用户在安装时,因为集群预先安装过istio,所以导致安装失败,建议之前先清理掉istio的相关内容
Kubeflow1.0 服务部署
1.下载kfctl工具用于kubeflow部署
wget http://kubeflow.oss-cn-beijing.aliyuncs.com/kfctl_v1.0-0-g94c35cf_linux.tar.gz
tar zxvf kfctl_v1.0-0-g94c35cf_linux.tar.gz
mv kfctl /usr/bin/
2.初始化部署环境和下载部署所用manifests (此处为了适配阿里云ACK的一键部署,类似国内镜像拉取超时、服务访问不通等问题已经处理,请使用阿里适配后的CONFIG文件)
export KF_NAME=my-kubeflow
export BASE_DIR=/root/
export KF_DIR=${BASE_DIR}/${KF_NAME}
export CONFIG_URI="http://kubeflow.oss-cn-beijing.aliyuncs.com/kfctl_k8s_istio.v1.0.1.yaml"
mkdir -p ${KF_DIR}
cd ${KF_DIR}
kfctl build -V -f ${CONFIG_URI}
export CONFIG=${KF_DIR}/kfctl_k8s_istio.v1.0.1.yaml
3.创建服务运行时需要的本地PV,用户可以根据自己情况创建不同类型的PV,
cat << EOF > local_pv.yaml
apiVersion: v1
kind: PersistentVolume
metadata:
  name: pipeline-mysql-pv
  namespace: kubeflow
  labels:
    type: local
    app: pipeline-mysql-pv
    key: kubeflow-pv
spec:
  capacity:
    storage: 20Gi
  accessModes:
    - ReadWriteOnce
  hostPath:
    path: /data/pipeline-mysql
    type: DirectoryOrCreate
---
apiVersion: v1
kind: PersistentVolume
metadata:
  name: pipeline-minio-pv
  namespace: kubeflow
  labels:
    type: local
    app: pipeline-minio-pv
    key: kubeflow-pv
spec:
  capacity:
    storage: 20Gi
  accessModes:
    - ReadWriteOnce
  hostPath:
    path: /data/pipeline-minio
    type: DirectoryOrCreate
---
apiVersion: v1
kind: PersistentVolume
metadata:
  name: katib-mysql
  namespace: kubeflow
  labels:
    type: local
    app: katib-mysql
spec:
  capacity:
    storage: 20Gi
  accessModes:
    - ReadWriteOnce
  hostPath:
    path: /data/katib-mysql
    type: DirectoryOrCreate
---
apiVersion: v1
kind: PersistentVolume
metadata:
  name: metadata-mysql-pv
  namespace: kubeflow
  labels:
    type: local
    app: metadata-mysql-pv
    key: kubeflow-pv
spec:
  capacity:
    storage: 20Gi
  accessModes:
    - ReadWriteOnce
  hostPath:
    path: /data/metadata-mysql
    type: DirectoryOrCreate
EOF
kubectl create -f local_pv.yaml
4.服务部署,时间稍长,请耐心等待....(预计10min以内)
kfctl apply -V -f ${CONFIG}部署后环境检查
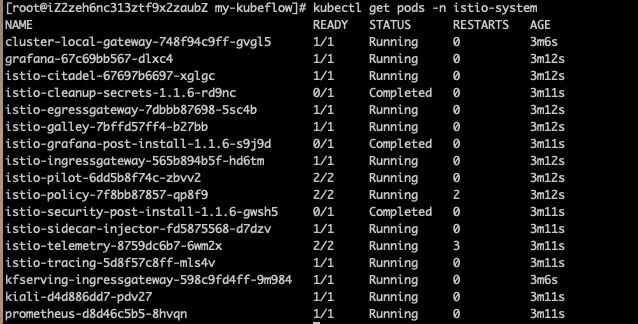
1.istio-system下的pod是否启动正常,执行kubectl get pods -n istio-system
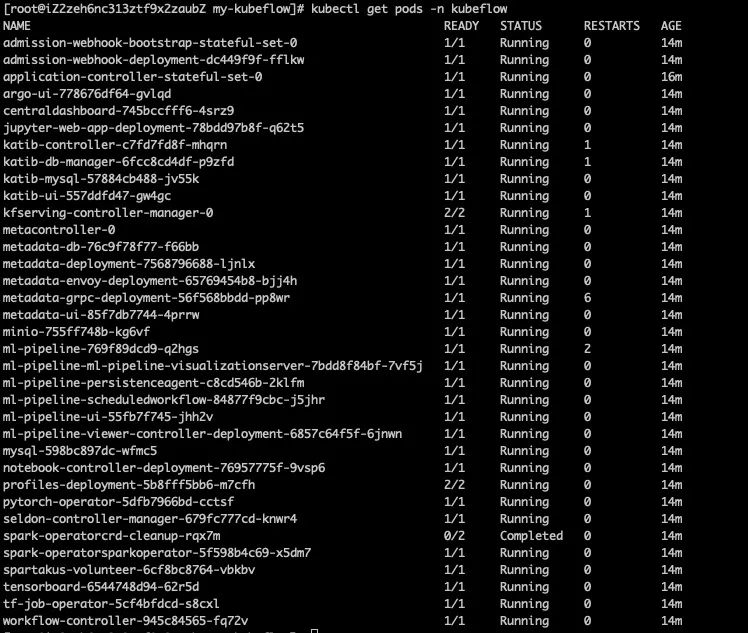
2.Kubeflow下的pod是否启动正常(此处由于服务部署的先后顺序,有些Pod会运行失败,可以等待服务重启),执行kubectl get pods -n kubeflow
3.是否能够正常访问Kubeflow页面
3.1执行 kubectl get svc -n istio-system istio-ingressgateway,查询istio对外暴露的IP
由于无法直接访问到Kubeflow的地址,可以通过使用sshuttle来访问,例如: sshuttle -r root@47.89.59.51 192.168.0.0/16

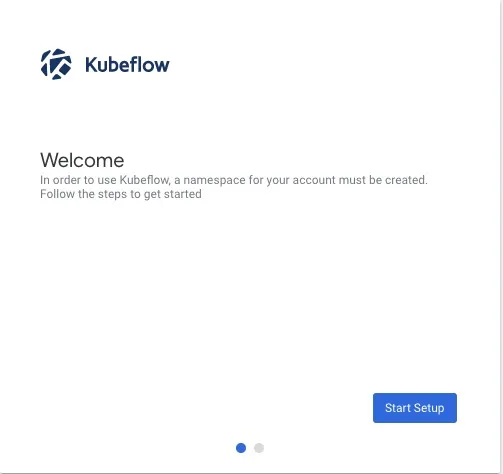
3.2访问对应的IP:80显示Kubeflow的主页面标识部署成功
体验Jupyter Hub
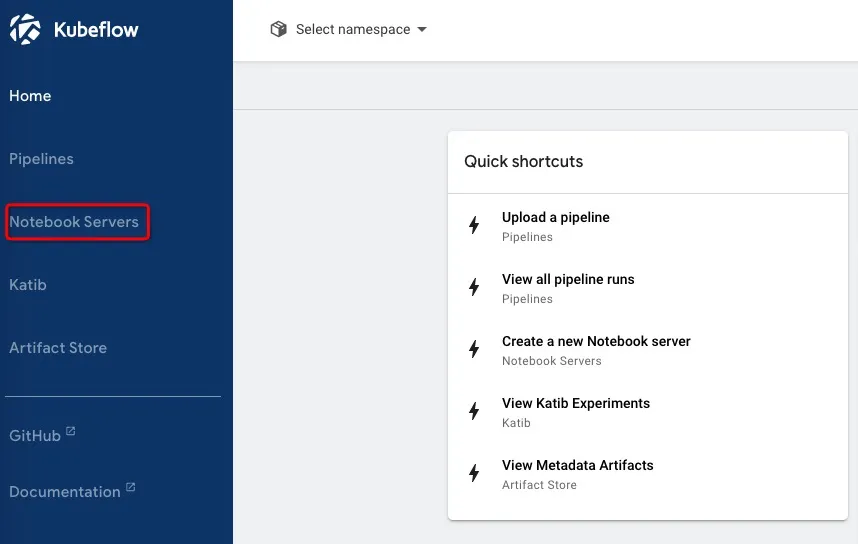
1.在主界面上选择Notebook Servers
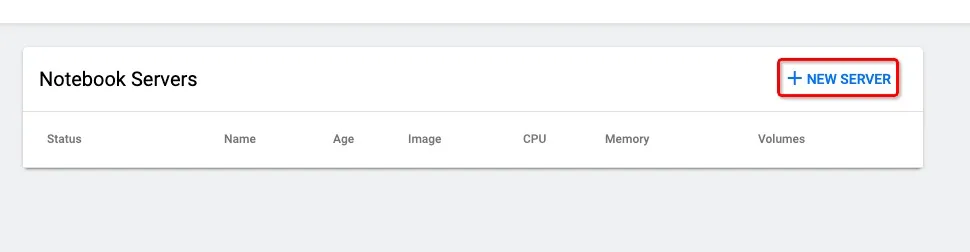
2.新建New Server
如果有提示No default Storage Class is set. 用户可以自行设置default Storage Class

例如在阿里云上设定disk-ssd为default stroage class
kubectl patch storageclass alicloud-disk-ssd -p '{"metadata": {"annotations":{"storageclass.kubernetes.io/is-default-class":"true"}}}'3.编辑Server信息
用户可以选择Custom Image解决gcr镜像拉取不下来的问题
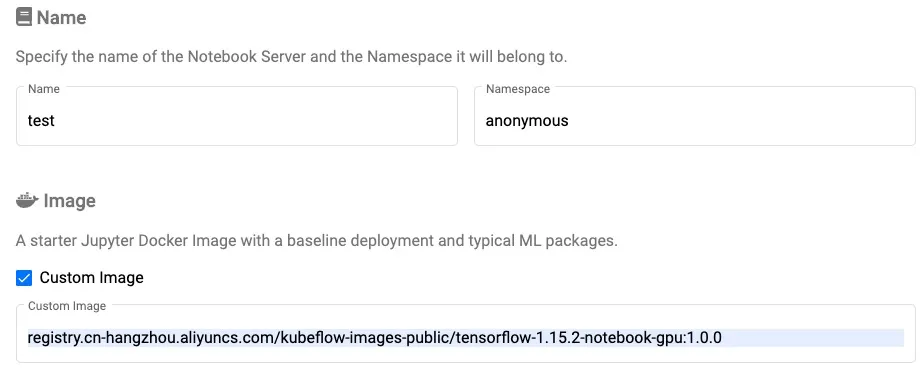
阿里云提供如下的docker镜像:
registry.cn-hangzhou.aliyuncs.com/kubeflow-images-public/tensorflow-1.15.2-notebook-cpu:1.0.0
registry.cn-hangzhou.aliyuncs.com/kubeflow-images-public/tensorflow-1.15.2-notebook-gpu:1.0.0
registry.cn-hangzhou.aliyuncs.com/kubeflow-images-public/tensorflow-2.1.0-notebook-cpu:1.0.0
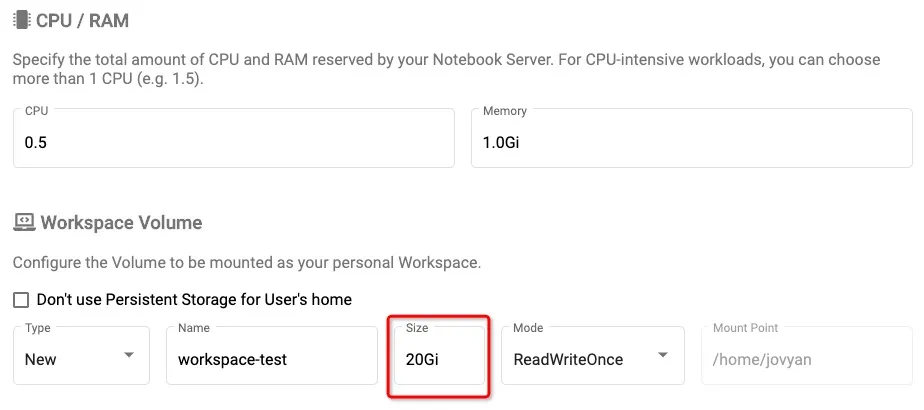
registry.cn-hangzhou.aliyuncs.com/kubeflow-images-public/tensorflow-2.1.0-notebook-gpu:1.0.0如果配置了Workspace Volume并且将alicloud-disk-ssd设为default stroage class,由于最低限制的原因,请将Size设置为20G
选择设定需要的GPU资源
4.使用Jupyter
服务启动成功后,状态显示为绿色

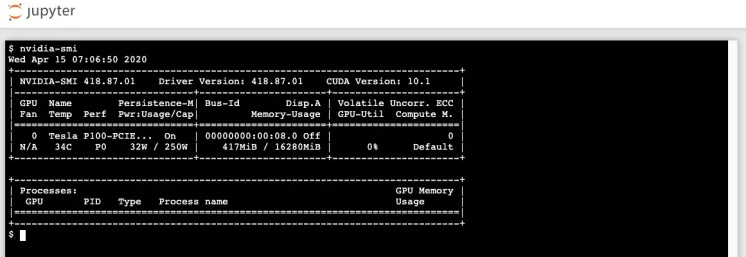
登录Terminal,检查GPU环境

使用Jupyter的开发环境
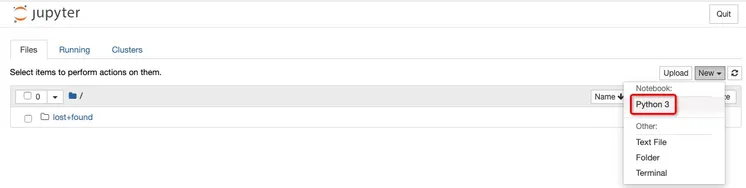
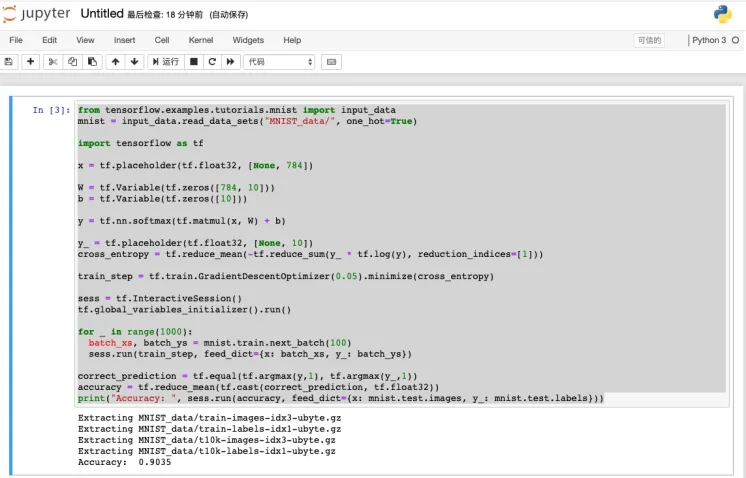
将示例代码复制到文本框中
from tensorflow.examples.tutorials.mnist import input_data
mnist = input_data.read_data_sets("MNIST_data/", one_hot=True)

import tensorflow as tf

x = tf.placeholder(tf.float32, [None, 784])

W = tf.Variable(tf.zeros([784, 10]))
b = tf.Variable(tf.zeros([10]))

y = tf.nn.softmax(tf.matmul(x, W) + b)

y_ = tf.placeholder(tf.float32, [None, 10])
cross_entropy = tf.reduce_mean(-tf.reduce_sum(y_ * tf.log(y), reduction_indices=[1]))

train_step = tf.train.GradientDescentOptimizer(0.05).minimize(cross_entropy)

sess = tf.InteractiveSession()
tf.global_variables_initializer().run()

for _ in range(1000):
  batch_xs, batch_ys = mnist.train.next_batch(100)
  sess.run(train_step, feed_dict={x: batch_xs, y_: batch_ys})

correct_prediction = tf.equal(tf.argmax(y,1), tf.argmax(y_,1))
accuracy = tf.reduce_mean(tf.cast(correct_prediction, tf.float32))
print("Accuracy: ", sess.run(accuracy, feed_dict={x: mnist.test.images, y_: mnist.test.labels}))
运行代码得出训练结果
展望
未来我们会带来更多的Kubeflow的实践文章,敬请期待~
参考文献: 1 https://medium.com/kubeflow/kubeflow-1-0-cloud-native-ml-for-everyone-a3950202751

