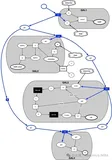
AOP原理解析(一)https://developer.aliyun.com/article/1469473
从 @Aspect 到 Advisor
a. 自动代理后处理器 AnnotationAwareAspectJAutoProxyCreator 会帮我们创建代理
bean对象的生命周期: 创建 -> (*) 依赖注入 -> 初始化 (*) ,打星号处可以进行代理的增强
b. 通常代理创建的活在原始对象初始化后执行, 但碰到循环依赖会提前至依赖注入之前执行
c. 高级的 @Aspect 切面会转换为低级的 Advisor 切面
关键方法
- findEligibleAdvisors 找到有【资格】的 Advisors
- 有【资格】的 Advisor 一部分是低级的, 可以由自己编写, 如本例 A17 中的 advisor3
- 有【资格】的 Advisor 另一部分是高级的, 由解析 @Aspect 后获得
- wrapIfNecessary
- 它内部调用 findEligibleAdvisors, 只要返回集合不空, 则表示需要创建代理
- 它的调用时机通常在原始对象初始化后执行, 但碰到循环依赖会提前至依赖注入之前执行
代码演示:
public class ProxyTest {
    public static void main(String[] args) {
        GenericApplicationContext context = new GenericApplicationContext();
        context.registerBean("aspect1", Aspect1.class);
        context.registerBean("config", Config.class);
        context.registerBean(ConfigurationClassPostProcessor.class);
        context.registerBean(AnnotationAwareAspectJAutoProxyCreator.class);
        // BeanPostProcessor
        // 创建 -> (*) 依赖注入 -> 初始化 (*)
        context.refresh();
//        for (String name : context.getBeanDefinitionNames()) {
//            System.out.println(name);
//        }
        /*
            第一个重要方法 findEligibleAdvisors 找到有【资格】的 Advisors
                a. 有【资格】的 Advisor 一部分是低级的, 可以由自己编写, 如下例中的 advisor3
                b. 有【资格】的 Advisor 另一部分是高级的, 由本章的主角解析 @Aspect 后获得
         */
        AnnotationAwareAspectJAutoProxyCreator creator = context.getBean(AnnotationAwareAspectJAutoProxyCreator.class);
        List<Advisor> advisors = creator.findEligibleAdvisors(Target2.class, "target2");
        /*for (Advisor advisor : advisors) {
            System.out.println(advisor);
        }*/

        /*
            第二个重要方法 wrapIfNecessary
                a. 它内部调用 findEligibleAdvisors, 只要返回集合不空, 则表示需要创建代理
         */
        Object o1 = creator.wrapIfNecessary(new Target1(), "target1", "target1");
        System.out.println(o1.getClass());
        Object o2 = creator.wrapIfNecessary(new Target2(), "target2", "target2");
        System.out.println(o2.getClass());
        ((Target1) o1).foo();
    }
    static class Target1 {
        public void foo() {
            System.out.println("target1 foo");
        }
    }
    static class Target2 {
        public void bar() {
            System.out.println("target2 bar");
        }
    }
    @Aspect // 高级切面类
    @Order(1)
    static class Aspect1 {
        @Before("execution(* foo())")
        public void before1() {
            System.out.println("aspect1 before1...");
        }
        @Before("execution(* foo())")
        public void before2() {
            System.out.println("aspect1 before2...");
        }
    }
    @Configuration
    static class Config {
        @Bean // 低级切面
        public Advisor advisor3(MethodInterceptor advice3) {
            AspectJExpressionPointcut pointcut = new AspectJExpressionPointcut();
            pointcut.setExpression("execution(* foo())");
            DefaultPointcutAdvisor advisor = new DefaultPointcutAdvisor(pointcut, advice3);
            return advisor;
        }
        @Bean
        public MethodInterceptor advice3() {
            return invocation -> {
                System.out.println("advice3 before...");
                Object result = invocation.proceed();
                System.out.println("advice3 after...");
                return result;
            };
        }
    }
}
代理创建时机
a. 代理的创建时机
1. 初始化之后 (无循环依赖时)
2. 实例创建后, 依赖注入前 (有循环依赖时), 并暂存于二级缓存
b. 依赖注入与初始化不应该被增强, 仍应被施加于原始对象
public class ProxyTest {
    public static void main(String[] args) {
        GenericApplicationContext context = new GenericApplicationContext();
        context.registerBean(ConfigurationClassPostProcessor.class);
        context.registerBean(Config.class);
        context.refresh();
        context.close();
        // 创建 -> (*) 依赖注入 -> 初始化 (*)
        /*
            学到了什么
                a. 代理的创建时机
                    1. 初始化之后 (无循环依赖时)
                    2. 实例创建后, 依赖注入前 (有循环依赖时), 并暂存于二级缓存
                b. 依赖注入与初始化不应该被增强, 仍应被施加于原始对象
         */
    }
    @Configuration
    static class Config {
        @Bean // 解析 @Aspect、产生代理
        public AnnotationAwareAspectJAutoProxyCreator annotationAwareAspectJAutoProxyCreator() {
            return new AnnotationAwareAspectJAutoProxyCreator();
        }
        @Bean // 解析 @Autowired
        public AutowiredAnnotationBeanPostProcessor autowiredAnnotationBeanPostProcessor() {
            return new AutowiredAnnotationBeanPostProcessor();
        }
        @Bean // 解析 @PostConstruct
        public CommonAnnotationBeanPostProcessor commonAnnotationBeanPostProcessor() {
            return new CommonAnnotationBeanPostProcessor();
        }
        @Bean
        public Advisor advisor(MethodInterceptor advice) {
            AspectJExpressionPointcut pointcut = new AspectJExpressionPointcut();
            pointcut.setExpression("execution(* foo())");
            return new DefaultPointcutAdvisor(pointcut, advice);
        }
        @Bean
        public MethodInterceptor advice() {
            return (MethodInvocation invocation) -> {
                System.out.println("before...");
                return invocation.proceed();
            };
        }
        @Bean
        public Bean1 bean1() {
            return new Bean1();
        }
        @Bean
        public Bean2 bean2() {
            return new Bean2();
        }
    }
    static class Bean1 {
        public void foo() {
        }
        public Bean1() {
            System.out.println("Bean1()");
        }
        @Autowired
        public void setBean2(Bean2 bean2) {
            System.out.println("Bean1 setBean2(bean2) class is: " + bean2.getClass());
        }
        @PostConstruct public void init() {
            System.out.println("Bean1 init()");
        }
    }
    static class Bean2 {
        public void foo() {
        }
        public Bean2() {
            System.out.println("Bean2()");
        }
        @Autowired
        public void setBean1(Bean1 bean1) {
            System.out.println("Bean2 setBean1(bean1) class is: " + bean1.getClass());
        }
        @PostConstruct public void init() {
            System.out.println("Bean2 init()");
        }
    }
}
控制台输出结果:
[INFO ] 14:01:46.282 [main] o.s.c.s.PostProcessorRegistrationDelegate$BeanPostProcessorChecker - Bean 'org.springframework.aop.framework.autoproxy.A17_1$Config' of type [org.springframework.aop.framework.autoproxy.A17_1$Config$$EnhancerBySpringCGLIB$$ebf9effa] is not eligible for getting processed by all BeanPostProcessors (for example: not eligible for auto-proxying)
[TRACE] 14:01:46.326 [main] o.s.a.a.a.AnnotationAwareAspectJAutoProxyCreator - Did not attempt to auto-proxy infrastructure class [org.springframework.aop.Advisor]
[TRACE] 14:01:46.328 [main] o.s.a.a.a.AnnotationAwareAspectJAutoProxyCreator - Did not attempt to auto-proxy infrastructure class [org.aopalliance.intercept.MethodInterceptor]
Bean1()
Bean2()
[TRACE] 14:01:46.460 [main] o.s.a.a.a.AnnotationAwareAspectJAutoProxyCreator - Creating implicit proxy for bean 'bean1' with 0 common interceptors and 2 specific interceptors
Bean2 setBean1(bean1) class is: class org.springframework.aop.framework.autoproxy.A17_1$Bean1$$EnhancerBySpringCGLIB$$5455d566
Bean2 init()
[TRACE] 14:01:46.471 [main] o.s.a.a.a.AnnotationAwareAspectJAutoProxyCreator - Creating implicit proxy for bean 'bean2' with 0 common interceptors and 2 specific interceptors
Bean1 setBean2(bean2) class is: class org.springframework.aop.framework.autoproxy.A17_1$Bean2$$EnhancerBySpringCGLIB$$67f15e09
Bean1 init()
@高级切面转成低级切面
演示findEligibleAdvisors和wrapIfNecessary方法底层具体怎么将高级切面转换成低级切面。
public class ProxyTest {
    static class Aspect {
        @Before("execution(* foo())")
        public void before1() {
            System.out.println("before1");
        }
        @Before("execution(* foo())")
        public void before2() {
            System.out.println("before2");
        }
        public void after() {
            System.out.println("after");
        }
        public void afterReturning() {
            System.out.println("afterReturning");
        }
        public void afterThrowing() {
            System.out.println("afterThrowing");
        }
        public Object around(ProceedingJoinPoint pjp) throws Throwable {
            try {
                System.out.println("around...before");
                return pjp.proceed();
            } finally {
                System.out.println("around...after");
            }
        }
    }
    static class Target {
        public void foo() {
            System.out.println("target foo");
        }
    }
    @SuppressWarnings("all")
    public static void main(String[] args) throws Throwable {
        AspectInstanceFactory factory = new SingletonAspectInstanceFactory(new Aspect());
        // 高级切面转低级切面类
        List<Advisor> list = new ArrayList<>();
        for (Method method : Aspect.class.getDeclaredMethods()) {
            if (method.isAnnotationPresent(Before.class)) {
                // 解析切点
                String expression = method.getAnnotation(Before.class).value();
                AspectJExpressionPointcut pointcut = new AspectJExpressionPointcut();
                pointcut.setExpression(expression);
                // 通知类
                AspectJMethodBeforeAdvice advice = new AspectJMethodBeforeAdvice(method, pointcut, factory);
                // 切面
                Advisor advisor = new DefaultPointcutAdvisor(pointcut, advice);
                list.add(advisor);
            }
        }
        for (Advisor advisor : list) {
            System.out.println(advisor);
        }
        /*
            @Before 前置通知会被转换为下面原始的 AspectJMethodBeforeAdvice 形式, 该对象包含了如下信息
                a. 通知代码从哪儿来
                b. 切点是什么(这里为啥要切点, 后面解释)
                c. 通知对象如何创建, 本例共用同一个 Aspect 对象
            类似的通知还有
                1. AspectJAroundAdvice (环绕通知)
                2. AspectJAfterReturningAdvice
                3. AspectJAfterThrowingAdvice
                4. AspectJAfterAdvice (环绕通知)
         */
    }
}
总结
- @Before 前置通知会被转换为原始的 AspectJMethodBeforeAdvice 形式, 该对象包含了如下信息
- 通知代码从哪儿来
- 切点是什么(这里为啥要切点, 后面解释)
- 通知对象如何创建, 本例共用同一个 Aspect 对象
- 类似的还有
- AspectJAroundAdvice (环绕通知)
- AspectJAfterReturningAdvice
- AspectJAfterThrowingAdvice (环绕通知)
- AspectJAfterAdvice (环绕通知)
- 通知统一转换为环绕通知 MethodInterceptor
- 其实无论 ProxyFactory 基于哪种方式创建代理, 最后干活(调用 advice)的是一个 MethodInvocation 对象
a. 因为 advisor 有多个, 且一个套一个调用, 因此需要一个调用链对象, 即 MethodInvocation
b. MethodInvocation 要知道 advice(通知) 有哪些, 还要知道目标, 调用次序如下
将 MethodInvocation 放入当前线程
|-> before1 ----------------------------------- 从当前线程获取 MethodInvocation
| |
| |-> before2 -------------------- | 从当前线程获取 MethodInvocation
| | | |
| | |-> target ------ 目标 advice2 advice1
| | | |
| |-> after2 --------------------- |
| |
|-> after1 ------------------------------------
c. 从上图看出, 环绕通知才适合作为 advice, 因此其他 before、afterReturning 都会被转换成环绕通知
d. 统一转换为环绕通知, 体现的是设计模式中的适配器模式
- 对外是为了方便使用要区分 before、afterReturning
- 对内统一都是环绕通知, 统一用 MethodInterceptor 表示
此步获取所有执行时需要的 advice (静态)
a. 即统一转换为 MethodInterceptor 环绕通知, 这体现在方法名中的 Interceptors 上
b. 适配如下: (这里使用了适配器模式)
- MethodBeforeAdviceAdapter 将 @Before AspectJMethodBeforeAdvice 适配为 MethodBeforeAdviceInterceptor
- AfterReturningAdviceAdapter 将 @AfterReturning AspectJAfterReturningAdvice 适配为 AfterReturningAdviceInterceptor
public class ProxyTest {
    static class Aspect {
        @Before("execution(* foo())")
        public void before1() {
            System.out.println("before1");
        }
        @Before("execution(* foo())")
        public void before2() {
            System.out.println("before2");
        }
        public void after() {
            System.out.println("after");
        }
        @AfterReturning("execution(* foo())")
        public void afterReturning() {
            System.out.println("afterReturning");
        }
        @AfterThrowing("execution(* foo())")
        public void afterThrowing(Exception e) {
            System.out.println("afterThrowing " + e.getMessage());
        }
        @Around("execution(* foo())")
        public Object around(ProceedingJoinPoint pjp) throws Throwable {
            try {
                System.out.println("around...before");
                return pjp.proceed();
            } finally {
                System.out.println("around...after");
            }
        }
    }
    static class Target {
        public void foo() {
            System.out.println("target foo");
        }
    }
    @SuppressWarnings("all")
    public static void main(String[] args) throws Throwable {
        AspectInstanceFactory factory = new SingletonAspectInstanceFactory(new Aspect());
        // 1. 高级切面转低级切面类
        List<Advisor> list = new ArrayList<>();
        for (Method method : Aspect.class.getDeclaredMethods()) {
            if (method.isAnnotationPresent(Before.class)) {
                // 解析切点
                String expression = method.getAnnotation(Before.class).value();
                AspectJExpressionPointcut pointcut = new AspectJExpressionPointcut();
                pointcut.setExpression(expression);
                // 通知类
                AspectJMethodBeforeAdvice advice = new AspectJMethodBeforeAdvice(method, pointcut, factory);
                // 切面
                Advisor advisor = new DefaultPointcutAdvisor(pointcut, advice);
                list.add(advisor);
            } else if (method.isAnnotationPresent(AfterReturning.class)) {
                // 解析切点
                String expression = method.getAnnotation(AfterReturning.class).value();
                AspectJExpressionPointcut pointcut = new AspectJExpressionPointcut();
                pointcut.setExpression(expression);
                // 通知类
                AspectJAfterReturningAdvice advice = new AspectJAfterReturningAdvice(method, pointcut, factory);
                // 切面
                Advisor advisor = new DefaultPointcutAdvisor(pointcut, advice);
                list.add(advisor);
            } else if (method.isAnnotationPresent(Around.class)) {
                // 解析切点
                String expression = method.getAnnotation(Around.class).value();
                AspectJExpressionPointcut pointcut = new AspectJExpressionPointcut();
                pointcut.setExpression(expression);
                // 通知类
                AspectJAroundAdvice advice = new AspectJAroundAdvice(method, pointcut, factory);
                // 切面
                Advisor advisor = new DefaultPointcutAdvisor(pointcut, advice);
                list.add(advisor);
            }
        }
        for (Advisor advisor : list) {
            System.out.println(advisor);
        }
       //2. 通知统一转换为环绕通知 MethodInterceptor

        Target target = new Target();
        ProxyFactory proxyFactory = new ProxyFactory();
        proxyFactory.setTarget(target);
        proxyFactory.addAdvice(ExposeInvocationInterceptor.INSTANCE); // 准备把 MethodInvocation 放入当前线程
        proxyFactory.addAdvisors(list);
        System.out.println(">>>>>>>>>>>>>>>>>>>>>>>>>>>>>>");
        //将各个通知转换成环绕通知
        List<Object> methodInterceptorList = proxyFactory.getInterceptorsAndDynamicInterceptionAdvice(Target.class.getMethod("foo"), Target.class);
        for (Object o : methodInterceptorList) {
            System.out.println(o);
        }
        System.out.println(">>>>>>>>>>>>>>>>>>>>>>>>>>>>>>");
        // 3. 创建并执行调用链 (环绕通知s + 目标)
        MethodInvocation methodInvocation = new ReflectiveMethodInvocation(
                null, target, Target.class.getMethod("foo"), new Object[0], Target.class, methodInterceptorList
        );
        methodInvocation.proceed();
    }
}
静态通知调用
代理对象调用流程如下(以 JDK 动态代理实现为例)
- 从 ProxyFactory 获得 Target 和环绕通知链,根据他俩创建 MethodInvocation,简称 mi
- 首次执行 mi.proceed() 发现有下一个环绕通知,调用它的 invoke(mi)
- 进入环绕通知1,执行前增强,再次调用 mi.proceed() 发现有下一个环绕通知,调用它的 invoke(mi)
- 进入环绕通知2,执行前增强,调用 mi.proceed() 发现没有环绕通知,调用 mi.invokeJoinPoint() 执行目标方法
- 目标方法执行结束,将结果返回给环绕通知2,执行环绕通知2 的后增强
- 环绕通知2继续将结果返回给环绕通知1,执行环绕通知1 的后增强
- 环绕通知1返回最终的结果
图中不同颜色对应一次环绕通知或目标的调用起始至终结

代理方法执行时会做如下工作
- 通过 proxyFactory 的 getInterceptorsAndDynamicInterceptionAdvice() 将其他通知统一转换为 MethodInterceptor 环绕通知
- MethodBeforeAdviceAdapter 将 @Before AspectJMethodBeforeAdvice 适配为 MethodBeforeAdviceInterceptor
- AfterReturningAdviceAdapter 将 @AfterReturning AspectJAfterReturningAdvice 适配为 AfterReturningAdviceInterceptor
- 这体现的是适配器设计模式
- 所谓静态通知,体现在上面方法的 Interceptors 部分,这些通知调用时无需再次检查切点,直接调用即可
- 结合目标与环绕通知链,创建 MethodInvocation 对象,通过它完成整个调用
MethodInvocation调用过程
- proceed() 方法调用链中下一个环绕通知
- 每个环绕通知内部继续调用 proceed()
- 调用到没有更多通知了, 就调用目标方法
MethodInvocation 的编程技巧在实现拦截器、过滤器时能用上
public class ProxyTest {
    static class Target {
        public void foo() {
            System.out.println("Target.foo()");
        }
    }
    static class Advice1 implements MethodInterceptor {
        public Object invoke(MethodInvocation invocation) throws Throwable {
            System.out.println("Advice1.before()");
            Object result = invocation.proceed();// 调用下一个通知或目标
            System.out.println("Advice1.after()");
            return result;
        }
    }
    static class Advice2 implements MethodInterceptor {
        public Object invoke(MethodInvocation invocation) throws Throwable {
            System.out.println("Advice2.before()");
            Object result = invocation.proceed();// 调用下一个通知或目标
            System.out.println("Advice2.after()");
            return result;
        }
    }
    static class MyInvocation implements MethodInvocation {
        private Object target;  // 1
        private Method method;
        private Object[] args;
        List<MethodInterceptor> methodInterceptorList; // 2
        private int count = 1; // 调用次数
        public MyInvocation(Object target, Method method, Object[] args, List<MethodInterceptor> methodInterceptorList) {
            this.target = target;
            this.method = method;
            this.args = args;
            this.methodInterceptorList = methodInterceptorList;
        }
        @Override
        public Method getMethod() {
            return method;
        }
        @Override
        public Object[] getArguments() {
            return args;
        }
        @Override
        public Object proceed() throws Throwable { // 调用每一个环绕通知, 调用目标
            if (count > methodInterceptorList.size()) {
                // 调用目标, 返回并结束递归
                return method.invoke(target, args);
            }
            // 逐一调用通知, count + 1
            MethodInterceptor methodInterceptor = methodInterceptorList.get(count++ - 1);
            return methodInterceptor.invoke(this);
        }
        @Override
        public Object getThis() {
            return target;
        }
        @Override
        public AccessibleObject getStaticPart() {
            return method;
        }
    }
    public static void main(String[] args) throws Throwable {
        Target target = new Target();
        List<MethodInterceptor> list = List.of(
                new Advice1(),
                new Advice2()
        );
        MyInvocation invocation = new MyInvocation(target, Target.class.getMethod("foo"), new Object[0], list);
        invocation.proceed();
    }
}