一、生产中mysqlq启动方式
在上一章节的时候,我们对mysql.server和mysqld_multi.server脚本做了修改,如果能修改到脚本初始化的状态可以自己修改,如果不可以就重新安装mysql。后面我们在修改配置文件的时候可以使用cp命令进行备份。
1.1 mysql的启动原理
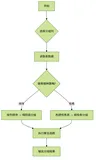
我们可以看看msyql脚本调用得关系如下:
service-->mysqld.safe-->mysqld-->启动mysql
systemctl-->mysqld-->启动mysql
mysqld.safe-->mysqld-->启动mysql
mysqld-->启动mysql
1、mysql.server会调用mysqld_safe,mysql_safe会调用mysqld
[root@mysql2 ~]# ll /usr/local/mysql/support-files/mysql.server
-rwxr-xr-x. 1 7161 31415 10599 4月 15 09:10 /usr/local/mysql/support-files/mysql.server
/usr/local/mysql/support-files/mysql.server
[root@mysql2 ~]# cat /usr/local/mysql/support-files/mysql.server

2、mysqld_safe
[root@mysql2 ~]# ll /usr/local/mysql/bin/mysqld_safe
-rwxr-xr-x. 1 7161 31415 27862 6月 8 2022 /usr/local/mysql/bin/mysqld_safe
mysqld_safe的启动会同时启动mysqld,也会监控mysqld
3、mysqld
[root@mysql2 ~]# which mysqld
/usr/local/mysql/bin/mysqld
[root@mysql2 ~]# ll /usr/local/mysql/bin/mysqld
-rwxr-xr-x. 1 7161 31415 255653197 6月 8 2022 /usr/local/mysql/bin/mysqld
4、mysqld_multi:用来启动多实例的
[root@mysql2 install]# which mysqld_multi
/usr/local/mysql/bin/mysqld_multi
1.2 参数文件的优先级
my.cnf可以看做是mysql的参数文件,和oracle一样可以存在多个地方。不同的是不指定参数文件的情况下,oracle启动的时候只会读取优先顺序第一的参数文件,而mysql则有点不同,会按照参数文件的等级来陆续读取。
上一章节的时候我们启动数据库需要指定参数文件,如果我们的参数文件在指定的位置,就不需要指定参数,我们可以使用ysqld --verbose --help | grep my.cnf命令查询mysql默认参数位置
[root@mysql2 ~]# mysqld --verbose --help | grep my.cnf
mysqld: Can't change dir to '/opt/mysql/mysql-5.7.39-linux-glibc2.12-x86_64/data/' (Errcode: 2 - No such file or directory)
/etc/my.cnf /etc/mysql/my.cnf /usr/local/mysql/etc/my.cnf ~/.my.cnf
my.cnf, $MYSQL_TCP_PORT, /etc/services, built-in default
优先级的高低顺序从右到左,读取顺序是从左到右。前面两个可以视为全局参数 , 后面两个可以视为用户选项参数。
也可以这么理解 ,4个参数同时存在的话,系统会按照优先等级来读取参数文件
先读取等级较低的/etc/my.cnf
接着读取/etc/mysql/my.cnf
接着读取–>/usr/local/mysql/etc/my.cnf
最后读取~/.my.cnf参数文件
最后只能应用~/.my.cnf参数文件里的所有参数。
如果这几个目录里都没有参数文件,在安装,启动,停止的时候需要我们手动指定参数文件。如下:
[root@mysql2 ~]#nohup mysqld --defaults-file=/data/mysql/my3306/my3306.cnf &
1
1.3 以server的方式启动mysql(实际启动mysql方式)
1、首先我们先对server进行备份,在将server文件移到 /etc/init.d目录下面,成为一个常规的服务文件
[root@mysql2 ~]# cp /usr/local/mysql/support-files/mysql.server /usr/local/mysql/support-files/mysql.server.bak
[root@mysql2 ~]# cp -f /usr/local/mysql/support-files/mysql.server /etc/init.d/mysqld
cp:是否覆盖"/etc/init.d/mysqld"? y
2、接着将mysql参数文件移到 /etc 目录下,作为mysql的全局参数文件
[root@mysql2 ~]# cp /data/mysql/my3306/my3306.cnf /etc/my.cnf
cp:是否覆盖"/etc/init.d/mysqld"? y
、通过服务器启动mysql
[root@mysql2 ~]# /etc/init.d/mysqld start
Starting MySQL SUCCESS!
[root@mysql2 ~]# 2023-04-15T02:40:43.366648Z mysqld_safe A mysqld process already exists
[root@mysql2 ~]# lsof -i:3306
COMMAND PID USER FD TYPE DEVICE SIZE/OFF NODE NAME
mysqld 13462 mysql 32u IPv6 1611543 0t0 TCP *:mysql (LISTEN)
[root@mysql2 ~]# ps -ef | grep mysql
4、添加到mysqld到service
[root@mysql2 ~]# chkconfig --add /etc/init.d/mysqld
[root@mysql2 ~]# chkconfig --list mysqld
注:该输出结果只显示 SysV 服务,并不包含
原生 systemd 服务。SysV 配置数据
可能被原生 systemd 配置覆盖。
要列出 systemd 服务,请执行 'systemctl list-unit-files'。
查看在具体 target 启用的服务请执行
'systemctl list-dependencies [target]'。
mysqld 0:关 1:关 2:开 3:开 4:开 5:开 6:关

1.4 mysqld_safe方式启动
启动命令:nohup mysqld_safe --defaults-file=/data/mysql/my3306/my3306.cnf
如果参数文件在默认位置,就可以不用指定
[root@mysql2 ~]# nohup mysqld_safe &
[1] 15524
[root@mysql2 ~]# lsof -i:3306
COMMAND PID USER FD TYPE DEVICE SIZE/OFF NODE NAME
mysqld 15953 mysql 31u IPv6 1647497 0t0 TCP *:mysql (LISTEN)
[root@mysql2 ~]# ps -ef | grep mysql

1.5 mysqld方式启动
启动命令:nohup mysql --defaults-file=/data/mysql/my3307/my3307.cnf
如果参数文件在默认位置,就可以不用指定
[root@mysql2 ~]# nohup mysqld &
[1] 16985
[roott@mysql2 ~]# lsof -i:3306
COMMAND PID USER FD TYPE DEVICE SIZE/OFF NODE NAME
mysqld 16985 mysql 31u IPv6 1611742 0t0 TCP *:mysql (LISTEN)
[root@mysql2 ~]# ps -ef | grep mysql

1.6 systemctl方式启动(CentOS 7)
[root@mysql2 ~]# cat <<EOF>> /etc/systemd/system/my3306.service
[Unit]
Description=MySQL Server by
Documentation=man:mysqld(8)
Documentation=http://dev.mysql.com/doc/refman/en/using-systemd.html
After=network.target
After=syslog.target
[Install]
WantedBy=multi-user.target
[Service]
User=mysql
Group=mysql
ExecStart=/usr/local/mysql/bin/mysqld ##--defaults-file=/data/mysql/my3306/my3306.cnf
LimitNOFILE = 5000
EOF
[root@mysql2 ~]# more /etc/systemd/system/my3306.service
[root@mysql2 ~]# systemctl start my3306.service
[root@mysql2 ~]# systemctl status my3306.service
● my3306.service - MySQL Server by
Loaded: loaded (/etc/systemd/system/my3306.service; disabled; vendor preset: disabled)
Active: active (running) since 六 2023-04-15 11:11:46 CST; 7s ago
Docs: man:mysqld(8)
Main PID: 17671 (mysqld)
Tasks: 27
CGroup: /system.slice/my3306.service
└─17671 /usr/local/mysql/bin/mysqld
4月 15 11:11:46 mysql2.x88.com systemd[1]: Started MySQL Server by.
[root@mysql2 ~]# lsof -i:3306
COMMAND PID USER FD TYPE DEVICE SIZE/OFF NODE NAME
mysqld 17671 mysql 31u IPv6 1629942 0t0 TCP *:mysql (LISTEN)
常用命令 start status stop enable disanble 等来管理数据库的启停
二、关库
2.1 相关参数innodb_fast_shutdown (数据库关闭参数)
[root@mysql2 my3306]# mysql -uroot -p --socket=/data/mysql/my3306/mysql.sock
mysql> select @@innodb_fast_shutdown ;
+------------------------+
| @@innodb_fast_shutdown |
+------------------------+
| 1 |
+------------------------+
1 row in set (0.00 sec)
在关闭时,参数innodb_fast_shutdown影响着表的存储引擎为InnoDB的行为。该参数可取值为0、1、2,默认值为1。
0表示在MySQL数据库关闭时,InnoDB需要完成所有的full purge(回收页)和merge insert buffer(合并插入缓冲区),并且将所有的脏页刷新回磁盘。这需要一些时间,有时甚至需要几个小时来完成。如果在进行InnoDB升级时,必须将这个参数调为0,然后再关闭数据库。
1是参数innodb_fast_shutdown的默认值,表示不需要完成上述的full purge和merge insert buffer操作,但是在缓冲池中的一些数据脏页还是会刷新回磁盘。生产环境推荐的参数
2表示不完成full purge和merge insert buffer操作,也不将缓冲池中的数据脏页写回磁盘,而是将日志都写入日志文件。这样不会有任何事务的丢失,但是下次mysql数据库启动时,会进行恢复操作(recovery)。如果写入日志文件出现异常,可能导致数据启动不了。
2.2 相关参数innodb_force_recovery(恢复参数)
mysql> select @@innodb_force_recovery ;
+-------------------------+
| @@innodb_force_recovery |
+-------------------------+
| 0 |
+-------------------------+
1 row in set (0.00 sec)
当正常关闭mysql数据库时,下次的启动应该是非常“正常”。但是如果没有正常地关闭数据库,如用kill命令关闭数据库,在mysql数据库运行中重启了服务器,或者在关闭数据库时,将参数innodb_fast_shutdown设为2,下次mysql数据库启动时都会对InnoDB存储引擎的表进行恢复操作.
参数innodb_force_recovery影响了整个InnoDB存储引擎恢复的状况。该参数值默认为0,代表当发生需要恢复时,进行所有的恢复操作,当不能进行有效恢复时,如数据页发生了corruption(坏块),mysqL数据库可能发生宕机(crash),并把错误写入错误日志中去。
但是,在某些情况下,可能并不需要进行完整的恢复操作,比如在对一个表进行alter table操作时发生意外了,数据库重启时会对InnoDB表进行回滚操作,对于一个大表来说这需要很长时间,可能是几个小时。这时用户可以自行进行恢复,例如把表删除,从备份中重新导入数据到表,可能这些操作的速度要远远快于回滚操作。
参数innodb_force_recovery还可以设置为6个非零值:1到6。大的数字表示包含了前面所有小数字表示的影响。具体情况如下:
1(SRV_FORCE_IGNORE_CORRUPT):忽略检查到的corrupt页。
2(SRV_FORCE_NO_BACKGROUND):阻止Master Thread线程的运行,如MasterThread线程需要进行full purge(完整清理)操作,而这会导致crash。
3(SRV_FORCE_NO_TRX_UNDO):不进行事务的回滚操作。
4(SRV_FORCE_NO_IBUF_MERGE):不进行插入缓冲的合并操作。
5(SRV_FORCE_NO_UNDO_LOG_SCAN):不查看撤销日志(Undo Log),InnoDB存储引擎会将未提交的事务视为已提交。
6(SRV_FORCE_NO_LOG_REDO):不进行前滚的操作。
建议:生产环境只能设置为0。即遇到故障,系统就要自动进行所有恢复操作。如果启动不了,就调整该参数进行数据库的调整。
2.2 关闭mysql多种方式
关闭脚本 方法说明
/etc/init.d/mysqld stop 使用stop参数调用时关闭本地服务器
mysqladmin -uroot -p123456 shutdown 作为客户机连接到服务器并且关闭服务器
mysql> shutdown; 作为客户机连接到服务器并且关闭服务器(有管理员(root)的权限)
kill -9 pid 杀掉mysqld进程,不建议使用
三、常见的mysql启动失败案例
3.1 目录权限
目录权限问题导致MySQL启动失败
[ERROR] Could not open file '/data/mysql/my3306/logs/error.log' for error logging: Permission denied
1
原因:数据目录的用户和用户组不是我们设置的用户
解决:
[root@mysql2 ~]# chown -R mysql:mysql /data/*
[root@mysql2 ~]# chmod -R 750 /data/mysql/
3.2 参数问题
在修改配置文件参数时,可能因为参数拼写错误或者参数因版本不再支持,在错误日志会记录内容,在mysql启动关闭及在运行时的错误
[ERROR] unknown variable 'basedi=/usr/local/mysql'
1
解决:在配置文件将错误的参数修改
3.3 配置文件
在启动时,mysqld 如果默认位置没有my.cnf,则要通过–defaults-file指定正确的配置文件
[root@mysql2 ~]# mysqld --verbose --help |grep defaults
--print-defaults Print the program argument list and exit.
--no-defaults Don't read default options from any option file,
--defaults-file=# Only read default options from the given file #.
--defaults-extra-file=# Read this file after the global files are read.
--defaults-group-suffix=#
--explicit-defaults-for-timestamp
Dump only the hottest N% of each buffer pool, defaults to
explicit-defaults-for-timestamp FALSE
[root@mysql2 ~]# nohup mysqld_safe --defaults-file=/data/mysql/my3306/my3306.cnf
3.4 端口占用
端口被占用导致MySQL启动失败
[ERROR] Do you already have another mysqld server running on port: 3306 ?
1
在多实例的环境下,因为某几个实例的端口是一样的,导致启动时造成端口的冲突,而无法启动,我们需要修改端口
3.5 误删二进制文件
二进制日志文件保的记录已提交的dml、ddl、dcl,主要用来主从复制、增量备份,而我们手工删除二进制文件导致mysql启动失败
[ERROR] Failed to open log (file '/data/mysql/my3306/logs/mysql-bin.000012', errno 2)
1
解决:vim mysql-bin.index 将对应的二进制日志文件记录删除即可
3.6 undo表空间异常
修改共享表空间参数大小导致MySQL启动失败,而共享表空间:ibdata1里保存元数据信息、insert buffer、double write、undo、回滚指针
参数:innodb_data_file_path=ibdata1:12M:autoextend
[ERROR] InnoDB: The Auto-extending innodb_system data file './ibdata1' is of a different size 768 pages (rounded down to MB) than specified in the .cnf file: initial 8192 pages, max 0 (relevant if non-zero) pages!
1
解决:在初始化数据库之前设置innodb_data_file_path的大小。重新修改配置文件中innodb_data_file_path的大小,必须是小于默认的大小(12M)或者等于默认的大小
3.7 binlog缓冲异常
报错
mysql> call insert_emp(1,4000000);
ERROR 1534 (HY000): Writing one row to the row-based binary log failed
+---------------------+
| @@binlog_cache_size |
+---------------------+
| 2097152 |
+---------------------+
1 row in set (0.00 sec)
因为内存不足导致的binlog cache size不够不能写入binlog,导致语句无法执行 在配置文件中调整binlog_cache_size和max_binlog_cache_size参数的值,改大一点
binlog_cache_size = 128M(binlog缓存根据实际情况调大)
max_binlog_cache_size = 512M (binlog日志根据实际情况调大)
四、mysql启动失败的排查方法
首选我们需要明确当前的数据库版本,启动方式和配置文件等,查看错误日志文件
mysql> select @@log_error;
+-----------------------------------+
| @@log_error |
+-----------------------------------+
| /data/mysql/my3306/logs/error.log |
+-----------------------------------+
1 row in set (0.01 sec)
mysql> show variables like '%log_error%';
+---------------------+-----------------------------------+
| Variable_name | Value |
+---------------------+-----------------------------------+
| binlog_error_action | ABORT_SERVER |
| log_error | /data/mysql/my3306/logs/error.log |
| log_error_verbosity | 3 |
+---------------------+-----------------------------------+
3 rows in set (0.00 sec)
五、连接mysql的方式
5.1 本地连接
[root@mysql2 ~]# mysql -uroot -p123456 --socket=/data/mysql/my3306/mysql.sock
如果不想指定套接字文件,我们可以使用软连接到默认的指定位置
[root@mysql2 ~]# ln -sf /data/mysql/my3306/mysql.sock /tmp/mysql.sock
[root@mysql2 ~]# mysql -uroot -p123456
mysql: [Warning] Using a password on the command line interface can be insecure.
Welcome to the MySQL monitor. Commands end with ; or \g.
Your MySQL connection id is 5
Server version: 5.7.39-log MySQL Community Server (GPL)
Copyright (c) 2000, 2022, Oracle and/or its affiliates.
Oracle is a registered trademark of Oracle Corporation and/or its
affiliates. Other names may be trademarks of their respective
owners.
Type 'help;' or '\h' for help. Type '\c' to clear the current input statement.
mysql>
5.2 远程连接
-u 用户名
-p 密码
-P 端口
-h 远程地址
[root@mysql1 ~]# mysql -uroot -pCjlr2023! -P3306 -h10.30.0.60
mysql: [Warning] Using a password on the command line interface can be insecure.
Welcome to the MySQL monitor. Commands end with ; or \g.
Your MySQL connection id is 8
Server version: 5.7.39-log MySQL Community Server (GPL)
Copyright (c) 2000, 2022, Oracle and/or its affiliates.
Oracle is a registered trademark of Oracle Corporation and/or its
affiliates. Other names may be trademarks of their respective
owners.
Type 'help;' or '\h' for help. Type '\c' to clear the current input statement.
mysql>
六、mysql数据库用户安全策略
6.1 数据库的初始化
方式一: –initialize-insecure 默认管理员root,密码为空
如果mysql参数文件在默认位置,可以忽略
[root@mysql1 ~]# mysqld --defaults-file=/data/mysql/my3306/my3306.cnf --initialize-insecure --user=mysql
1
mysql登陆
-S 参数 = --socket=/data/mysql/my3306/mysql.sock,如果套接字文件在默认位置,可以忽略
[root@mysql1 ~]# mysql -uroot -S /data/mysql/my3306/mysql.sock
方式二(推荐使用): –initialize 默认管理员root,生成密码;保存在error.log
如果mysql参数文件在默认位置,可以忽略
[root@mysql1 ~]# mysqld --defaults-file=/data/mysql/mysql3306/my3306.cnf --initialize --user=mysql --basedir=/usr/local/mysql --datadir=/data/mysql/mysql3306/data
6.2 修改密码
方法一:登陆数据库,修改密码
[root@mysql1 ~]# mysql -uroot -pCjlr2023! -P3306 -h10.30.0.60
mysql> alter user root@'%' identified by '123456';
mysql> flush privileges;
方法二:mysqladmin修改密码
[root@mysql2 ~]# mysqladmin -uroot -p password
Enter password:
New password:
Confirm new password:
Warning: Since password will be sent to server in plain text, use ssl connection to ensure password safety.
方法三:set password修改密码
• 使用默认加密
mysql> set password for 'test'@'%' ='abcdefg';
Query OK, 0 rows affected (0.01 sec)
• 使用PASSWORD()函数加密(mysql使用该方式)
mysql> set password for 'test'@'%' =password('123456');
Query OK, 0 rows affected (0.01 sec)
6.3 删除无用用户
mysql> use mysql;
Reading table information for completion of table and column names
You can turn off this feature to get a quicker startup with -A
Database changed
mysql> select user from user;
+---------------+
| user |
+---------------+
| root |
| mysql.session |
| mysql.sys |
| root |
+---------------+
4 rows in set (0.00 sec)
mysql> delete from user where user !='root';
Query OK, 2 rows affected (0.01 sec)
mysql> select user from user;
+------+
| user |
+------+
| root |
| root |
+------+
2 rows in set (0.00 sec)
mysql> grant all privileges on *.* to 'multis'@'%' identified by '123456' with grant option;
mysql> grant all privileges on *.* to 'multis'@'localhost' identified by '123456' with grant option;
mysql> flush privileges;
6.4 mysql_secure_installation(推荐使用该方式修改密码)
用于安装后,权限安全的初始化
[root@mysql2 ~]# mysql_secure_installation -uroot -p --socket=/data/mysql/my3306/mysql.sock
#输入日志里密码
Enter password:
Securing the MySQL server deployment.
The existing password for the user account root has expired. Please set a new password.
#设置新密码
New password:
#确认新密码
Re-enter new password:
#是否设置验证密码插件
VALIDATE PASSWORD PLUGIN can be used to test passwords
and improve security. It checks the strength of password
and allows the users to set only those passwords which are
secure enough. Would you like to setup VALIDATE PASSWORD plugin?
Press y|Y for Yes, any other key for No:
Using existing password for root.
Change the password for root ? ((Press y|Y for Yes, any other key for No) :
... skipping.
# 是否删除匿名账户
By default, a MySQL installation has an anonymous user,
allowing anyone to log into MySQL without having to have
a user account created for them. This is intended only for
testing, and to make the installation go a bit smoother.
You should remove them before moving into a production
environment.
Remove anonymous users? (Press y|Y for Yes, any other key for No) :
... skipping.
# 是否禁止远程登录root用户
Normally, root should only be allowed to connect from
'localhost'. This ensures that someone cannot guess at
the root password from the network.
Disallow root login remotely? (Press y|Y for Yes, any other key for No) :
... skipping.
# 是否删除test 数据库
By default, MySQL comes with a database named 'test' that
anyone can access. This is also intended only for testing,
and should be removed before moving into a production
environment.
Remove test database and access to it? (Press y|Y for Yes, any other key for No) :
... skipping.
# 是否重新加载特权表
Reloading the privilege tables will ensure that all changes
made so far will take effect immediately.
Reload privilege tables now? (Press y|Y for Yes, any other key for No) :
... skipping.
All done!
6.5 找回丢失的用户密码
方式一: 管理员root密码丢失,无法登录数据库,我们关闭数据后可以在参数文件中添加skip-grant-tables参数
[root@mysql2 ~]# cat /etc/my.cnf
[mysqld]
user=mysql
basedir=/usr/local/mysql
datadir=/data/mysql/my3306/data
socket = /data/mysql/my3306/mysql.sock
server_id = 1
port = 3306
log_error=/data/mysql/my3306/logs/error.log
log_bin=/data/mysql/my3306/logs/mysql-bin
binlog_format=row
gtid_mode=on
enforce_gtid_consistency=true
log_slave_updates=1
max_connections=1024
wait_timeout=60
sort_buffer_size=2M
max_allowed_packet=32M
join_buffer_size=2M
innodb_buffer_pool_size=128M
innodb_flush_log_at_trx_commit=1
innodb_log_buffer_size=32M
innodb_log_file_size=128M
innodb_log_files_in_group=2
binlog_cache_size=2M
max_binlog_cache_size=8M
max_binlog_size=512M
expire_logs_days=7
slow_query_log=on
slow_query_log_file=/data/mysql/my3306/logs/slow.log
long_query_time=0.5
log_queries_not_using_indexes=1
skip-grant-tables
[root@mysql2 ~]# mysqld &
[root@mysql2 ~]# mysql
mysql> flush privileges;
Query OK, 0 rows affected (0.01 sec)
mysql> alter user root@'localhost' identified by '123456';
Query OK, 0 rows affected (0.00 sec)
mysql> flush privileges;
Query OK, 0 rows affected (0.01 sec)
密码修改完成,关闭数据库。注释到skip-grant-tables参数
mysql> shutdown;
Query OK, 0 rows affected (0.00 sec)
启动数据库
[root@mysql2 ~]# mysqld &

方式二 :
[root@mysql2 ~]# mysqld --skip-grant-tables &
[root@mysql2 ~]# mysql
mysql> flush privileges;
mysql> alter user root@'localhost' identified by '123456';
mysql> flush privileges;
mysql> shutdown;
mysql> exit;
[root@mysql2 ~]# nohup mysqld &
[root@mysql2 ~]# mysqld -uroot -p