降维算法PCA及其应用
利用PCA算法实现手写字体识别,要求:
1、实现手写数字数据集的降维;
2、比较两个模型(64维和10维)的准确率;
3、对两个模型分别进行10次10折交叉验证,绘制评分对比曲线。
实验步骤
1. 导入数据集
from sklearn.datasets import load_digits
digits = load_digits()
train = digits.data
target = digits.target
2. 实现手写数字数据集的降维;
pca = PCA(n_components=10,whiten=True)
pca.fit(x_train,y_train)
x_train_pca = pca.transform(x_train)
x_test_pca = pca.transform(x_test)
3. 比较两个模型(64维和10维)的准确率;
64维
svc = SVC(kernel = 'rbf')
svc.fit(x_train,y_train)
y_predict = svc.predict(x_test)
print('The Accuracy of SVC is', svc.score(x_test, y_test))
print("classification report of SVC\n",classification_report(y_test, y_predict,
target_names=digits.target_names.astype(str)))
10维
svc = SVC(kernel = 'rbf')
svc.fit(x_train_pca,y_train)
y_pre_svc = svc.predict(x_test_pca)
print("The Accuracy of PCA_SVC is ", svc.score(x_test_pca,y_test))
print("classification report of PCA_SVC\n", classification_report(y_test, y_pre_svc,
target_names=digits.target_names.astype(str)))
4. 对两个模型分别进行10次10折交叉验证,绘制评分对比曲线。
for i in range(100):
    # 创建子图
    plt.subplot(10,10,i+1)
    # 显示灰度图像
    plt.imshow(samples[i].reshape(8,8),cmap='gray')
    title = str(y_pre[i])
    plt.title(title,color='red')
    # 关闭坐标轴
    plt.axis('off')
plt.show()
代码详解
import matplotlib.pyplot as plt
from sklearn.svm import SVC
from sklearn.preprocessing import StandardScaler
from sklearn.decomposition import PCA
from sklearn.metrics import classification_report
from sklearn.model_selection import train_test_split
from sklearn.datasets import load_digits
digits = load_digits()
train = digits.data
target = digits.target
x_train,x_test,y_train,y_test = train_test_split(train,target,test_size=0.2,random_state=33)
ss = StandardScaler()
x_train = ss.fit_transform(x_train)
x_test = ss.transform(x_test)
svc = SVC(kernel = 'rbf')
svc.fit(x_train,y_train)
y_predict = svc.predict(x_test)
print('The Accuracy of SVC is', svc.score(x_test, y_test))
print("classification report of SVC\n",classification_report(y_test, y_predict,
target_names=digits.target_names.astype(str)))
# 实现手写数字数据集的降维实现手写数字数据集的降维
pca = PCA(n_components=10,whiten=True)
pca.fit(x_train,y_train)
x_train_pca = pca.transform(x_train)
x_test_pca = pca.transform(x_test)
svc = SVC(kernel = 'rbf')
svc.fit(x_train_pca,y_train)
# 比较两个模型(64维和10维)的准确率
y_pre_svc = svc.predict(x_test_pca)
print("The Accuracy of PCA_SVC is ", svc.score(x_test_pca,y_test))
print("classification report of PCA_SVC\n", classification_report(y_test, y_pre_svc,
target_names=digits.target_names.astype(str)))
samples = x_test[:100]
y_pre = y_pre_svc[:100]
plt.figure(figsize=(12,38))
# 对两个模型分别进行10次10折交叉验证,绘制评分对比曲线
for i in range(100):
    plt.subplot(10,10,i+1)
    plt.imshow(samples[i].reshape(8,8),cmap='gray')
    title = str(y_pre[i])
    plt.title(title)
    plt.axis('off')
plt.show()
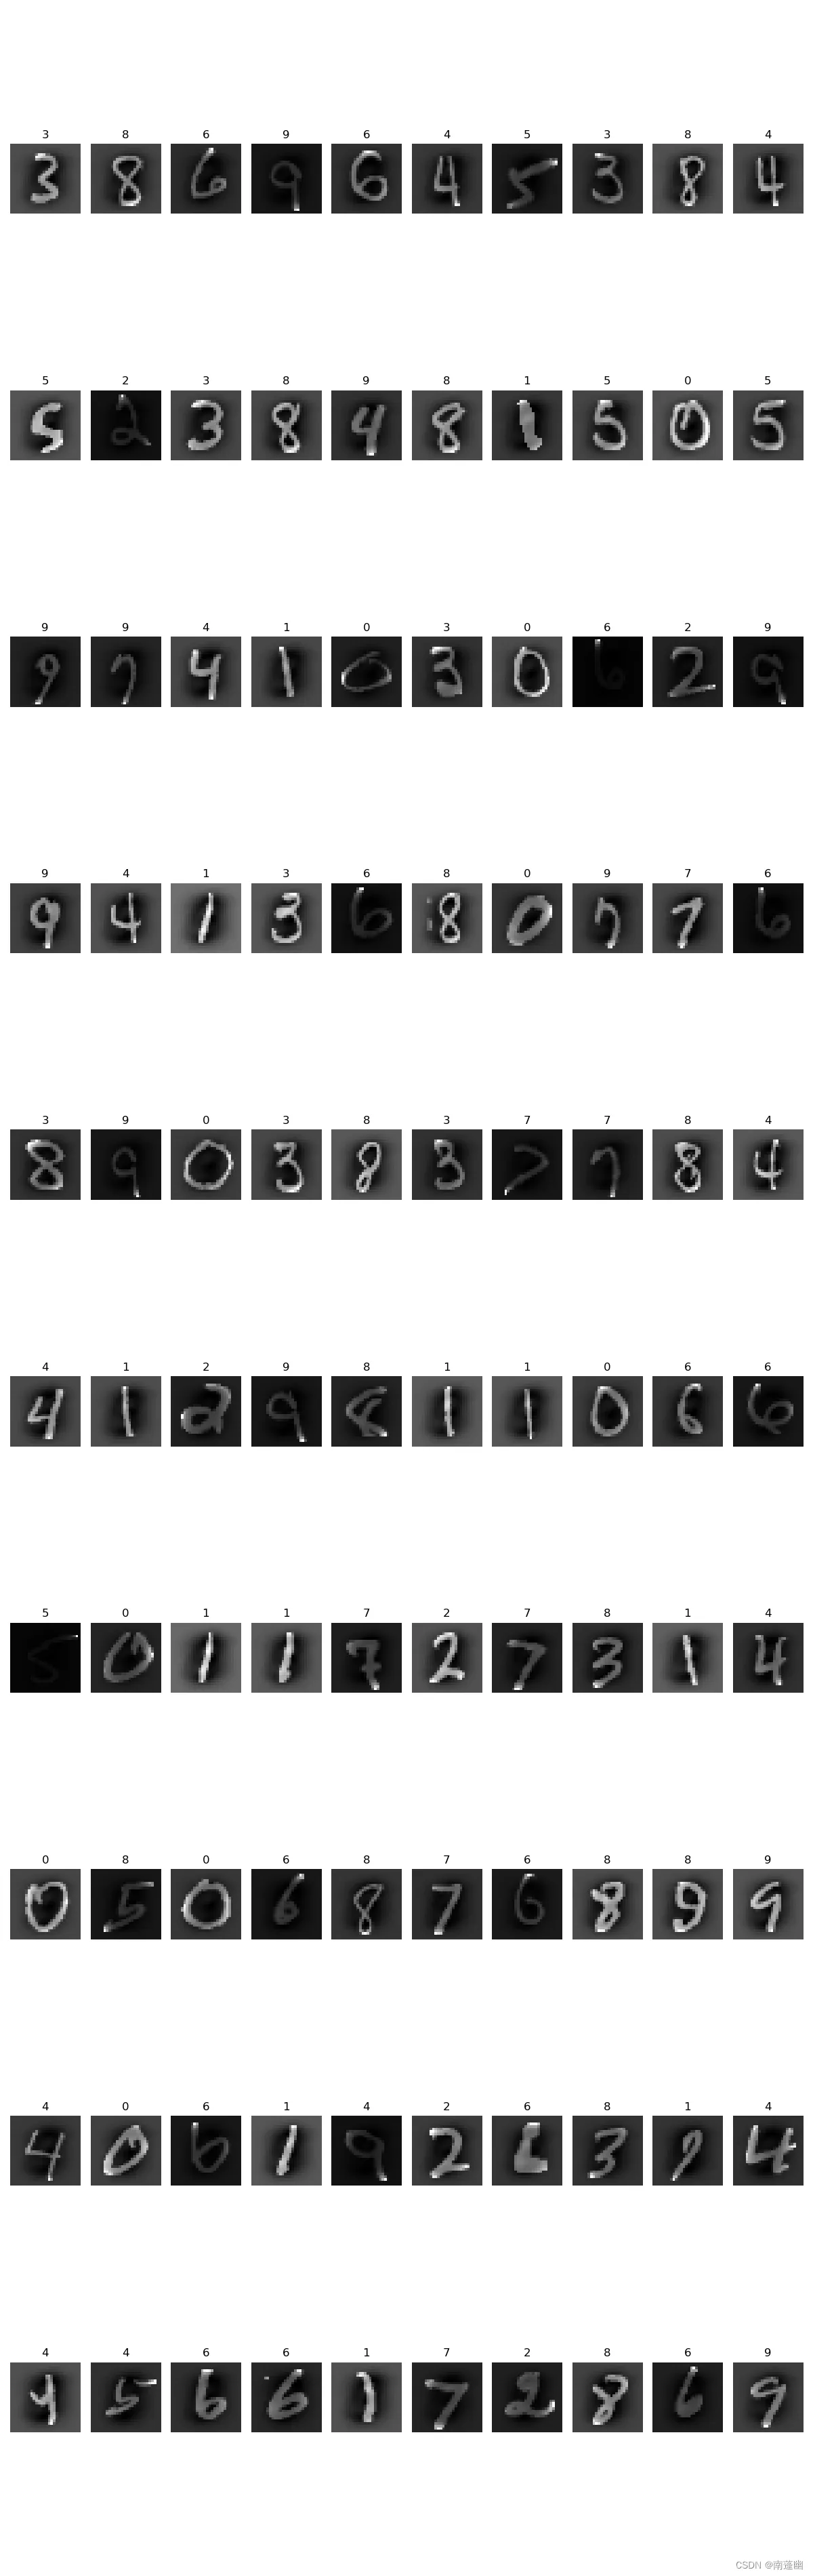
结果:
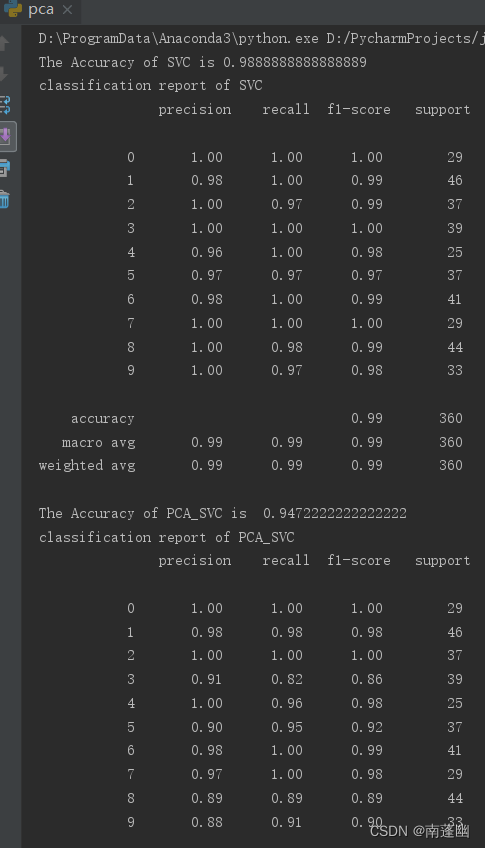
SVC
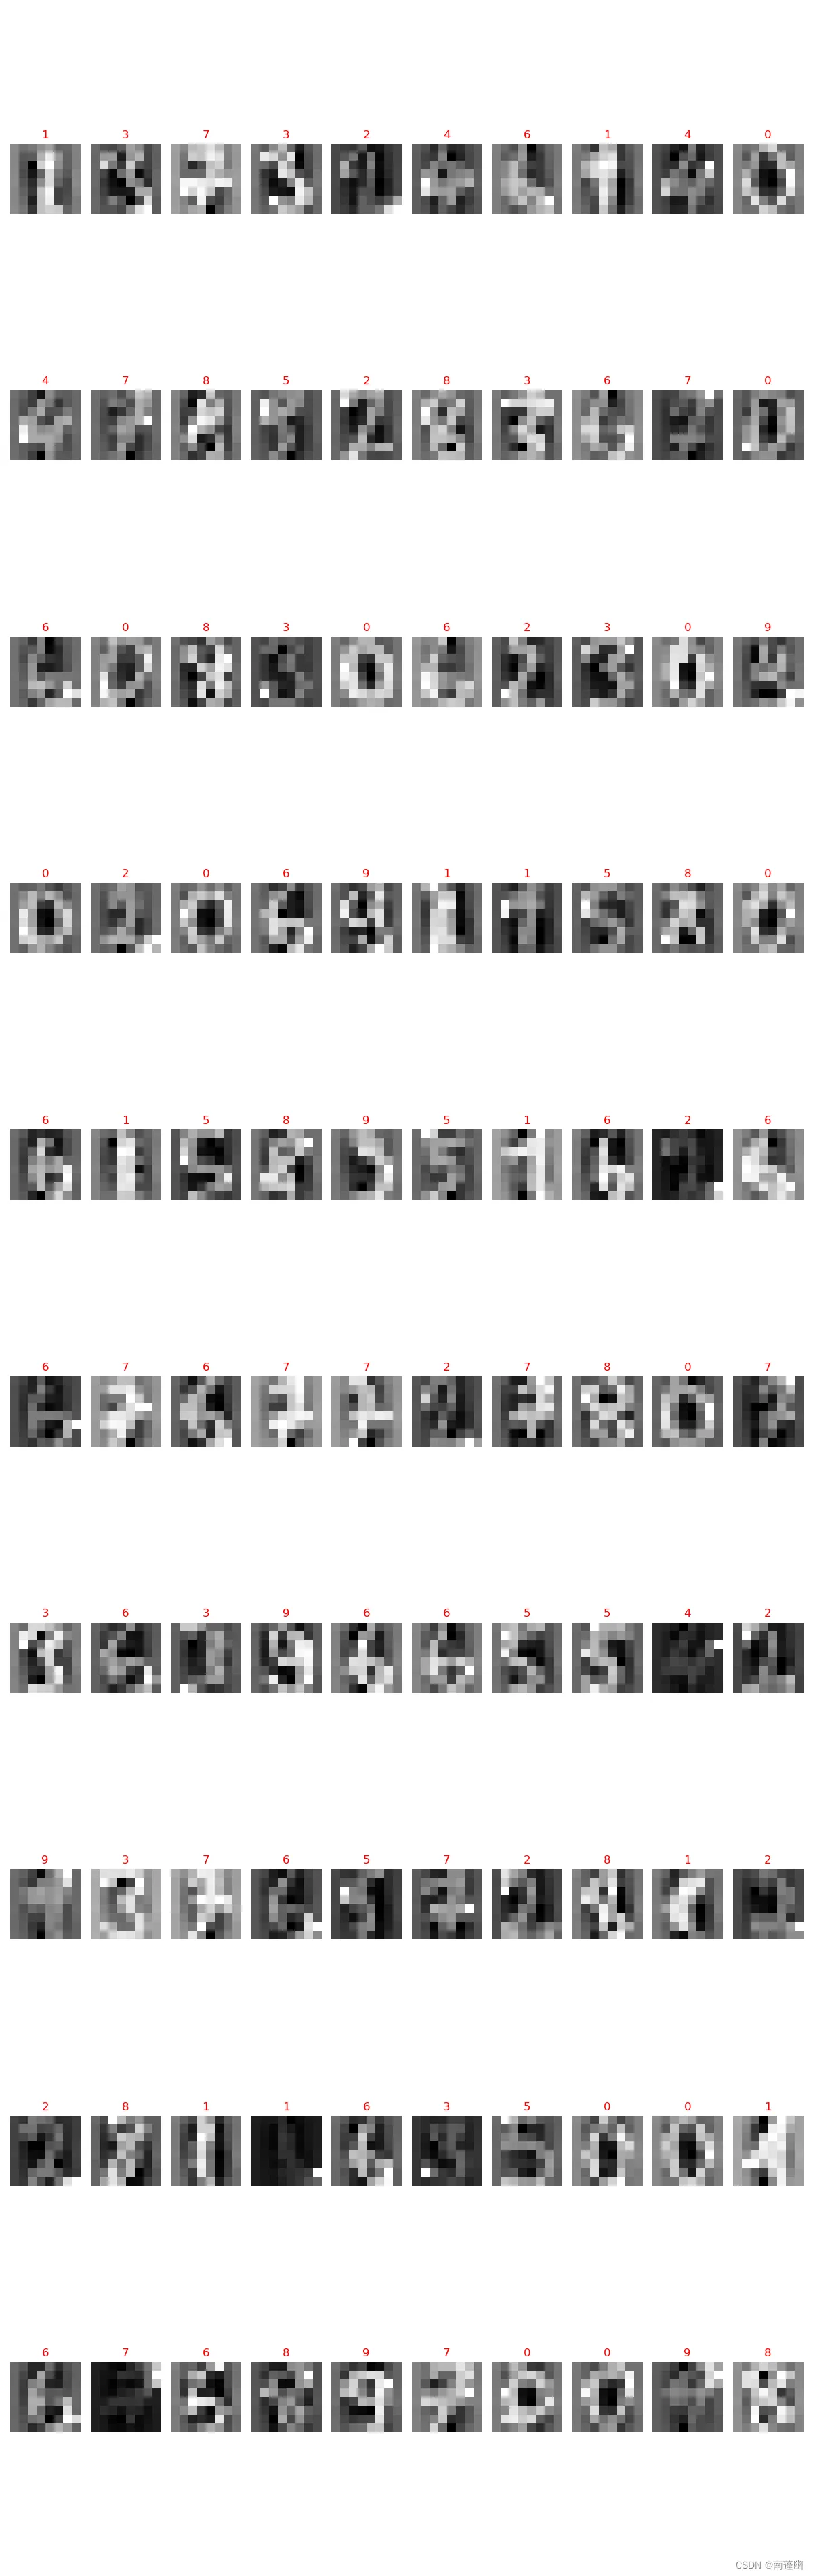
PCA
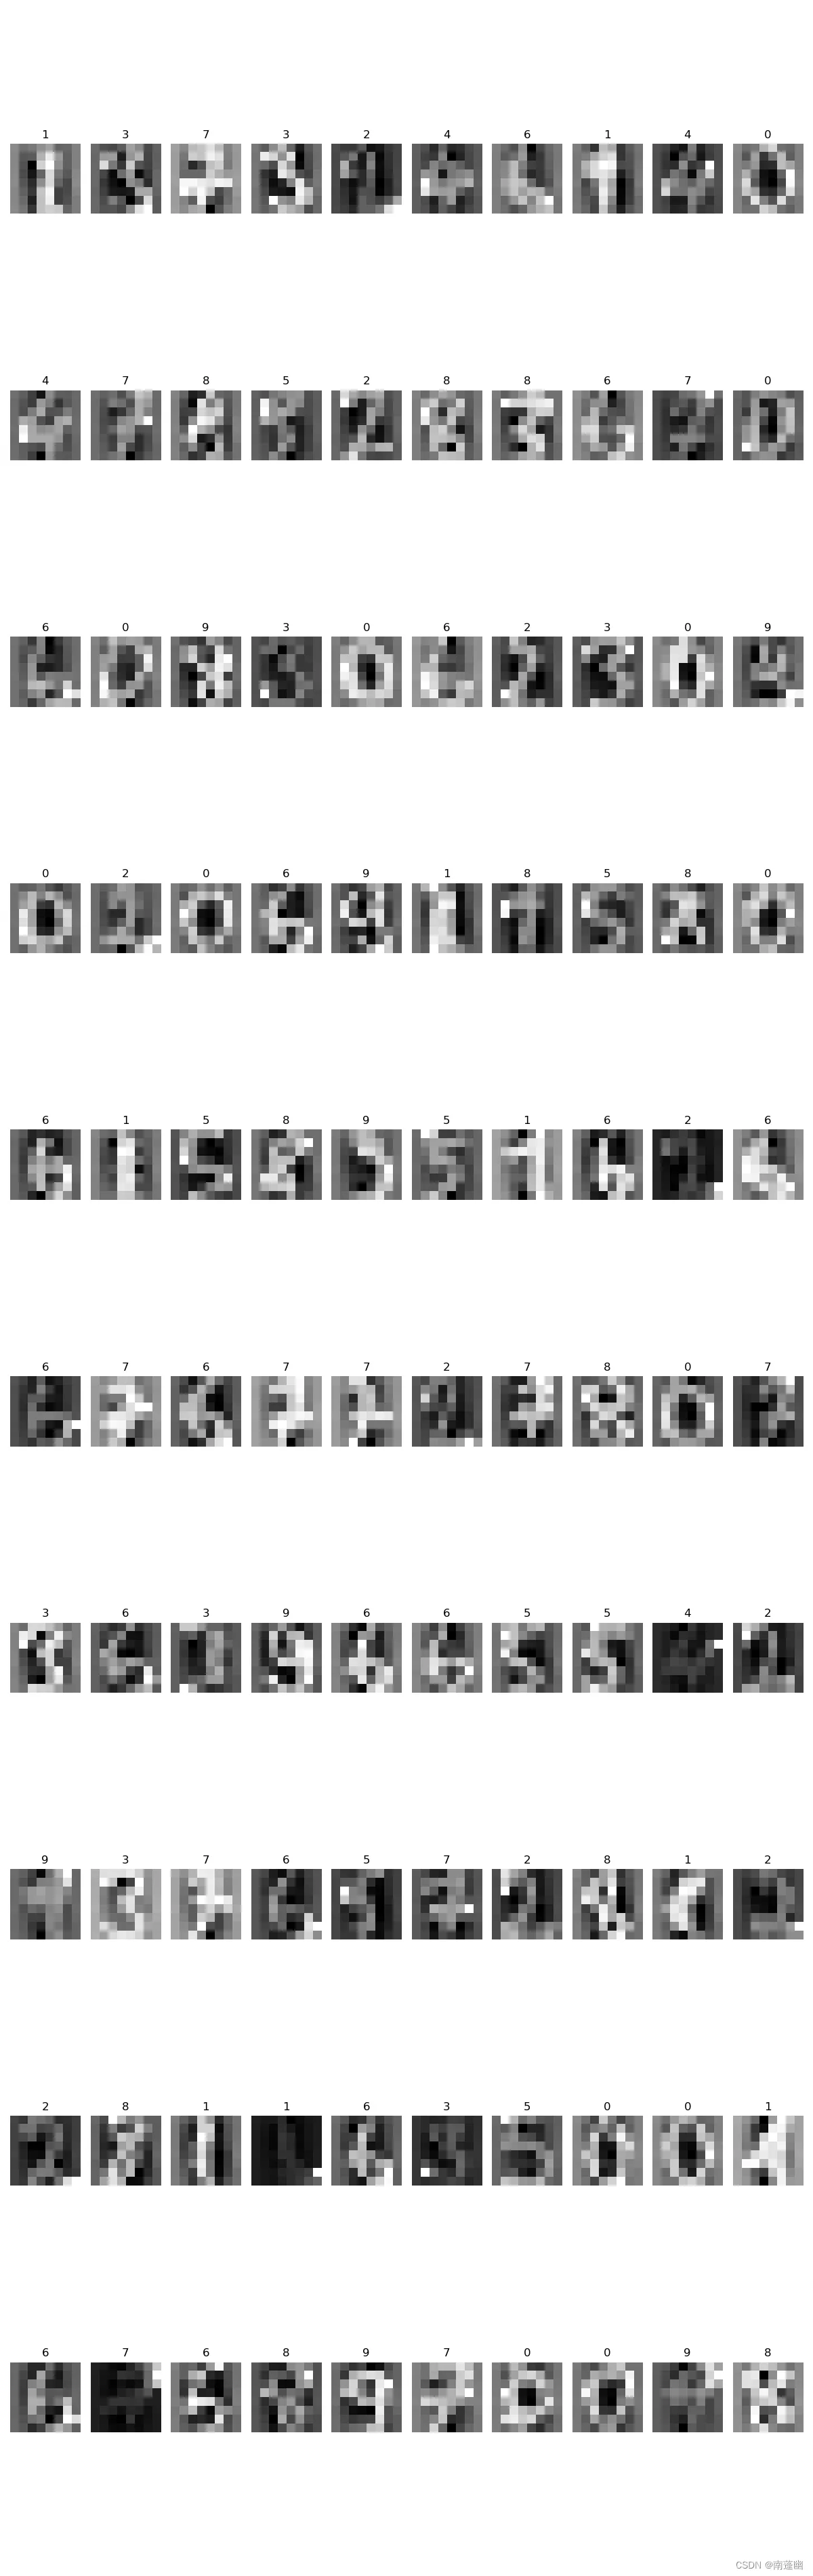
降维算法PCA及其应用手写识别【自定义数据集】
利用PCA算法实现手写字体识别,要求:
1、实现手写数字数据集的降维;
2、比较两个模型(64维和10维)的准确率;
3、对两个模型分别进行10次10折交叉验证,绘制评分对比曲线。
实验步骤
1. 导入自定义数据集
可以事先下载,也可以联网下载!
下载地址:
http://deeplearning.net/data/mnist/
保存如下: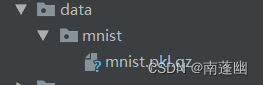
from pathlib import Path
DATA_PATH = Path("data")
PATH = DATA_PATH / "mnist"
PATH.mkdir(parents=True, exist_ok=True)
URL = "http://deeplearning.net/data/mnist/"
FILENAME = "mnist.pkl.gz"
# 如果未下载,则创建目录下载数据
if not (PATH / FILENAME).exists():
    content = requests.get(URL + FILENAME).content
    (PATH / FILENAME).open("wb").write(content)
# 读取数据集
with gzip.open((PATH / FILENAME).as_posix(), "rb") as f:
    ((x_train, y_train), (x_test, y_test), _) = pickle.load(f, encoding="latin-1")
x_train = x_train[:5000,:]
y_train = y_train[:5000,]
x_test = x_test[:360,:]
y_test = y_test[:360,]其他步骤和上一个相同【人工智能之手写字体识别】机器学习及与智能数据处理之降维算法PCA及其应用手写字体识别
代码详解
import matplotlib.pyplot as plt
from pathlib import Path
from sklearn.svm import SVC
from sklearn.decomposition import PCA
from sklearn.preprocessing import StandardScaler
from sklearn.metrics import classification_report
import requests
import pickle
import gzip
DATA_PATH = Path("data")
PATH = DATA_PATH / "mnist"
PATH.mkdir(parents=True, exist_ok=True)
URL = "http://deeplearning.net/data/mnist/"
FILENAME = "mnist.pkl.gz"
if not (PATH / FILENAME).exists():
    content = requests.get(URL + FILENAME).content
    (PATH / FILENAME).open("wb").write(content)
# 读取数据集
with gzip.open((PATH / FILENAME).as_posix(), "rb") as f:
    ((x_train, y_train), (x_test, y_test), _) = pickle.load(f, encoding="latin-1")
x_train = x_train[:5000,:]
y_train = y_train[:5000,]
x_test = x_test[:360,:]
y_test = y_test[:360,]
#################################################################
# Each image is 28 x 28, and is being stored as a flattened row of length
# 784 (=28x28). Let's take a look at one; we need to reshape it to 2d
# first.
ss = StandardScaler()
x_train = ss.fit_transform(x_train)
x_test = ss.transform(x_test)
svc = SVC(kernel = 'rbf')
svc.fit(x_train,y_train)
y_predict = svc.predict(x_test)
print('The Accuracy of SVC is', svc.score(x_test, y_test))
print("classification report of SVC\n",classification_report(y_test, y_predict))
samples = x_test[:100]
y_pre = y_predict[:100]
plt.figure(figsize=(12,38))
for i in range(100):
    # 创建子图
    plt.subplot(10,10,i+1)
    # 显示灰度图像
    plt.imshow(samples[i].reshape(28,28),cmap='gray')
    title = str(y_pre[i])
    plt.title(title,color='red')
    # 关闭坐标轴
    plt.axis('off')
plt.show()
# 实现手写数字数据集的降维实现手写数字数据集的降维
pca = PCA(n_components=10,whiten=True)
pca.fit(x_train,y_train)
x_train_pca = pca.transform(x_train)
x_test_pca = pca.transform(x_test)
svc = SVC(kernel = 'rbf')
svc.fit(x_train_pca,y_train)
# 比较两个模型(64维和10维)的准确率
y_pre_svc = svc.predict(x_test_pca)
print("The Accuracy of PCA_SVC is ", svc.score(x_test_pca,y_test))
print("classification report of PCA_SVC\n", classification_report(y_test, y_pre_svc))
samples = x_test[:100]
y_pre = y_pre_svc[:100]
plt.figure(figsize=(12,38))
# 对两个模型分别进行10次10折交叉验证,绘制评分对比曲线
for i in range(100):
    plt.subplot(10,10,i+1)
    plt.imshow(samples[i].reshape(28,28),cmap='gray')
    title = str(y_pre[i])
    plt.title(title)
    plt.axis('off')
plt.show()
结果:
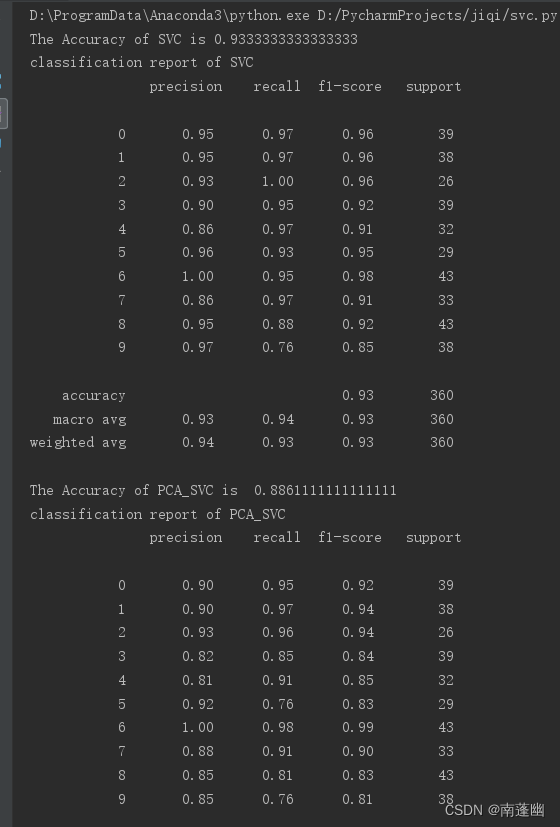
SVC
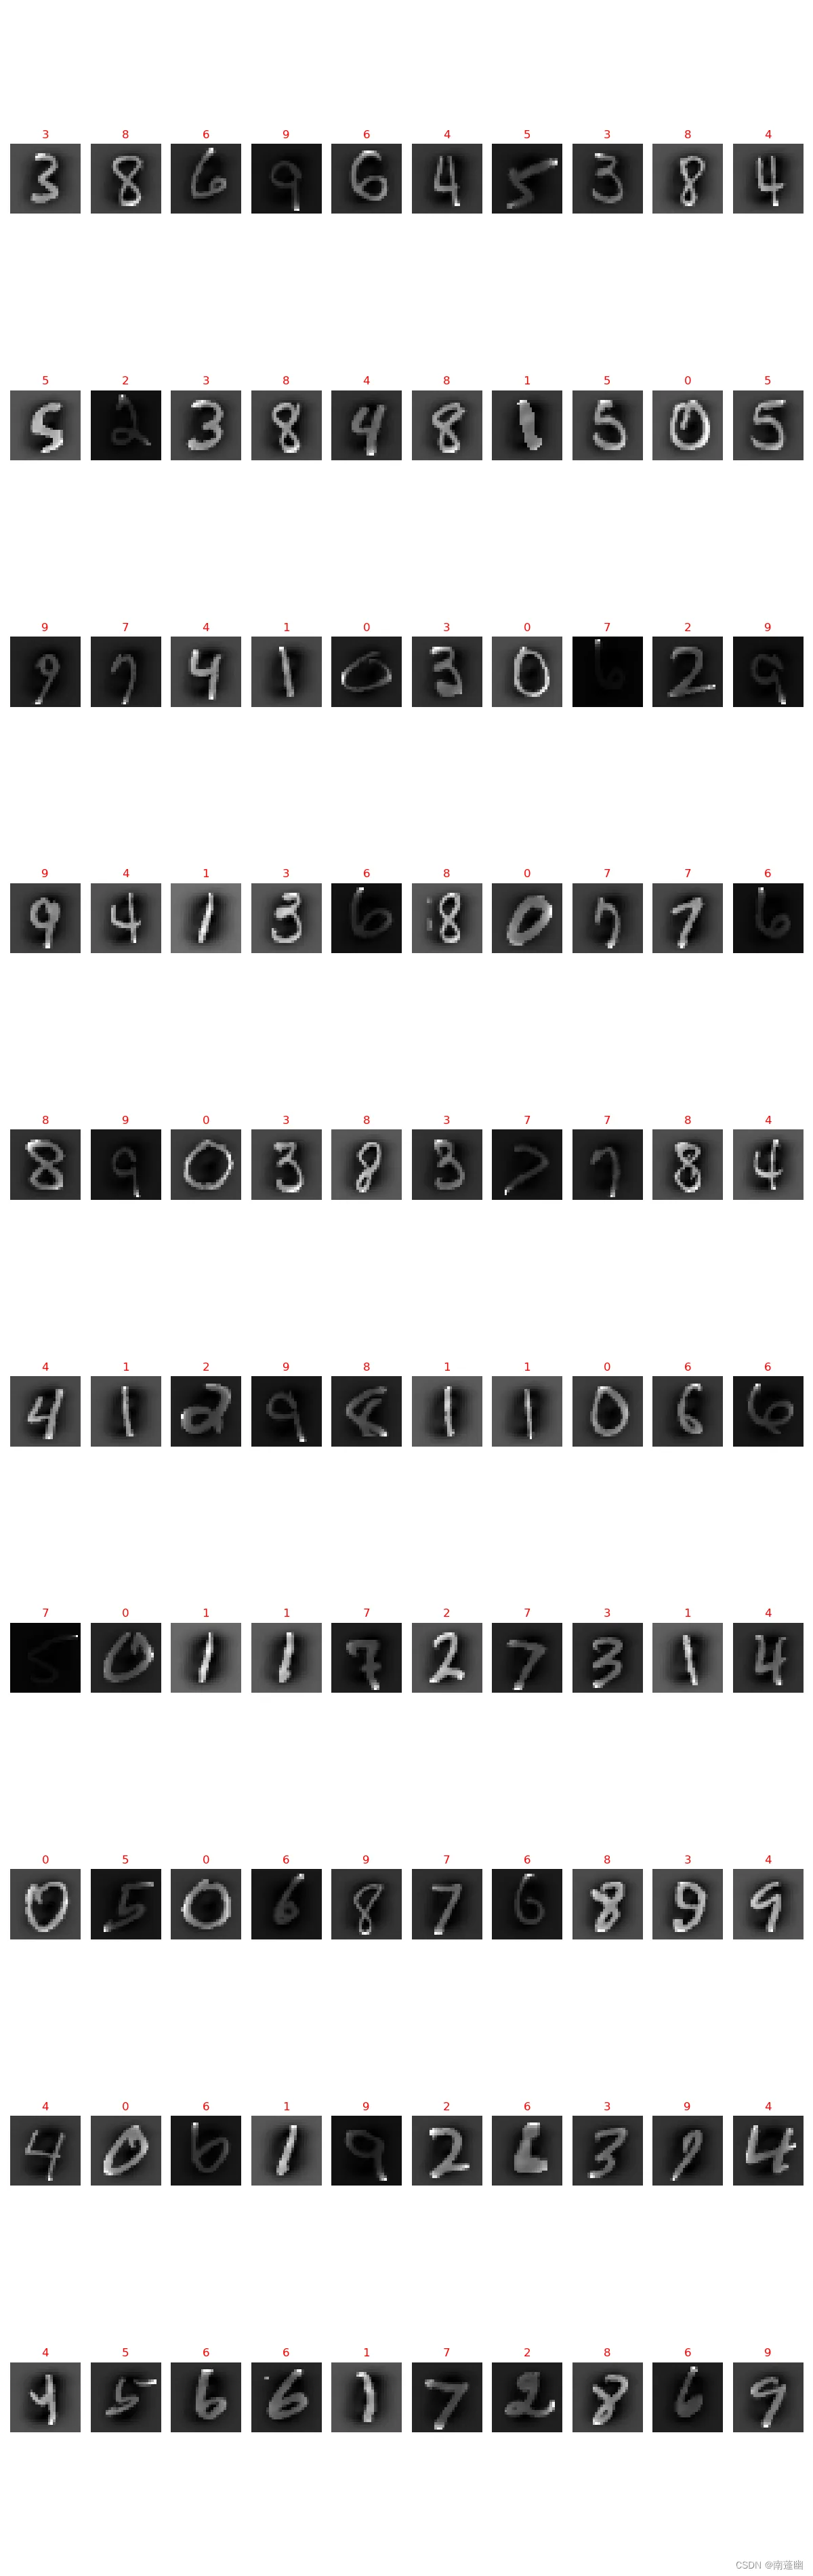
PCA