原文:https://docs.sonatype.org/display/Repository/Sonatype+OSS+Maven+Repository+Usage+Guide
Sonatype OSS Maven Repository Usage Guide
- 1. Introduction
- 1a. Terms of Service
- 2. Sign up
- 3. Create a JIRA ticket
- 4. Maven Repositories
- 5. Prerequisites
- 6. Central Sync Requirement
- 7a. Deploy Snapshots and Stage Releases with Maven
- 7b. Stage Existing Artifacts
- 7c. Deploy Snapshots and Stage Releases with Ant
- 7d. Stage Releases with Gradle
- 7e. Deploy and Stage with SBT
- 8a. Release It
- 8b. Automating Releases
- 8c. Automating Releases in Nexus 2.4
- 9. Activate Central Sync
- 10. Help
- 11. What Do People Think About OSSRH
1. Introduction
Sonatype OSSRH (OSS Repository Hosting Service) uses Nexus to provide Maven repository hosting service for open source projects: https://oss.sonatype.org/. You can deploy snapshots, stage releases, and promote your releases so they will be synced to The Central Repository. All you need to do is to sign up a Sonatype JIRA account, create a JIRA ticket and make some POM/settings configuration. This document will guide you step by step for the details.
1a. Terms of Service
2. Sign up
You need a Sonatype JIRA account to create tickets and access your Maven repositories. Go to https://issues.sonatype.org/
- Click the Sign Up link under the Username field.
- Fill in the Sign up form and submit.


3. Create a JIRA ticket
- Go to Sonatype Open Source Project Repository Hosting JIRA
- Create a ticket with Project of Support - Open Source Project Repository Hosting and Issue Type of New Project
- Fill the page with the following information
Summary a brief introduction of your project groupId IMPORTANT the groupId of your projects, generally it must match your domain name, so com.googlecode.myprj is valid but myprj is not, if you are unsure about this, please read Choosing your Coordinates Project URL location of the project website SCM URL location of source control system Nexus Username the JIRA Username you just signed up, one or more Already Sync To Central are there any artifacts with same groupId existing in The Central Repository already? Description any other information you think we need to know
After the ticket is created, we will prepare Maven repositories for you. We will update the ticket and set it as _resolved_ once it’s done. Normally it takes less than 2 business days.
4. Maven Repositories
| https://oss.sonatype.org/content/repositories/snapshots/ | repository for deploying snapshots |
| https://oss.sonatype.org/service/local/staging/deploy/maven2/ | repository for staging releases, you should never visit this url in browser |
| https://oss.sonatype.org/content/repositories/releases/ | repository where staging promotion will go, this repository is synced to The Central Repository, but you should not deploy to this repository directly |
| https://oss.sonatype.org/content/groups/public/ | repository group which contains snapshots and releases |
5. Prerequisites
- JDK 5+ is installed on your command line path.
- Subversion 1.5+ is installed on your command line path. For more information, please refer to http://subversion.apache.org/.
- Maven 2.2.1+ is installed on your command line path.
- A GPG client is installed on your command line path. For more information, please refer to http://www.gnupg.org/.
- You have created your GPG keys and distributed your public key to hkp://pool.sks-keyservers.net/. For more information, please refer to How To Generate PGP Signatures With Maven.
6. Central Sync Requirement
To Improve The Central Repository and the Supporting the Maven Ecosystem, all artifacts to be synced to central must meet these requirements.
- Project POM has the following elements.
- <modelVersion>
- <groupId>
- <artifactId>
- <version>
- <packaging>
- <name>
- <description>
- <url>
- <licenses>
- <scm><url>
- <scm><connection>
- <developers>
- If the project packaging is jar, and the jar file contains java classes, there must be a -javadoc.jar for main artifact.
- If the project packaging is jar, and the jar file contains java classes, there must be a -sources.jar for main artifact.
- All project artifacts are signed using GPG, and the public key is distributed to hkp://pool.sks-keyservers.net/. For more information, please refer to How To Generate PGP Signatures With Maven.
Some folks have asked why do we require all this information in the POM for deployed artifacts so here's a small explanation. The POM being deployed with the artifact is part of the process to make transitive dependencies a reality in Maven. The logic for getting transitive dependencies working is really not that hard, the problem is getting the data. The other applications that are made possible by having all the POMs available for artifacts are vast, so by placing them into the repository as part of the process we open up the doors to new ideas that involve unified access to projects.
We also ask for license now because it is possible that your project's license may change in the course of its life time and we are trying create tools to help normal people sort out licensing issues. For example, knowing all the licenses for a particular graph of artifacts we could have some strategies that would identify potential licensing problems.
Besides, we discourage putting release repository/pluginRepository in your POM. In ideal conditions, all your dependencies should be already in central and central repository is self-contained. Otherwise people's build might break because of missing dependencies. If some of your dependencies are not in central, please upload them using our 3rd-party artifacts bundle upload service.
Brian has written 2 posts from different angles:
- Why Putting Repositories in your POMs is a Bad Idea
- Why external repos are being phased out of Central
 <project>
  <modelVersion>4.0.0</modelVersion>
  <groupId>org.apache.maven</groupId>
  <artifactId>maven</artifactId>
  <packaging>jar</packaging>
  <name>Maven core</name>
  <version>2.0</version>
  <description>The maven main core project description</description>
  <url>http://maven.apache.org</url>
  <licenses>
    <license>
      <name>The Apache Software License, Version 2.0</name>
      <url>http://www.apache.org/licenses/LICENSE-2.0.txt</url>
      <distribution>repo</distribution>
    </license>
  </licenses>
  <scm>
    <url>http://svn.apache.org/viewcvs.cgi/maven</url>
    <connection>http://svn.apache.org/viewcvs.cgi/maven</connection>
  </scm>
  <developers>
    <developer>
      <id>...</id>
      <name>...</name>
      <email>...</email>
    </developer>
  </developers>
  <dependencies>
    <dependency>
      <groupId>...</groupId>
      <artifactId>...</artifactId>
      <version>...</version>
    </dependency>
    ...
  </dependencies>
  <!--
  AVOID RELEASE REPOSITORY/PLUGINREPOSITORY:
  <repositories></repositories>
  <pluginRepositories></pluginRepositories>
  -->
</project>
7a. Deploy Snapshots and Stage Releases with Maven
7a.1. POM and settings config
Configure your POM to inherit from Sonatype OSS Parent POM:
<project>
  ...
  <parent>
    <groupId>org.sonatype.oss</groupId>
    <artifactId>oss-parent</artifactId>
    <version>7</version>
  </parent>
  ...
</project>
Configure your POM's SCM element with the information matching your SCM repository like this:
<project>
  ...
  <scm>
    <connection>scm:svn:http://foo.googlecode.com/svn/trunk/</connection>
    <developerConnection>scm:svn:https://foo.googlecode.com/svn/trunk/</developerConnection>
    <url>http://foo.googlecode.com/svn/trunk/</url>
  </scm>
  ...
</project>
or
<project>
  ...
  <scm>
    <connection>scm:git:git@github.com:juven/git-demo.git</connection>
    <developerConnection>scm:git:git@github.com:juven/git-demo.git</developerConnection>
    <url>git@github.com:juven/git-demo.git</url>
  </scm>
  ...
</project>
or
<project>
  ...
  <scm>
    <connection>scm:git:https://code.google.com/p/foo/</connection>
    <developerConnection>scm:git:https://code.google.com/p/foo/</developerConnection>
    <url>http://code.google.com/p/foo/source/browse</url>
  </scm>
  ...
</project>
or
<project>
  ...
  <scm>
    <connection>scm:hg:http://bitbucket.org/juven/hg-demo</connection>
    <developerConnection>scm:hg:https://bitbucket.org/juven/hg-demo</developerConnection>
    <url>http://bitbucket.org/juven/hg-demo</url>
  </scm>
  ...
</project>
Configure your Maven settings.xml, typically located in your ~/.m2 directory:
<settings>
  ...
  <servers>
    <server>
      <id>sonatype-nexus-snapshots</id>
      <username>your-jira-id</username>
      <password>your-jira-pwd</password>
    </server>
    <server>
      <id>sonatype-nexus-staging</id>
      <username>your-jira-id</username>
      <password>your-jira-pwd</password>
    </server>
  </servers>
  ...
</settings>
7a.2. Publish Snapshots
To publish a snapshot, simply run:
Don't worry about deploying too many snapshots so server disk will be overloaded. Nexus server has a scheduled task running weekly for cleaning up old snapshots. Snapshots older than 15 days will be deleted while a 5 minimum will always be kept. If a version is released, then all snapshots of this version will be removed.
If you want to selectively delete some snapshots, log into Nexus UI, go to the Repositories page and browse the Snapshots repository. In the repository tree view, right click on the node you want to delete and select Delete, just like this:

7a.3. Stage a Release
First you need to prepare a release:
Then stage the release:
Maven will checkout the tag you just prepared, then build and deploy it into Nexus staging repository.
7b. Stage Existing Artifacts
You don't have to go though the maven-release-plugin steps if your artifacts are already released. maven-gpg-plugin can help sign and deploy artifacts.
For example, if you want to sign and deploy these artifacts:
Run commands like this:
Note that when you sign and deploy classifiers like sources and javadoc, you need to specify the -Dclassifier parameter.
Besides, -DrepositoryId means you need to configure a matching server element in settings.xml like this:
<settings>
  ...
  <servers>
    ...
    <server>
      <id>sonatype-nexus-staging</id>
      <username>your-jira-id</username>
      <password>your-jira-pwd</password>
    </server>
  </servers>
  ...
</settings>
The other way to stage existing artifacts is to create a bundle and upload it. For example, if you have the following artifacts:
First create a bundle with a command like this:
Then go to Nexus UI, click Staging Upload in the left column. In the Staging Upload panel, select Artifact Bundle as Upload Mode and select the bundle you just created, like this:

Now click the Upload Bundle button, staging repository will be created and Nexus will run rules on it. You will get a report telling you if your artifacts are successfully staged and verified.
7c. Deploy Snapshots and Stage Releases with Ant
Maven repositories (even The Central Repository) are not limited to Maven users, Ant users can deploy artifacts to Maven repositories as well. First you need to manually create a pom.xml, which must contain all the elements specified inCentral Sync Requirements.
Now your project directory should look like this:
Then install the Maven Ant Tasks. Download it from http://maven.apache.org/ant-tasks/download.html and put it into ~/.ant/lib/.
Now write your Ant build.xml like this:
<project name="ant-demo" default="deploy" basedir="." xmlns:artifact="antlib:org.apache.maven.artifact.ant">

	<property name="src" location="src" />
	<property name="build" location="build" />
	<property name="dist" location="dist" />

	<!-- define Maven coordinates -->
	<property name="groupId" value="com.juvenxu" />
	<property name="artifactId" value="ant-demo" />
	<property name="version" value="1.0-SNAPSHOT" />

        <!-- define artifacts' name, which follows the convention of Maven -->
	<property name="maven-jar" value="${dist}/lib/${artifactId}-${version}.jar" />
	<property name="maven-javadoc-jar" value="${dist}/lib/${artifactId}-${version}-javadoc.jar" />
	<property name="maven-sources-jar" value="${dist}/lib/${artifactId}-${version}-sources.jar" />

        <!-- defined maven snapshots and staging repository id and url -->
	<property name="maven-snapshots-repository-id" value="sonatype-nexus-snapshots" />
	<property name="maven-snapshots-repository-url" value="https://oss.sonatype.org/content/repositories/snapshots/" />
	<property name="maven-staging-repository-id" value="sonatype-nexus-staging" />
	<property name="maven-staging-repository-url" value="https://oss.sonatype.org/service/local/staging/deploy/maven2/" />


	<target name="init">
		<mkdir dir="${build}" />
		<mkdir dir="${dist}/lib" />
	</target>

	<target name="compile" depends="init" description="compile the source ">
		<javac srcdir="${src}" destdir="${build}" />

	</target>

	<target name="dist" depends="compile" description="generate the distribution">

		<!-- build the main artifact -->
		<jar jarfile="${maven-jar}" basedir="${build}" />

		<!-- build the javadoc artifact -->
		<javadoc sourcepath="${src}" destdir="${dist}/javadoc" />
		<jar jarfile="${maven-javadoc-jar}">
			<fileset dir="${dist}/javadoc" />
		</jar>

		<!-- build the sources artifact -->
		<jar jarfile="${maven-sources-jar}">
			<fileset dir="${src}" />
		</jar>
	</target>

        <target name="deploy" depends="dist" description="deploy snapshot version to Maven snapshot repository">
		<artifact:mvn>
			<arg value="org.apache.maven.plugins:maven-deploy-plugin:2.6:deploy-file" />
			<arg value="-Durl=${maven-snapshots-repository-url}" />
			<arg value="-DrepositoryId=${maven-snapshots-repository-id}" />
			<arg value="-DpomFile=pom.xml" />
			<arg value="-Dfile=${maven-jar}" />
		</artifact:mvn>
        </target>

        <!-- before this, update project version (both build.xml and pom.xml) from SNAPSHOT to RELEASE -->
	<target name="stage" depends="dist" description="deploy release version to Maven staging repository">
		<!-- sign and deploy the main artifact -->
		<artifact:mvn>
			<arg value="org.apache.maven.plugins:maven-gpg-plugin:1.3:sign-and-deploy-file" />
			<arg value="-Durl=${maven-staging-repository-url}" />
			<arg value="-DrepositoryId=${maven-staging-repository-id}" />
			<arg value="-DpomFile=pom.xml" />
			<arg value="-Dfile=${maven-jar}" />
                        <arg value="-Pgpg" />
		</artifact:mvn>

		<!-- sign and deploy the sources artifact -->
		<artifact:mvn>
			<arg value="org.apache.maven.plugins:maven-gpg-plugin:1.3:sign-and-deploy-file" />
			<arg value="-Durl=${maven-staging-repository-url}" />
			<arg value="-DrepositoryId=${maven-staging-repository-id}" />
			<arg value="-DpomFile=pom.xml" />
			<arg value="-Dfile=${maven-sources-jar}" />
			<arg value="-Dclassifier=sources" />
                        <arg value="-Pgpg" />
		</artifact:mvn>

		<!-- sign and deploy the javadoc artifact -->
		<artifact:mvn>
			<arg value="org.apache.maven.plugins:maven-gpg-plugin:1.3:sign-and-deploy-file" />
			<arg value="-Durl=${maven-staging-repository-url}" />
			<arg value="-DrepositoryId=${maven-staging-repository-id}" />
			<arg value="-DpomFile=pom.xml" />
			<arg value="-Dfile=${maven-javadoc-jar}" />
			<arg value="-Dclassifier=javadoc" />
                        <arg value="-Pgpg" />
		</artifact:mvn>
	</target>

	<target name="clean" description="clean up">
		<delete dir="${build}" />
		<delete dir="${dist}" />
	</target>

</project>
Some explanation to the code above:
- xmlns:artifact="antlib:org.apache.maven.artifact.ant" is mandatory for installing Maven Ant Tasks
- you need to package a main jar artifact, a javadoc jar artifact and a sources jar artifact
- the deploy task uses Maven to deploy your main artifacts to the snapshot repository
- the stage task uses Maven to sign and deploy artifacts, you also need to make sure GPG is correctly installed
- maven-snapshots-repository-url is the snapshot deploy URL, maven-snapshots-repository-id is used to identify it
- maven-staging-repository-url is the staging deploy URL, maven-staging-repository-id is used to identify it
To make the Ant script work, you also need to create a XML at ~/.m2/settings.xml, with content like this:
<settings>
  <servers>
    <server>
      <id>sonatype-nexus-snapshots</id>
      <username>your-username</username>
      <password>your-password</password>
    </server>
    <server>
      <id>sonatype-nexus-staging</id>
      <username>your-username</username>
      <password>your-password</password>
    </server>
  </servers>
  <profiles>
    <profile>
      <id>gpg</id>
      <properties>
        <gpg.passphrase>xxxxxx</gpg.passphrase>
      </properties>
    </profile>
  </profiles>
</settings>
- the <server> element is used to configure nexus access credential, its id must be identical to the value of maven-snapshots-repository-id and maven-staging-repository-id property in build.xml.
- the <profile> element is used to provide your gpg passphrase, it's not a good idea to put it directly into build.xml, so you should put passphrase here, and <arg value="-Pgpg" /> in build.xml will make it work.
To deploy a SNAPSHOT, make sure the 'version' element in your pom.xml the 'version' property in your build.xml has a SNAPSHOT version value (like 1.0-SNAPSHOT), then run ant deploy.
To stage a release, make sure the 'version' element in your pom.xml the 'version' property in your build.xml has a RELEASE version value (like 1.0), then run ant stage.
7d. Stage Releases with Gradle
Yennick Trevels wrote an excellent article for Gradle users.
7e. Deploy and Stage with SBT
Here are some references to publishing to OSSRH with Scala Build Tool:
http://www.cakesolutions.net/teamblogs/2012/01/28/publishing-sbt-projects-to-nexus/
https://github.com/sbt/sbt.github.com/blob/gen-master/src/jekyll/using_sonatype.md
https://raw.github.com/paulp/scala-improving/master/project/PublishToSonatype.scala
8a. Release It
To release your artifacts, open your favorite browser and go to Nexus UI with address: https://oss.sonatype.org/.
To close a staging repository:
- Login to the Nexus UI.
- Go to Staging Repositories page.
- Select a staging repository.
- Click the Close button.
You will be asked to provide a description for this staging close operation. If the staging repository is closed successfully, you will get a notification email and confirmation via the ui.
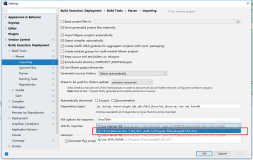
See the image below for details.

To make sure the deployed artifacts meet the Central Sync Requirements , Nexus has a few staging rules running on Staging Close and Release. These rules will validate your deployment has correct POM, javadoc, source, pgp signatures, and checksums etc. If your deployment has any problem, you will get a report like this:

Then you have to find out what's causing the problem, drop the staging repository, fix your release, and deploy again.
After staging repository is closed successfully, you can click on it to get a repository tree view. You will want to download them and do some manual testing (or hold a community vote) before finally releasing them. To download an artifact, right click on it and select Download.

In these 2 cases you will want to drop a staging/staged repository:
- Staging rules fail to pass when you try to close a staging repository, so you have to drop it.
- Staging repository is closed, but when you test the artifacts in the staged repository, you find some problems. So you will want to drop it and stage again.
To drop a staging repository, select it and click the Drop button, see the image below.

When you are sure the closed staging repository has no problem, click the Release button. You will be asked to input a description for this release. Staging rules will run again. If the closed staging repository is released successfully, you will get a notification email. Now your artifacts are in the Releases repository, which is synced to The Central Repository roughly every 2 hours. Now you can browse or search your artifacts from Nexus UI.

8b. Automating Releases
You are not limited to using the Nexus Web UI to close/release your Staging repositories. If you want to automate the Staging process, you can use the Nexus Staging Maven Plugin or Ant Tasks. Please read Build Promotion with the Nexus Staging Suite in the book Repository Management with Nexus for more information.
8c. Automating Releases in Nexus 2.4
Once OSSRH is upgraded to version 2.4 of Nexus, users who have been automating the close and/or release of staging repositories may need to modify their build procedures in the following scenarios:
- Users who use the nexus-maven-plugin will have to use nexus-staging-maven-plugin version 1.4.4
- Users who already use the nexus-staging-maven-plugin will have to upgrade to version 1.4.4. This should be as simple as changing the version element for the plugin in your POM.
- Users who use nexus-ant tasks will have to upgrade to version 1.4
- Users who are calling the REST API directly to close/release staging repositories you will need to consult the Nexus 2.4 API documentation to determine what changes they may need to make. The new API calls will be available here after the upgrade is complete: https://oss.sonatype.org/nexus-staging-plugin/default/docs/index.html
9. Activate Central Sync
The first time you promote a release, you need to comment on the OSSRH JIRA ticket you created in Section 3 so we can know you are ready to be synced. We will review your promoted artifacts. If no problem found, we will activate Central Sync for you and close your JIRA ticket.
After Central Sync is activated, your future promotion will be synced automatically. The sync process runs roughly every 2 hours.
10. Help
We have created two mailing lists for OSSRH Users:
| List Address |
Unsubscribe |
Subscribe |
|---|---|---|
| ossrh-announcements@sonatype.org | ossrh-announcements-unsubscribe@sonatype.org | ossrh-announcements-subscribe@sonatype.org |
| ossrh-users@sonatype.org |
ossrh-users-unsubscribe@sonatype.org | ossrh-users-subscribe@sonatype.org |
Upon account creation, you will automatically be added to the Announcements List. This list will be used for outbound announcements regarding system upgrades and other changes that affect your projects. All replies to this list are redirected back to the user list which is where more general discussion in the community will take place.
You can also come to our IRC (irc.codehaus.org, channel #mavencentral).
11. What Do People Think About OSSRH
- Automated Gradle project deployment to Sonatype OSS Repository by Yennick Trevels on Nov 5, 2011
- Want to host on Maven Central? by Kvahuja on Sep 8, 2011
- Deployer un artefact sur repo1.maven.org [French] by Issam El Fatmi and Cyrille Le Clerc on Jul 22, 2011
- How to upload your artifacts to maven central by umut.utkan on Apr 24, 2011
- Releasing Maven Artifacts to Central Repository through Sonatype by Jarrod Roberson on Mar 22, 2011
- Automating publishing to maven central via Sonatype by Yan Pujante on Nov 27, 2010
- Publishing javassist releases to Sonatype public repo/maven central by Andrew Dinn on Jul 27, 2010
- Automating Releases with maven-release-plugin [covered a lot on CVS and PGP] by Michael Remijan on May 20, 2010
- Free Maven Repository Hosting for Open Source projects by Sonatype by James Lorenzen on Mar 1, 2010
- Sonatype Free Maven Repository Hosting For FLOSS projects - Great Stuff! by Fabrizio Giudici on Feb 26, 2010
- Releasing a project to Maven Central repository via Sonatype by Jakub Holý on Feb 7, 2010