
目录
SSH远程winrar不是内部或外部命令,也不是可运行的程序
1.系统环境准备
- OpenSSH
- WinRAR
2.安装OpenSSH
OpenSSH是用于使用SSH协议进行远程登录的主要连接工具。它对所有流量进行加密,以消除窃听,连接劫持和其他攻击。此外,OpenSSH还提供了一整套安全的隧道功能,多种身份验证方法和复杂的配置选项。
OpenSSH套件包含以下工具:
- 远程操作使用 ssh, scp和 sftp完成。
- 使用ssh-add, ssh-keysign, ssh-keyscan和 ssh-keygen进行密钥管理 。
- 服务 端由sshd, sftp-server和 ssh-agent组成。
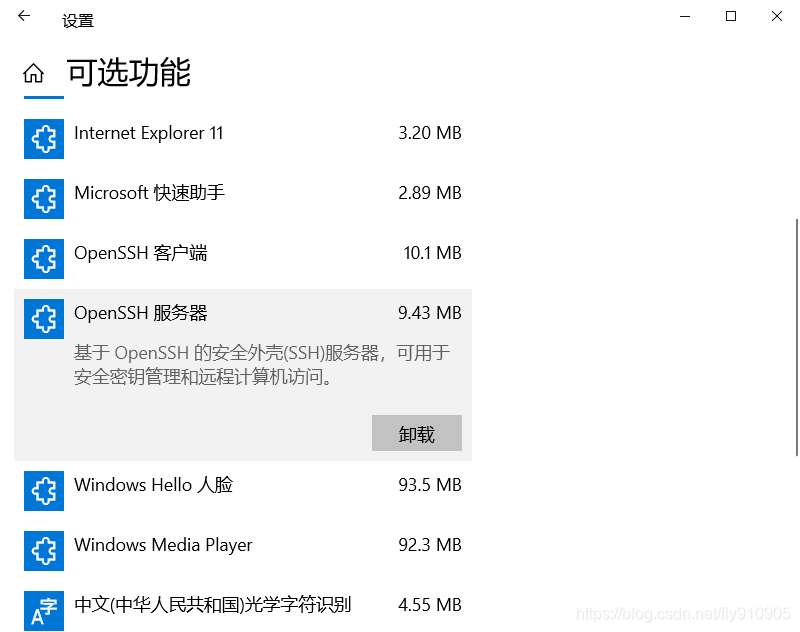
win10 开启OpenSSH服务
设置-应用-应用和功能-管理可选功能-添加功能
安装OpenSSH服务器和客户端,提示需要重启完成安装,重启电脑
非 win10 安装OpenSSH服务
1. 下载OpenSSH windows版本
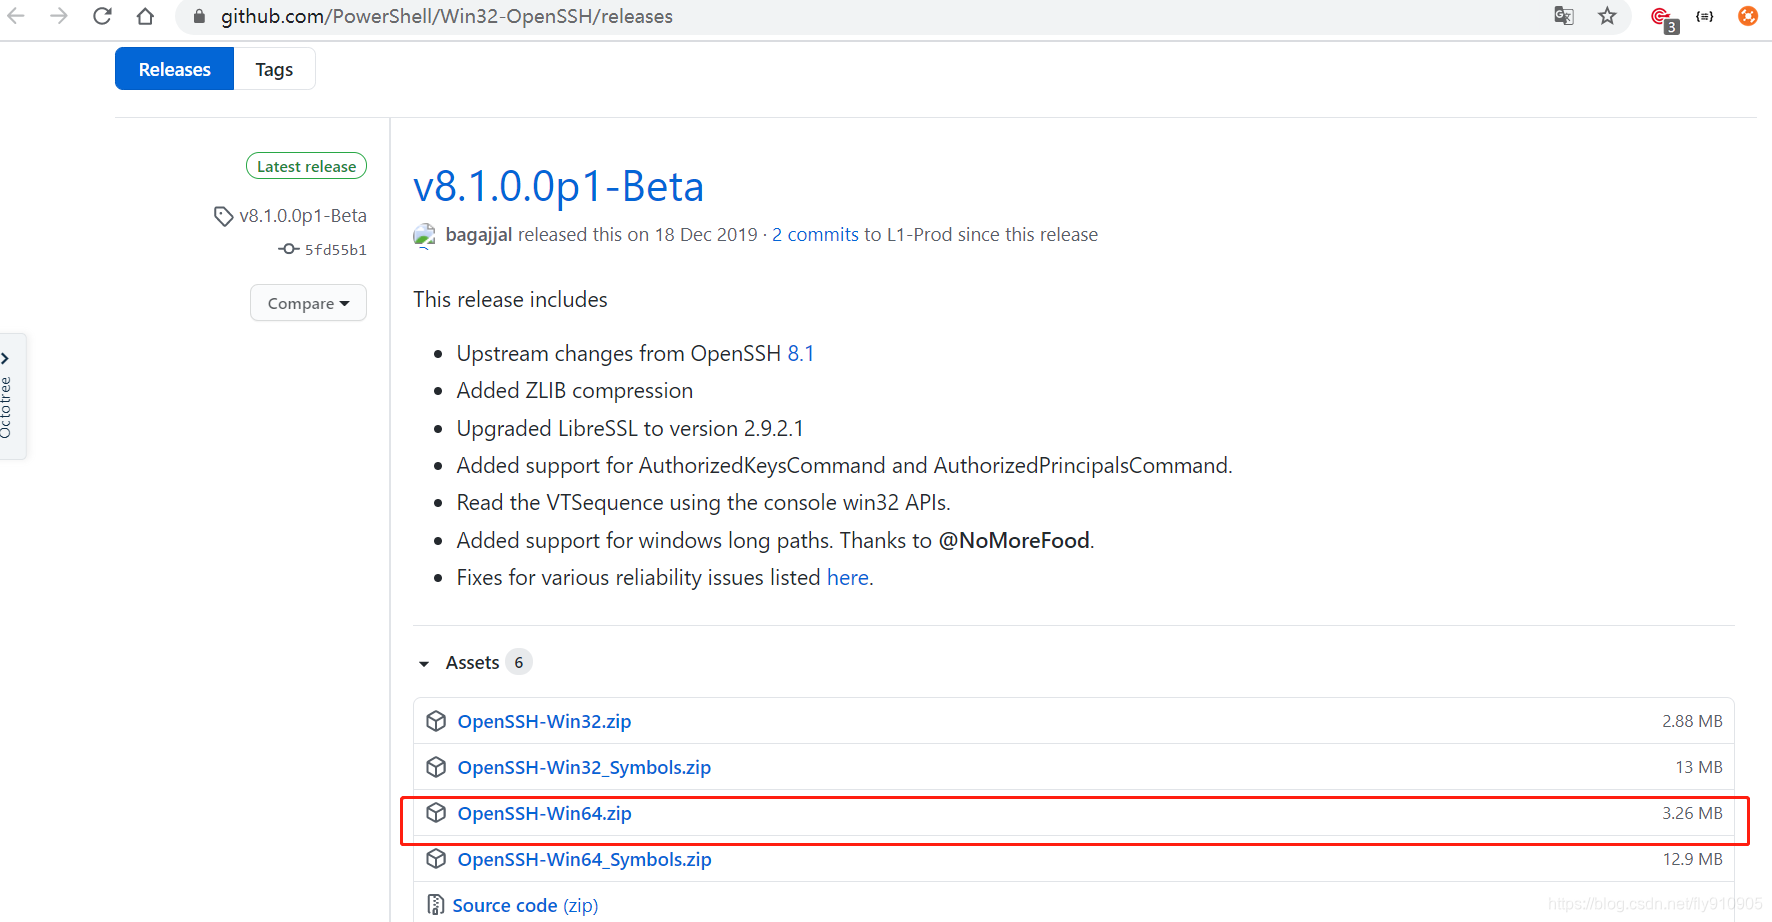
2 解压到C:\Program Files\OpenSSH (官方要求地址)
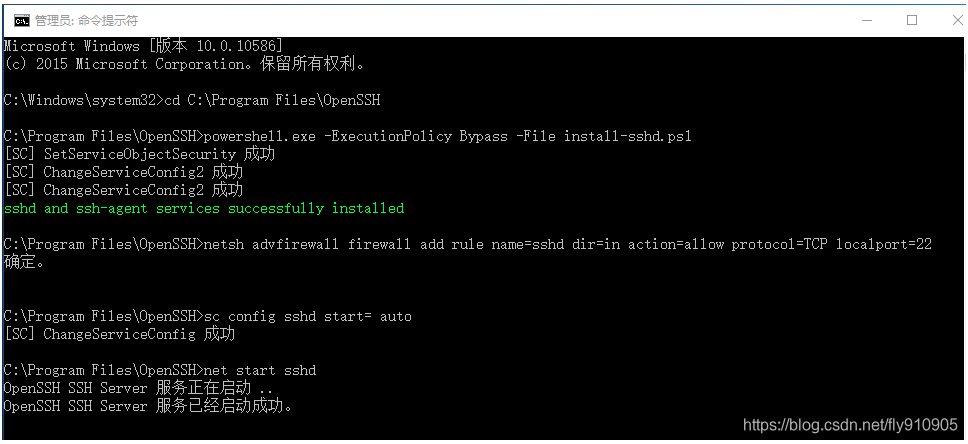
3 cmd到OpenSSH服务
1)安装sshd服务
powershell.exe -ExecutionPolicy Bypass -File install-sshd.ps1
2)开放22端口(如果你在windows关闭了防火墙并配置了入站规则可以不执行如下命令,多执行不影响)
netsh advfirewall firewall add rule name=sshd dir=in action=allow protocol=TCP localport=22
3)配置开机自启sshd服务
sc config sshd start= auto
到此就安装完成
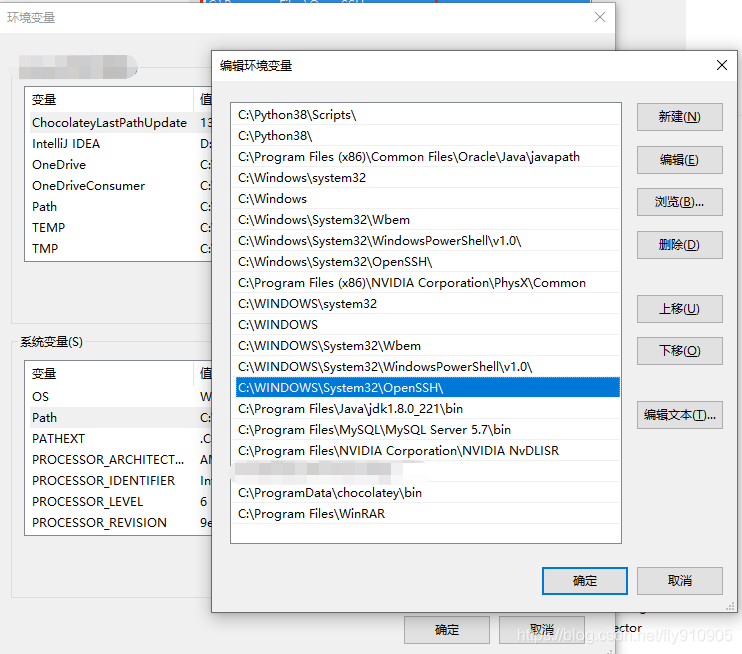
4) 将C:\Program Files\OpenSSH添加到path中,免得每次都要切到C:\Program Files\OpenSSH才能使用ssh,启动ssh服务
net start sshd
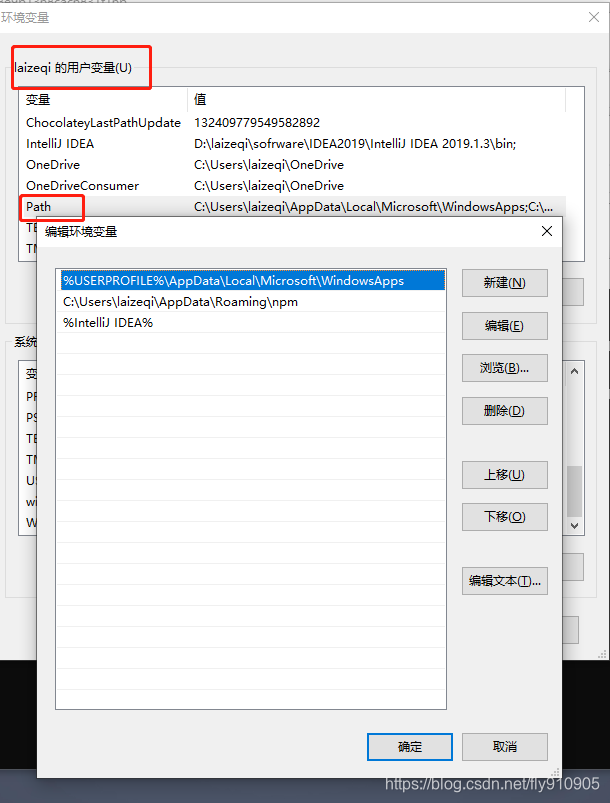
新增系统环境变量
启动OpenSSH服务
net start sshd
OpenSSH SSH Server 服务正在启动 .
OpenSSH SSH Server 服务已经启动成功。
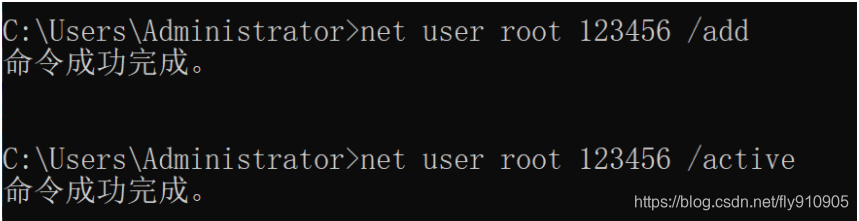
OpenSSH服务新增用户
net user root 123456 /add
net user root 123465 /active
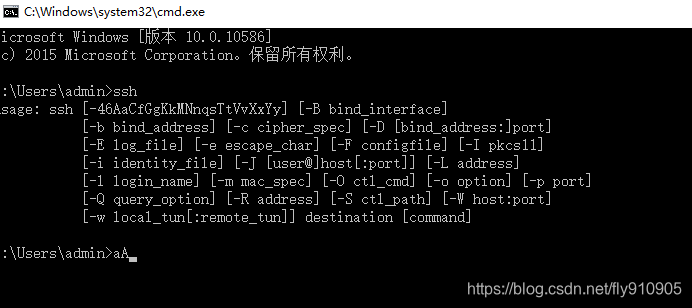
OpenSSH验证是否安装成功
安装成功之后,在cmd命令提示符窗口中输入 ssh 即可运行OpenSSH。如下图
3.安装WinRAR--远程解压zip包
1)安装WinRAR解压软件(5.30版本)
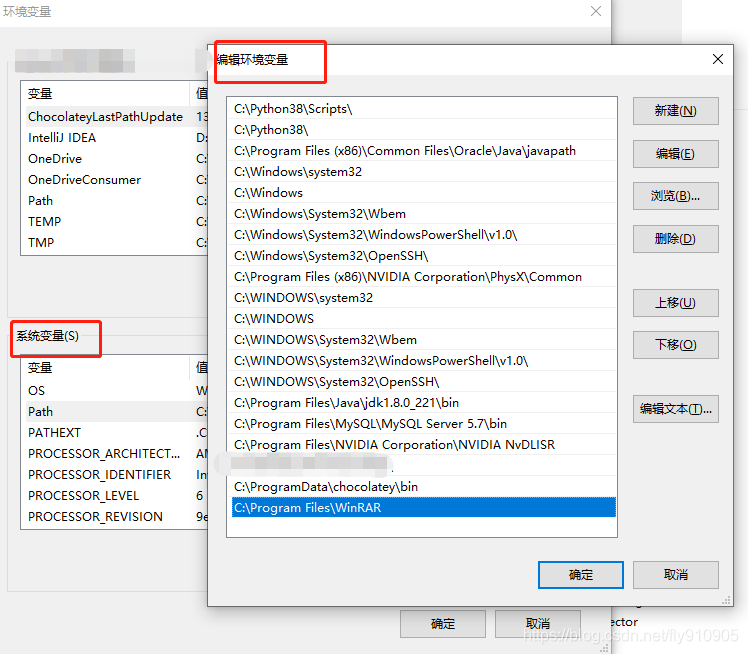
2)新增系统环境变量
WinRAR 解压命令
winrar x D:\WebVr\zip\0ebbd570a3cd424fadd6947742e7073f\Train.zip -r D:\WebVr\zip\0ebbd570a3cd424fadd6947742e7073f\
SSH远程winrar不是内部或外部命令,也不是可运行的程序
问题描述:
1.通过ssh远程控制用户
命令:ssh root@10.0.50.236 输入密码后
2.通过winrar命令行解压文件
命令:winrar x 文件路径及文件名 -r wenjian 文件路径
示例:winrar x D:\WebVr\zip\71ee2c8ef24248e9b1368cac6831f16b\Train.zip -r D:\WebVr\zip\71ee2c8ef24248e9b1368cac6831f16b\
提示:

解决办法
根本来说, WinRAR 在系统变量的PATH路径信息没有更新
1.通过ssh远程控制用户
命令:ssh root@10.0.50.236
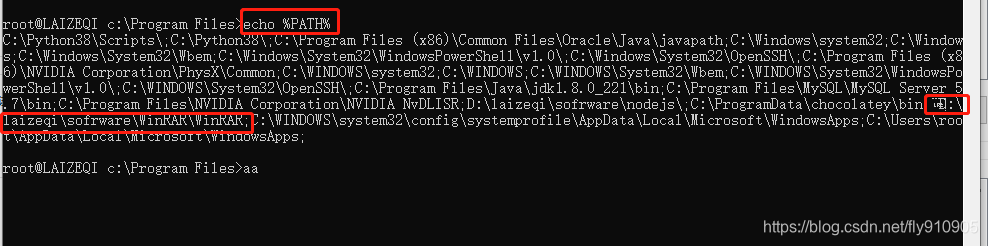
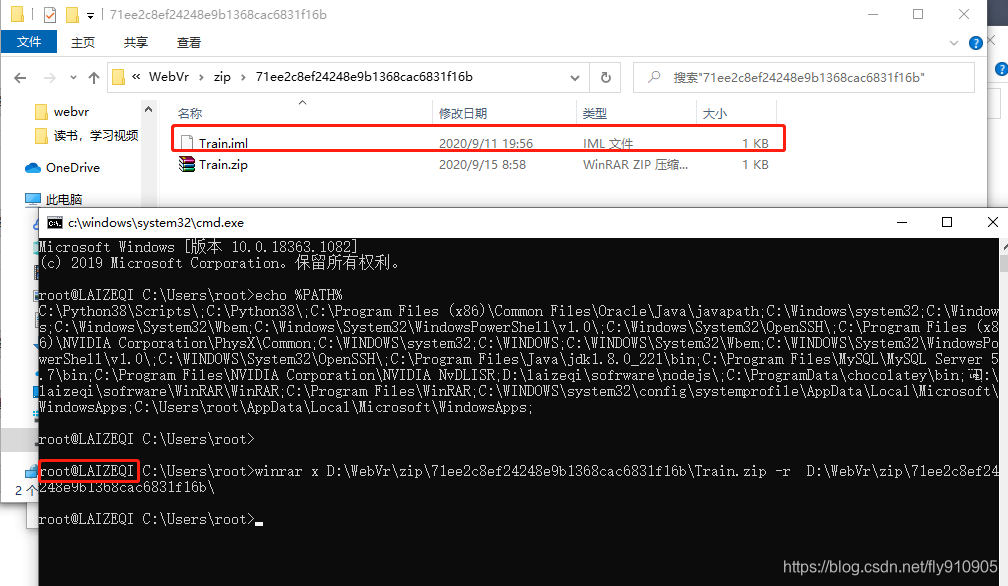
2.回显环境变量
命令:echo %PATH%
3.查看系统环境变量以及用户环境变量
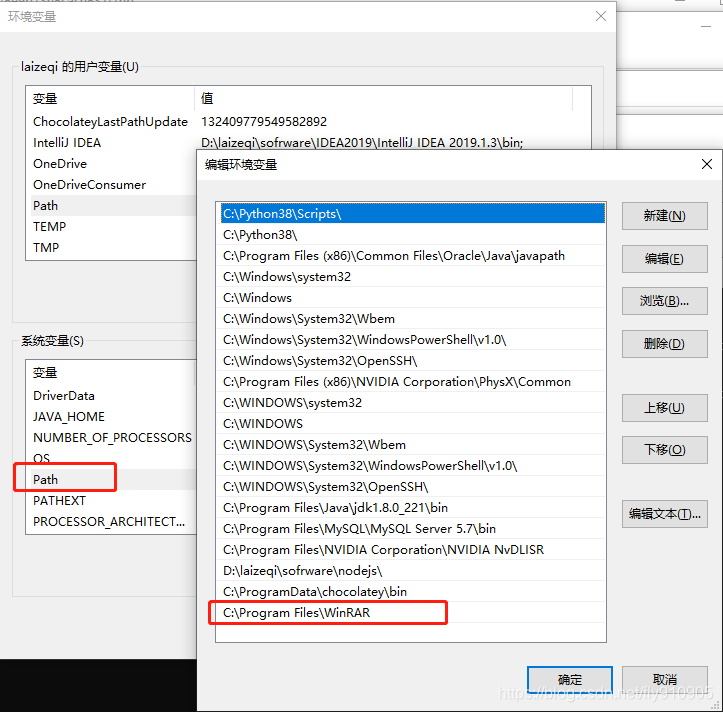
4.对比系统环境变量与回显环境变量是否一致,不一致为此问题的原因
5.修改系统环境变量,(winrar建议安装在默认位置)

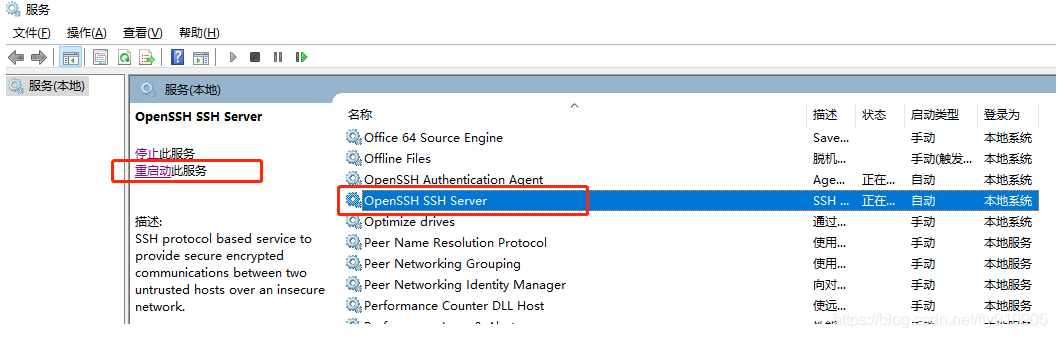
6.重启openssh服务,重新加载PATH信息
命令:
services.msc
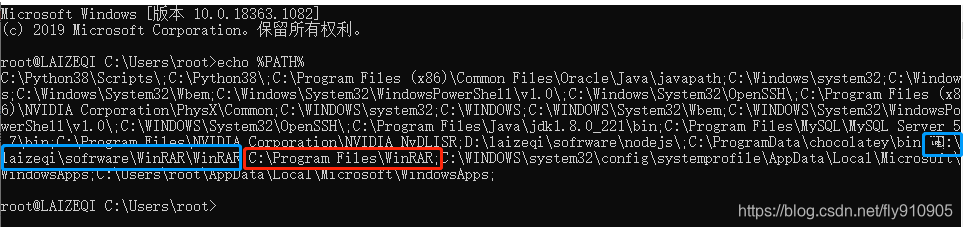
7.回显环境变量,最终检查
命令:echo %PATH%
红色框为新增路径,蓝色框为原来错误路径,蓝色框路径存在不影响
8.解压
命令:winrar x 文件路径及文件名 -r wenjian 文件路径
示例:winrar x D:\WebVr\zip\71ee2c8ef24248e9b1368cac6831f16b\Train.zip -r D:\WebVr\zip\71ee2c8ef24248e9b1368cac6831f16b\
4. Java通过SSH实现文件上传和解压
依赖包
<dependency>
  <groupId>ch.ethz.ganymed</groupId>
  <artifactId>ganymed-ssh2</artifactId>
  <version>build210</version>
</dependency>
OpenSSH工具类
import ch.ethz.ssh2.Connection;
import ch.ethz.ssh2.SCPClient;
import ch.ethz.ssh2.Session;
import ch.ethz.ssh2.StreamGobbler;
import org.slf4j.LoggerFactory;
import java.io.*;
import java.net.InetAddress;
import java.net.InetSocketAddress;
import java.net.Socket;
import java.net.SocketAddress;
import java.util.logging.Level;
import java.util.logging.Logger;
/**
 * @Title:  OpenSSH 工具类
 * @ClassName: com.ruoyi.release.utils.OpenSSHClient.java
 * @Description:
 *
 * @Copyright 2020-2021 - Powered By 研发中心
 * @author: 王延飞
 * @date:  2020/9/4 0004 14:20
 * @version V1.0
 */
public class OpenSSHClient {
    private static final org.slf4j.Logger log = LoggerFactory.getLogger(OpenSSHClient.class);
    public OpenSSHClient(String IP, int port, String username, String passward) {
        this.ip = IP;
        this.port = port;
        this.username = username;
        this.password = passward;
    }
    /**
     * @Title:
     * @MethodName:  execCommand
     * @param command
     * @Return void
     * @Exception
     * @Description:
     *
     * @author: 王延飞
     * @date:  2020/9/4 0004 14:56
     */
    public void execCommand(String command) {
        Connection conn = new Connection(ip,port);
        Session sess = null;
        try {
            conn.connect();
            boolean isAuthenticated = conn.authenticateWithPassword(username,
                    password);
            if (isAuthenticated == false) {
                log.error("authentication failed");
            }
            log.info("【主机】:{}连接成功,---执行命令:{}", ip, command);
            sess = conn.openSession();
            sess.execCommand(command);
            //将Terminal屏幕上的文字全部打印出来
            InputStream is = new StreamGobbler(sess.getStdout());
            BufferedReader brs = new BufferedReader(new InputStreamReader(is));
            while (true) {
                String line = brs.readLine();
                if (line == null) {
                    break;
                }
                //log.info("【主机】:{}连接成功,---执行命令:{},===返回结果:{}", ip, command, line);
                System.out.println(line);
            }
        } catch (IOException ex) {
            Logger.getLogger(SCPClient.class.getName()).log(Level.SEVERE, null,ex);
        }finally {
            //连接的Session和Connection对象都需要关闭
            if (sess != null) {
                sess.close();
            }
            if (conn != null) {
                conn.close();
            }
        }
    }
    public void getFile(String remoteFile, String localTargetDirectory) {
        Connection conn = new Connection(ip,port);
        try {
            conn.connect();
            boolean isAuthenticated = conn.authenticateWithPassword(username,
                    password);
            if (isAuthenticated == false) {
                log.error("authentication failed");
            }
            log.info(ip+"【连接成功】");
            SCPClient client = new SCPClient(conn);
            client.get(remoteFile, localTargetDirectory);
            conn.close();
        } catch (IOException ex) {
            Logger.getLogger(SCPClient.class.getName()).log(Level.SEVERE, null,ex);
        }
    }
    public void putFile(String localFile, String remoteTargetDirectory) {
        Connection conn = new Connection(ip,port);
        try {
            conn.connect();
            boolean isAuthenticated = conn.authenticateWithPassword(username,
                    password);
            if (isAuthenticated == false) {
                log.error("authentication failed");
            }
            log.info(ip+"【连接成功】");
            SCPClient client = new SCPClient(conn);
            client.put(localFile, remoteTargetDirectory);
            conn.close();
        } catch (IOException ex) {
            Logger.getLogger(SCPClient.class.getName()).log(Level.SEVERE, null,ex);
        }
    }
    /**
     * @Title: 文件远程上传
     * @MethodName:  putFile
     * @param localFile
     * @param remoteFileName
     * @param remoteTargetDirectory
     * @param mode
     * @Return void
     * @Exception
     * @Description:
     *
     * @author: 王延飞
     * @date:  2020/9/7 0007 16:23
     */
    public void  putFile(String localFile, String remoteFileName,String remoteTargetDirectory,String mode) {
        Connection conn = new Connection(ip,port);
        try {
            conn.connect();
            boolean isAuthenticated = conn.authenticateWithPassword(username,
                    password);
            if (isAuthenticated == false) {
                log.error("【文件远程上传】"+ip+"authentication failed");
            }
            log.info("【文件远程上传】"+ip+"【连接成功】");
            SCPClient client = new SCPClient(conn);
            if((mode == null) || (mode.length() == 0)){
                mode = "0600";
            }
            client.put(localFile, remoteFileName, remoteTargetDirectory, mode);
            //重命名
            ch.ethz.ssh2.Session sess = conn.openSession();
            String tmpPathName = remoteTargetDirectory +File.separator+ remoteFileName;
            String newPathName = tmpPathName.substring(0, tmpPathName.lastIndexOf("."));
            sess.execCommand("mv " + remoteFileName + " " + newPathName);//重命名回来
            log.info("【文件远程上传】"+ip+"【上传成功】");
            conn.close();
        } catch (IOException ex) {
            Logger.getLogger(SCPClient.class.getName()).log(Level.SEVERE, null,ex);
        }
    }
    public void putFile(String localFile, String remoteFileName,String remoteTargetDirectory) {
        Connection conn = new Connection(ip,port);
        try {
            conn.connect();
            boolean isAuthenticated = conn.authenticateWithPassword(username,
                    password);
            if (isAuthenticated == false) {
                log.error("authentication failed");
            }
            log.info(ip+"【连接成功】");
            SCPClient client = new SCPClient(conn);
            client.put(getBytes(localFile), remoteFileName, remoteTargetDirectory);
            conn.close();
        } catch (IOException ex) {
            Logger.getLogger(SCPClient.class.getName()).log(Level.SEVERE, null,ex);
        }
    }
    public static byte[] getBytes(String filePath) {
        byte[] buffer = null;
        try {
            File file = new File(filePath);
            FileInputStream fis = new FileInputStream(file);
            ByteArrayOutputStream byteArray = new ByteArrayOutputStream(1024*1024);
            byte[] b = new byte[1024*1024];
            int i;
            while ((i = fis.read(b)) != -1) {
                byteArray.write(b, 0, i);
            }
            fis.close();
            byteArray.close();
            buffer = byteArray.toByteArray();
        } catch (FileNotFoundException e) {
            e.printStackTrace();
        } catch (IOException e) {
            e.printStackTrace();
        }
        return buffer;
    }
    private String ip;
    private int port;
    private String username;
    private String password;
    public String getUsername() {
        return username;
    }
    public void setUsername(String username) {
        this.username = username;
    }
    public String getPassword() {
        return password;
    }
    public void setPassword(String password) {
        this.password = password;
    }
    public int getPort() {
        return port;
    }
    public void setPort(int port) {
        this.port = port;
    }
    public static String ScannerPortisAlive(int port) {
        String result = "OPEN";
        Socket socket = null;
        try {
            socket = new Socket();
            InetAddress ip = InetAddress.getLocalHost();
            SocketAddress address = new InetSocketAddress(ip, port);
            socket.connect(address, 100);
            socket.close();
//            Socket testPortSocket = new Socket(HostIP, port);
//            testPortSocket.close();
        } catch (IOException e) {
            result = "CLOSE";
        }
        return result;
    }
    public static void main(String[] args) {
        OpenSSHClient scpclient = new OpenSSHClient("10.0.50.236", 22, "root", "123456");
        scpclient.putFile("C:\\Users\\Administrator\\Desktop\\Middle.bat", "Middle.bat", "D:\\WebVr\\zip", null);
    }
}
远程上传文件
OpenSSHClient scpclient = new OpenSSHClient(ip, 22, opensshUsername, opensshPassword);
try {
  // 1.3.2.1 创建远程文件夹
  String makeDirCommand = "mkdir " + uploadPath;
  scpclient.execCommand(makeDirCommand);
  // 1.3.2.2 上传文件到远程服务器
  scpclient.putFile(uploadFullPath, zipFileName, uploadPath, null);
} catch (Exception e) {
  log.error("zip包远程分发失败,{}", e);
  return AjaxResult.error("zip包远程分发失败");
}
远程解压文件
OpenSSHClient scpclient = new OpenSSHClient(ip, 22, opensshUsername, opensshPassword);
// 1.3.2.4 zip包远程解压
// https://blog.csdn.net/huaairen/article/details/88067598
//在服务器上解压zip到指定路径下
// winrar x -r
String unzipCommand = "winrar x " + uploadFullPath + " -r  " + uploadPath;
/**
 * /P 删除每一个文件之前提示确认。
 * /F 强制删除只读文件。
 * /S 从所有子目录删除指定文件。
 * /Q 安静模式。删除全局通配符时,不要求确认。
 * /A 根据属性选择要删除的文件。
 */
String deleteServerCommand = "del /f/s/q " + uploadFullPath;
scpclient.execCommand(unzipCommand);
try {
  // 1.3.2.4 远程zip包删除
  //延迟5秒再删除,可能解压没有结束
  Thread.sleep(5000);
  scpclient.execCommand(deleteServerCommand);
} catch (Exception e) {
  e.printStackTrace();
}
