QT+OpenGL几何着色器
本篇完整工程见gitee:QtOpenGL 对应点的tag,由turbolove提供技术支持,您可以关注博主或者私信博主
几何着色器
- 几何着色器的输入是一个图元(如点或者三角形)的一组顶点
- 几何着色器可以再顶点发送到下一着色器阶段之前对他们随意变换
- 几何着色器最有趣的地方在于,他能够将(这一组)顶点变换为完全不同的图元,并且还能生成比原来更多的顶点
输入布局限定符可以从顶点着色器接收下列任何一个图元值:
● points:绘制GL_POINTS图元时
● lines:绘制GL_LINES或GL_LINE_STRIP时
● lines_adjacency:GL_ADJACENCY或GL_LINESTRIP_ADJACENCY
● triangles:GL_TRIANGLES、GL_TRIANGLE_STRIP或GL_TRIANGLE_FAN
● triangles_adjacency:GL_TRIANGLES_ADJACENCY或GL_TRIANGLE_STRIP_ADJACENCY
#version 330 core
layout (points) in;
layout (line_strip, max_vertices = 2) out;
void main() {
    gl_Position = gl_in[0].gl_Position + vec4(-0.1, 0.0, 0.0, 0.0);
    EmitVertex();
    gl_Position = gl_in[0].gl_Position + vec4( 0.1, 0.0, 0.0, 0.0);
    EmitVertex();
    EndPrimitive();
}
和输入布局修饰符一样,输出布局修饰符也可以接受几个图元值
- points
- line_strip
- triangle_strip
为了生成更有意义的结果,我们需要某种方式来获取前一着色器阶段的输出。GLSL提供给我们一个内建变量在内部看来可能是这样的:
in gl_Vertex
{
    vec4 gl_Posititon;
    float gl_PointSize;
    float gl_ClipDistance[];
}gl_in[];
它被声明成一个数组,因为大多数的渲染图元包含多于一个的顶点,而几何着色器的输入是一个图元的所有顶点。
每次我们调用EmitVertex时候,gl_Position中的向量会被添加到图元中,当EndPrimitive()被调用时候,所有发射出的(Emitted)顶点都会合成指定的输出渲染图元。
#version 330 core
layout (points) in;
layout (triangle_strip, max_vertices = 5) out;
in VS_OUT {
    vec3 color;
} gs_in[];
out vec3 fColor;
void build_house(vec4 position) {
    fColor=gs_in[0].color;
    gl_Position = position + vec4(-0.2, -0.2, 0.0, 0.0); // 1:bottom-left
    EmitVertex();
    gl_Position = position + vec4( 0.2, -0.2, 0.0, 0.0); // 2:bottom-right
    EmitVertex();
    gl_Position = position + vec4(-0.2, 0.2, 0.0, 0.0); // 3:top-left
    EmitVertex();
    gl_Position = position + vec4( 0.2, 0.2, 0.0, 0.0); // 4:top-right
    EmitVertex();
    gl_Position = position + vec4( 0.0, 0.4, 0.0, 0.0); // 5:top
    fColor=vec3(1.0, 1.0, 1.0);
    EmitVertex();
    EndPrimitive();
}
void main() {
    build_house(gl_in[0].gl_Position);
}
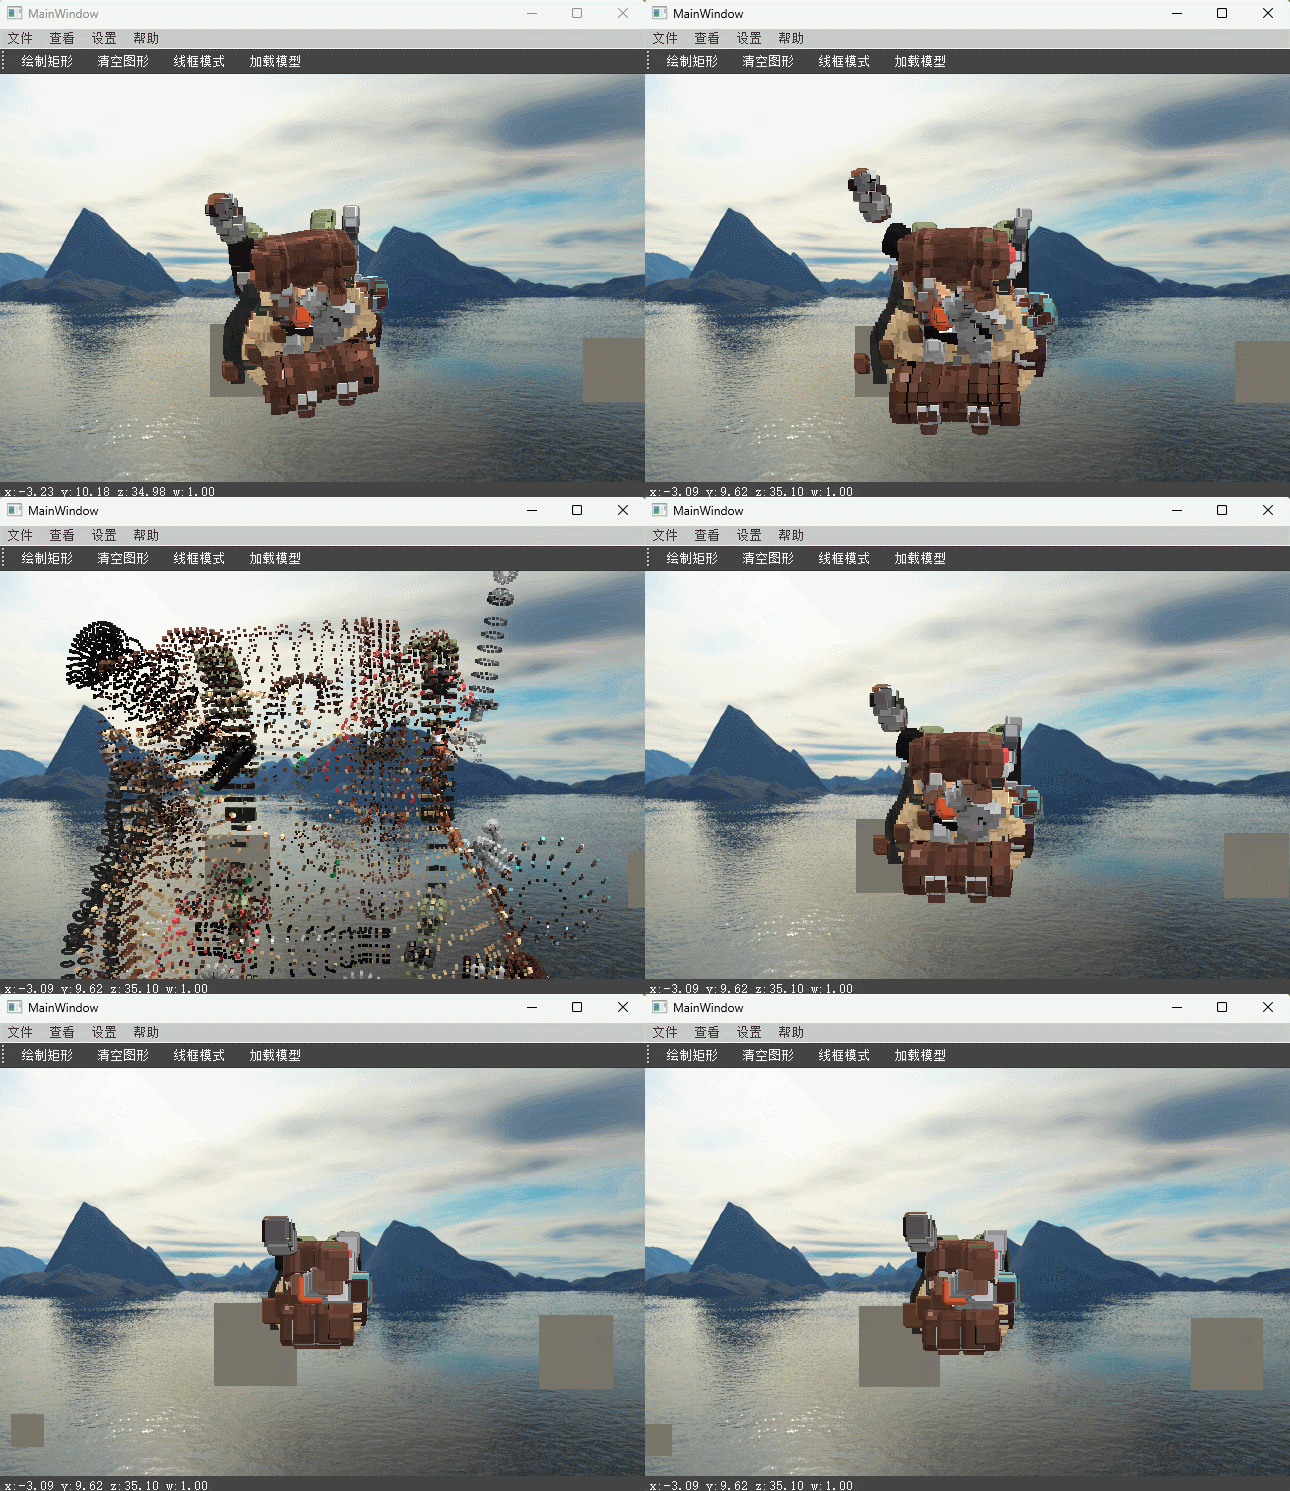
爆破物体效果
几何着色器
#version 330 core
layout (triangles) in;
layout (triangle_strip, max_vertices = 3) out;
in VS_OUT { vec2 texCoords; } gs_in[];
out vec2 TexCoords;
uniform float time;
vec3 GetNormal() {
    vec3 a = vec3(gl_in[0].gl_Position) - vec3(gl_in[1].gl_Position);
    vec3 b = vec3(gl_in[2].gl_Position) - vec3(gl_in[1].gl_Position);
    return normalize(cross(a, b));
}
vec4 explode(vec4 position, vec3 normal) {
    float magnitude = 4.0;
    vec3 direction = normal * ((sin(time) + 1.0) / 2.0) * magnitude;
    return position + vec4(direction, 0.0);
}
void main() {
    vec3 normal = GetNormal();
    gl_Position = explode(gl_in[0].gl_Position, normal);
    TexCoords = gs_in[0].texCoords;
    EmitVertex();
    gl_Position = explode(gl_in[1].gl_Position, normal);
    TexCoords = gs_in[1].texCoords;
    EmitVertex();
     gl_Position = explode(gl_in[2].gl_Position, normal);
    TexCoords = gs_in[2].texCoords;
    EmitVertex();
    EndPrimitive();
}
片段着色器
#version 330 core
struct Material {
    sampler2D texture_diffuse1;
    sampler2D texture_specular1;
    float shininess;
};
struct Light {
    vec3 direction;
    vec3 ambient;
    vec3 diffuse;
    vec3 specular;
};
uniform Light light;
uniform Material material;
out vec4 FragColor;
in vec2 TexCoords;
in vec3 Normal;
in vec3 FragPos;
uniform vec3 viewPos;
void main() {
    vec3 diffuseTexColor=vec3(texture(material.texture_diffuse1,TexCoords));
    vec3 specularTexColor=vec3(texture(material.texture_specular1,TexCoords));
    // ambient
    vec3 ambient = diffuseTexColor*light.ambient;
    // diffuse
    vec3 norm = normalize(Normal);
    vec3 lightDir = normalize(-light.direction);
    float diff = max(dot(norm, lightDir), 0.0);
    vec3 diffuse = diff *diffuseTexColor*light.diffuse;
    // specular
    vec3 viewDir = normalize(viewPos - FragPos);
    vec3 reflectDir = reflect(-lightDir, norm);
    float spec = pow(max(dot(viewDir, reflectDir), 0.0), material.shininess);
    vec3 specular =  spec*specularTexColor*light.specular;
    vec3 result = (ambient + diffuse + specular);
    FragColor = vec4(result, 1.0);
}
顶点着色器
#version 330 core
layout (location = 0) in vec3 aPos;
layout (location = 1) in vec3 aNormal;
layout (location = 2) in vec2 aTexCoords;
out VS_OUT { vec2 texCoords;} vs_out;
out vec3 Normal;
out vec3 FragPos;
out vec2 TexCoords;
uniform mat4 model;
uniform mat4 view;
uniform mat4 projection;
void main() {
  vs_out.texCoords=aTexCoords;
  TexCoords=aTexCoords;
  Normal = mat3(transpose(inverse(model))) * aNormal;
  FragPos=vec3(model * vec4(aPos,1.0));
  gl_Position = projection * view * model * vec4(aPos, 1.0);
  gl_PointSize=20.0;
}
法向量可视化
顶点着色器
#version 330 core
layout (location = 0) in vec3 aPos;
layout (location = 1) in vec3 aNormal;
out VS_OUT { vec3 normal;} vs_out;
uniform mat4 model;
uniform mat4 view;
void main() {
    vs_out.normal = mat3(transpose(inverse(view*model))) * aNormal;
//    mat3 normalMatrix = mat3(transpose(inverse(view * model)));
//    vs_out.normal = normalize(vec3(vec4(normalMatrix * aNormal, 0.0)));
    gl_Position = view * model * vec4(aPos, 1.0);
}
几何着色器
#version 330 core
layout (triangles) in;
layout (line_strip, max_vertices = 6) out;
in VS_OUT { vec3 normal; } gs_in[];
const float MAGNITUDE = 0.4;
uniform mat4 projection;
void GenerateLine(int index) {
    gl_Position = projection * gl_in[index].gl_Position;
    EmitVertex();
    gl_Position = projection * (gl_in[index].gl_Position +
                            vec4(gs_in[index].normal, 0.0) * MAGNITUDE);
    EmitVertex();
    EndPrimitive();
}
void main() {
    GenerateLine(0); // first vertex normal
    GenerateLine(1); // second vertex normal
    GenerateLine(2); // third vertex normal
}
片段着色器
#version 330 core
out vec4 FragColor;
void main() {
    FragColor = vec4(1.0,1.0,0.0, 1.0);
}


