这一节来学习Python的函数使用。首先看看函数的基本组成,然后学习不同种类的参数传递,以及Python的内置函数。
定义函数的时候,需要包括以下几个部分:
-
def:表示函数的关键字
-
函数名:函数的名称,日后根据函数名调用函数
-
函数体:函数中进行一系列的逻辑计算,如:发送邮件、计算出 [11,22,38,888,2]中的最大数等...
-
参数:为函数体提供数据
-
返回值:当函数执行完毕后,可以给调用者返回数据。可以返回任何数据,一旦返回数据,则函数自动结束,后面的代码不会再执行,如果不主动定义返回值,则默认返回值为None
例子
|
1
2
3
4
5
6
7
8
|
def
sendmail():
try
:
pass
except
:
return
"Failed"
else
:
return
"Succesful"
ret
=
sendmail()
|
执行函数的时候注意函数声明必须在前面,调用在后面,Python是按顺序操作的,而java,c#是直接把整个文件放内存,因此调用函数的位置无关紧要
小技巧:如果需要测试,可以在Pycharm里面执行断点和debug进行一步步跟踪
接下来看看具体参数是怎么传递的,Python里面有下面几种情况
-
普通参数
-
默认参数,可以在定义的时候给一个预分配的值,但是这个默认参数必须放在末尾
-
动态参数
-
动态参数 *args 和 **args
* 默认将传入的参数,全部放在元组中,元组的元素按顺序传入的值,比如 f1(*[1,2,3,4])
** 默认将传入的参数,全部放在字典中 f1(**{'k1':'v1','k2':'v2'})
例子(默认参数,指定参数)
定义函数send,里面有3个参数,最后一个参数预分配了一个值oo,那么传入参数的时候,最后一个有值的参数可以不用传递;传递参数的时候,如果不指定参数名,那么就默认安装位置传递;如果指定了名字,那么位置可以颠倒。
|
1
2
3
4
5
6
7
8
|
>>>
def
send(xx,bb,dd
=
"oo"
):
print
(xx,bb,dd)
return
True
send(
23
,
233
,
22
)
send(bb
=
22
,xx
=
33
)
-
-
-
-
-
-
-
-
-
-
-
-
-
-
23
233
22
33
22
oo
|
例子(动态参数)
定义了一个*args参数,注意调用的时候,f1(list)和f1(*list)的区别;前者把整个列表当做元组的一个元素,后者把列表转换成元组
|
1
2
3
4
5
6
7
8
9
10
11
12
|
>>>
def
f1(
*
args):
print
(args,
type
(args))
f1(
11
,
22
,
"ddd"
)
li
=
[
1
,
2
,
3
,
4
]
#把整个列表当做元组的一个元素
f1(li,
'2'
)
#把列表的每一个元素都转换成元组的元素
f1(
*
li)
-
-
-
-
-
-
-
-
-
-
-
-
-
-
-
(
11
,
22
,
'ddd'
) <
class
'tuple'
>
([
1
,
2
,
3
,
4
],
'2'
) <
class
'tuple'
>
(
1
,
2
,
3
,
4
) <
class
'tuple'
>
|
类似的,定义了一个**args的参数,调用的时候,需要传入字典;同理对应比较f2(dic)和f2(**dic)
|
1
2
3
4
5
6
7
8
9
10
|
>>>
def
f2(
*
*
args):
print
(args,
type
(args))
f2(n1
=
"alex"
,n2
=
18
)
dic
=
{
'k1'
:
'v1'
,
'k2'
:
'v2'
}
f2(kk
=
dic)
f2(
*
*
dic)
#直接赋值
-
-
-
-
-
-
-
-
-
-
-
-
-
-
-
-
-
-
-
-
-
{
'n1'
:
'alex'
,
'n2'
:
18
} <
class
'dict'
>
{
'kk'
: {
'k1'
:
'v1'
,
'k2'
:
'v2'
}} <
class
'dict'
>
{
'k1'
:
'v1'
,
'k2'
:
'v2'
} <
class
'dict'
>
|
例子(万能参数)
|
1
2
3
4
5
6
7
8
9
|
>>>
#形式参数的名字可以变换,但是默认习惯使用以下
def
f1(
*
args,
*
*
kwargs):
print
(args)
print
(kwargs)
#自动把列表顺序的(一个星)放第一个参数,字典格式的放第二个(两星的)
-
-
-
-
-
-
-
-
-
-
-
-
-
-
-
-
-
-
-
-
-
f1(
11
,
22
,
33
,
44
,k1
=
'v1'
,k2
=
'v2'
)
(
11
,
22
,
33
,
44
)
{
'k1'
:
'v1'
,
'k2'
:
'v2'
}
|
看看万能参数的实际应用,比如字符串有个format的函数,它的解释是这样的
|
1
2
3
4
5
6
7
8
|
def
format
(
self
,
*
args,
*
*
kwargs):
# known special case of str.format
"""
S.format(*args, **kwargs) -> str
Return a formatted version of S, using substitutions from args and kwargs.
The substitutions are identified by braces ('{' and '}').
"""
pass
|
使用的时候,传递列表的效果
|
1
2
3
4
5
6
7
|
>>> s1
=
"i am {0},age {1}"
.
format
(
"alex"
,
18
)
#自动封装到*args 里面
print
(s1)
s2
=
"i am {0},age {1}"
.
format
(
*
[
"alex"
,
18
])
#自动封装到*args 里面
print
(s2)
-
-
-
-
-
-
-
-
-
-
-
-
-
i am alex,age
18
i am alex,age
18
|
传递字典的效果
|
1
2
3
4
5
6
|
>>> s
=
"iam {name},age{age}"
.
format
(name
=
'alex'
,age
=
19
)
#传到了**kwargs
dic
=
{
'name'
:
'alex'
,
'age'
:
189
}
s2
=
"iam {name},age{age}"
.
format
(
*
*
dic)
#传到了**kwargs
print
(s2)
-
-
-
-
-
-
-
-
-
-
-
-
-
-
iam alex,age189
|
几个注意事项注意事项:
1.当定义函数的时候,如果定义了2个重名的函数,因为是按照顺序放入内存的,那么后面的函数会覆盖前面的定义
2.很重要的一点,函数参数传递的是引用,而不是拷贝,因此内容会一起改变
3.在函数后面直接输入""",然后回车会自动生成注释的格式
4.如果使用全局变量,约定俗成的习惯是全部大写,如果要在函数中修改,需要使用global
例子(传递的参数在函数中发生了改变,在函数外也同时发生了改变)
|
1
2
3
4
5
6
7
8
9
10
11
|
>>>
def
f1(a):
'''
:param a:
:return:
'''
a.append(
999
)
li
=
[
1
,
2
,
3
]
f1(li)
print
(li)
-
-
-
-
-
-
-
-
-
-
-
-
-
-
-
-
[
1
,
2
,
3
,
999
]
|
例子 全局变量如果需要在函数里面修改,需要使用global关键字
|
1
2
3
4
5
6
7
8
|
>>> a
=
10
def
f1(num):
global
a
a
+
=
num
print
(a)
f1(
20
)
-
-
-
-
-
-
-
-
-
-
-
-
-
-
30
|
三元运算和lambda 表达式
三元运算:有些简单的if..else语句可以直接用一行表示
例子
|
1
|
name
=
"alex"
if
1
=
=
1
else
"sb"
|
lambda表达式,一些简单的函数也可以用一行表示
例子
下面的函数等同于一行就实现的lambda表达式
|
1
2
3
4
5
6
|
>>>
def
f1(a1):
return
a1
+
100
ret
=
f1(
10
)
print
(ret)
-
-
-
-
-
-
-
-
-
-
110
|
lambda表达式,对比上面的正式写法,冒号前面的是形式参数;冒号后面是函数的主体,函数的结果自动返回
|
1
2
3
4
5
|
>>> f2
=
lambda
a1:a1
+
100
#冒号前面是参数,注意只能用一行
r2
=
f2(
9
)
print
(r2)
-
-
-
-
-
-
-
-
-
-
-
-
-
-
109
|
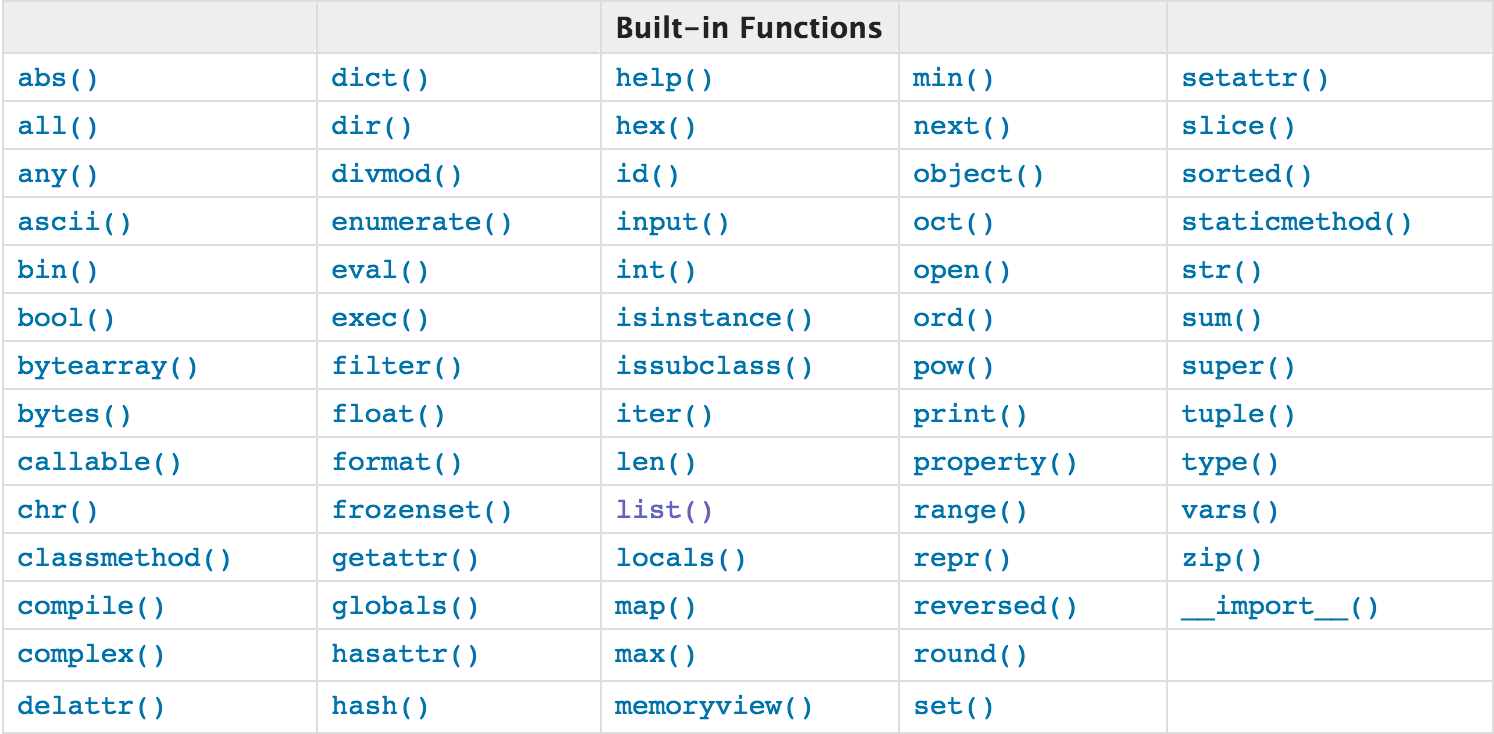
最后看看种类繁多的内置函数
例子:
abs()求绝对值
|
1
2
3
|
>>>
print
(
abs
(
-
1
))
-
-
-
-
-
-
-
-
-
-
-
-
-
-
-
-
1
|
bool()返回布尔值,注意0,None,"",[],{},() 返回的布尔值都是False
|
1
2
3
4
5
|
>>>
print
(
bool
(
None
))
print
(
bool
(()))
-
-
-
-
-
-
-
-
False
False
|
all()里面传入可以迭代的对象,比如列表,字典,如果每一个对象的布尔值都是真,那么结果为真,其中一个为假,结果为假
any()和all()相对应,如果有一个对象为真,那么他的结果就是真
|
1
2
3
4
|
>>> n
=
all
([
1
,
2
,
3
,
4
,
None
])
print
(n)
-
-
-
-
-
-
-
-
False
|
|
1
2
3
4
|
>>> m
=
any
([
1
,
0
,""])
print
(m)
-
-
-
-
-
-
-
-
-
-
True
|
ascii(),自动执行对象的_repr_方法,比如定义了一个class,该class里面有一个_repr_的方法,那么他会自动执行。
bin() 10进制转2进制
oct() 10进制转8进制
hex() 10进制转16进制
|
1
2
3
4
5
6
7
|
>>>
print
(
bin
(
5
))
print
(
oct
(
9
))
print
(
hex
(
15
))
-
-
-
-
-
-
-
-
-
-
0b101
0o11
0xf
|
byte() 把字符串转换为字节,请注意编码不同,汉字的转换不同
utf-8 1个汉字是3个字节,gbk一个汉字 2个字节
utf-8,一个字节8位,一个汉字3个字节,所以一个汉字24位
如下所示,同样的“李杰”转换成utf-8是6个字节,而gbk只有4个字节
|
1
2
3
4
5
6
7
8
9
|
>>> s
=
"李杰"
#把字符串转换成字节类型
n
=
bytes(s,encoding
=
"utf-8"
)
print
(n)
n
=
bytes(s,encoding
=
"gbk"
)
print
(n)
-
-
-
-
-
-
-
-
-
-
-
-
-
b
'\xe6\x9d\x8e\xe6\x9d\xb0'
b
'\xc0\xee\xbd\xdc'
|
str()和bytes功能相反,把字节转换为字符串,同样需要指定编码
|
1
2
3
4
5
|
>>>
#字节转换成字符串
m
=
str
(bytes(s,encoding
=
"utf-8"
),encoding
=
"utf-8"
)
print
(m)
-
-
-
-
-
-
-
-
-
-
李杰
|
callable()判断是否可以是调用的函数
|
1
2
3
4
5
6
7
8
|
>>>
def
f1():
pass
f1()
f2
=
123
print
(
callable
(f1))
print
(
callable
(f2))
True
False
|
chr()和ord()都是用来进行ASCII码的转换,前者是把代码转换成对应的字符;后者是把字符转换成代码
|
1
2
3
4
5
6
7
|
>>>
#ASCII 转换
r
=
chr
(
65
)
print
(r)
n
=
ord
(
"B"
)
print
(n)
A
66
|
随机数
比如ASCII 65-90 代表 A-Z,我选择一个范围,随机生成一个数字,然后把这个数字转换成字符就是一个随机的英文字符
|
1
2
3
4
5
6
|
>>>
import
random
i
=
random.randrange(
65
,
91
)
c
=
chr
(i)
print
(c)
-
-
-
-
-
-
-
-
-
-
H
|
例子 生成一组随机的代码
|
1
2
3
4
5
6
7
8
9
10
11
12
13
14
15
16
17
|
import
random
li
=
[]
for
i
in
range
(
6
):
r
=
random.randrange(
0
,
5
)
if
r
=
=
2
or
r
=
=
4
:
num
=
random.randrange(
0
,
10
)
li.append(
str
(num))
else
:
temp
=
random.randrange(
65
,
91
)
c
=
chr
(temp)
li.append(c)
res
=
"".join(li)
print
(li)
print
(res)
-
-
-
-
-
-
-
-
-
-
-
-
-
-
-
-
-
-
-
[
'T'
,
'Q'
,
'G'
,
'2'
,
'Q'
,
'6'
]
TQG2Q6
|
当执行一个Phython文件的时候,他一般会经过以下几个步骤
-
读取文件内容,把读取的字符串保存到内存
-
python把这些字符串编译为特殊代码
-
执行这些代码
比如saltstack,django的语法,其实最后都是转换成python的字符串,然后通过python编译执行。
下面是相关的一些函数
compile()把字符串转换成python代码
exec()执行任意的的Python代码,没有返回值
eval()执行运算表达式,有返回值
例子
compile可以把字符串转换成代码,然后exec来执行这个代码
|
1
2
3
4
5
6
7
|
s
=
"print(123)"
r
=
compile
(s,
"<string>"
,
"exec"
)
print
(r)
exec
(r)
-
-
-
-
-
-
-
-
-
-
-
-
-
-
-
<code
object
<module> at
0x000001CB92285D20
,
file
"<string>"
, line
1
>
123
|
当然exec()也可以直接执行,他会自动转换之后再编译执行
|
1
2
3
|
>>>
exec
(
"print(123)"
)
-
-
-
-
-
123
|
当使用eval()的时候,我们可以有返回值,比如
|
1
2
3
4
5
6
|
>>>s
=
"6*8"
ret
=
eval
(s)
print
(ret)
exec
(
"print(11)"
)
-
-
-
-
-
-
-
-
-
-
-
-
48
|
dir()可以快速查看他有哪些函数
|
1
2
3
|
print
(
dir
(
dict
))
-
-
-
-
-
-
-
-
-
-
-
[
'__class__'
,
'__contains__'
,
'__delattr__'
,
'__delitem__'
,
'__dir__'
,
'__doc__'
,
'__eq__'
,
'__format__'
,
'__ge__'
,
'__getattribute__'
,
'__getitem__'
,
'__gt__'
,
'__hash__'
,
'__init__'
,
'__iter__'
,
'__le__'
,
|
如果想查看细节,可以用help()
|
1
2
3
4
5
6
7
8
9
10
11
12
13
14
15
|
help
(
list
)
-
-
-
-
-
-
-
-
-
-
-
Help
on
class
list
in
module builtins:
class
list
(
object
)
|
list
()
-
> new empty
list
|
list
(iterable)
-
> new
list
initialized
from
iterable's items
|
| Methods defined here:
|
| __add__(
self
, value,
/
)
| Return
self
+
value.
|
| __contains__(
self
, key,
/
)
| Return key
in
self
...
|
divmod()用来取商和余数
比如
|
1
2
3
4
5
6
7
|
>>> r
=
divmod
(
97
,
10
)
print
(r)
n1,n2
=
divmod
(
97
,
10
)
print
(n1,n2)
-
-
-
-
-
-
-
-
-
-
-
-
-
-
-
-
-
(
9
,
7
)
9
7
|
isinstance()判断一个对象是否为某个类的实例
比如字符串alex是str的一个实例,所以返回值为True
|
1
2
3
4
|
>>> s
=
"alex"
r
=
isinstance
(s,
str
)
print
(r)
True
|
filter(),第一个参数参数传入函数,第二个参数传入一个可以迭代的对象,比如列表;在filter 内部,循环第二个参数,让每个循环元素执行函数(第一个参数),如果返回为True,表示元素合法
例如下面一个函数的效果
|
1
2
3
4
5
6
7
8
9
10
11
|
def
f1(args):
res
=
[]
for
item
in
args:
if
item >
22
:
res.append(item)
return
res
li
=
[
11
,
22
,
33
,
44
,
55
]
ret
=
f1(li)
print
(ret)
-
-
-
-
-
-
-
-
-
-
-
-
-
-
[
33
,
44
,
55
]
|
他可以用filter来实现
|
1
2
3
4
5
6
7
|
>>>
def
f2(a):
if
a >
22
:
return
True
ret
=
filter
(f2,li)
print
(
list
(ret))
-
-
-
-
-
-
-
-
-
-
-
-
-
-
-
-
-
[
33
,
44
,
55
]
|
例:结合lambda表达式,可以很简便
|
1
2
3
4
5
6
7
8
9
|
>>> f1
=
lambda
a: a>
30
ret
=
f1(
90
)
print
(ret)
li
=
[
11
,
22
,
33
,
44
,
55
]
res
=
filter
(
lambda
a:a >
14
,li)
print
(
list
(res))
-
-
-
-
-
-
-
-
-
-
-
-
-
-
-
-
-
-
-
True
[
22
,
33
,
44
,
55
]
|
map()的使用方式和filter类似,第一个参数是函数,第二个参数是可以迭代的对象
比如,下面一个例子
|
1
2
3
4
5
6
7
8
9
10
|
>>> li
=
[
11
,
22
,
33
,
44
,
55
]
def
f1(args):
res
=
[]
for
i
in
args:
res.append(
100
+
i)
return
res
r
=
f1(li)
print
(
list
(r))
-
-
-
-
-
-
-
-
-
-
-
-
-
-
-
-
[
111
,
122
,
133
,
144
,
155
]
|
同样的功能如果用map实现的话
|
1
2
3
4
5
6
|
>>>
def
f2(a):
return
a
+
100
result
=
map
(f2,li)
print
(
list
(result))
-
-
-
-
-
-
-
-
-
-
-
-
-
-
-
-
[
111
,
122
,
133
,
144
,
155
]
|
区别:
filter: 函数返回True; 将元素添加到结果中
map:把函数返回值添加到结果中
float()转换到浮点型
set()集合
fronzenset()不可变的集合
globals()所有全局变量
locals()所有局部变量
例
|
1
2
3
4
5
6
7
8
9
10
11
12
|
>>> NAME
=
"ALEX"
def
show():
a
=
123
c
=
123
print
(
locals
())
print
(
globals
())
show()
-
-
-
-
-
-
-
-
-
-
-
-
{
'c'
:
123
,
'a'
:
123
}
{
'NAME'
:
'ALEX'
,
'show'
: <function show at
0x0000025EFD3DB488
>,
'sys'
: <module
'sys'
(built
-
in
)>,
'__builtins__'
: {
'PendingDeprecationWarning'
: <
class
'PendingDeprecationWarning'
>,
'IndexError'
: <
class
'IndexError'
>,
'SystemError'
: <
class
'SystemError'
>,
'abs'
: <built
-
in
function
abs
>,
'getattr'
: <built
-
in
function
getattr
>,
'iter'
: <built
-
in
function
iter
>,
'BaseException'
: <
class
'BaseException'
>,
'UnicodeDecodeError'
: <
class
'UnicodeDecodeError'
>,
'sum'
: <built
-
in
function
sum
>,
'id'
: <built
-
in
function
id
>,
'setattr'
: <built
-
in
function
setattr
>,
'__doc__'
:
"Built-in functions, exceptions, and other objects.\n\nNoteworthy: None is the `nil' object; Ellipsis represents `...' in slices."
,
'ProcessLookupError'
: <
class
'ProcessLookupError'
>,
'NotImplemented'
: NotImplemented,
'memoryview'
: <
class
'memoryview'
>,
'str'
: <
class
'str'
>,
'RuntimeError'
: <
class
'RuntimeError'
>,
'print'
: <built
-
in
function
print
>,
'enumerate'
: <
class
'enumerate'
>,
'BrokenPipeError'
: <
class
'BrokenPipeError'
>,
'open'
: <built
-
in
function
open
>,
'eval'
: <built
-
in
function
eval
>,
'KeyError'
: <
class
'KeyError'
>,
'locals'
: <built
-
in
function
locals
>,
'UnicodeWarning'
: <
class
'UnicodeWarning'
>,
'__import__'
: <bound method ImportHookManager.do_import of <module
'_pydev_bundle.pydev_import_hook.import_hook'
>>,
'__spec__'
: ModuleSpec(name
=
'builtins'
, loader
=
<
class
'_frozen_importlib.BuiltinImporter'
>),
'ZeroDivisionError'
: <
class
'ZeroDivisionError'
>,
'int'
: <
class
'int'
>,
'license'
:
Type
license() to see the full license text,
'isinstance'
: <built
-
in
function
isinstance
>,
'len'
: <built
-
in
function
len
>,
'LookupError'
: <
class
'LookupError'
>,
'OverflowError'
: <
class
'OverflowError'
>,
'dict'
: <
class
'dict'
>,
'__debug__'
:
True
,
'dir'
: <built
-
in
function
dir
>,
'BlockingIOError'
: <
class
'BlockingIOError'
>,
'range'
: <
class
'range'
>,
'super'
: <
class
'super'
>,
'PermissionError'
: <
class
'PermissionError'
>,
'FutureWarning'
: <
class
'FutureWarning'
>,
'True'
:
True
,
'FileNotFoundError'
: <
class
'FileNotFoundError'
>,
'staticmethod'
: <
class
'staticmethod'
>,
'TabError'
: <
class
'TabError'
>,
'hex'
: <built
-
in
function
hex
>,
'__name__'
:
'builtins'
,
'copyright'
: Copyright (c)
2001
-
2016
Python Software Foundation.
All
Rights Reserved.
Copyright (c)
2000
BeOpen.com.
|
hash() 生成哈希值,然后保存到内存;一般用于比如字典的key转换成哈希值的保存,做索引
|
1
2
3
4
|
s
=
"hhh"
print
(
hash
(s))
-
-
-
-
-
-
-
-
-
-
-
-
-
-
3961184104134240409
|
len()输出长度,Python3是显示字符,而2显示的是字节
|
1
2
3
4
5
6
7
|
>>> s
=
"理解"
#python 3 是2(字符),2.7是6(字节)
print
(
len
(s))
b
=
bytes(s,encoding
=
"utf8"
)
print
(
len
(b))
-
-
-
-
-
-
-
-
-
-
-
-
2
6
|
max()最大
min()最小
sum()求和
|
1
2
3
4
5
6
7
8
9
10
11
12
13
|
>>>
r
=
max
([
11
,
22
,
33
])
print
(r)
l
=
min
([
11
,
22
,
33
])
s
=
sum
([
1
,
2
,
3
])
print
(l,s)
>>> r
=
max
([
11
,
22
,
33
])
print
(r)
l
=
min
([
11
,
22
,
33
])
s
=
sum
([
1
,
2
,
3
])
print
(l,s)
33
11
6
|
pow()求指数,效果和两个*一样
|
1
2
3
4
|
>>>
print
(
2
*
*
10
)
print
(
pow
(
2
,
10
))
1024
1024
|
reverse翻转,下面例子两个表达效果一样
|
1
2
3
4
|
>>> 翻转
li
=
[
11
,
22
,
33
]
li.reverse()
reversed
(li)
|
zip()可以把多个列表的列抽出来
|
1
2
3
4
5
6
|
>>> l1
=
[
"alex"
,
11
,
22
,
33
]
l2
=
[
"is"
,
11
,
22
,
33
]
l3
=
[
"sb"
,
11
,
22
,
33
]
r
=
zip
(l1,l2,l3)
print
(
list
(r)[
0
])
(
'alex'
,
'is'
,
'sb'
)
|
