源码地址:https://gitee.com/fighter3/eshop-project.git
持续更新中……
在上一节里,我们搭建了一个微服务项目的整体架构,并进行了版本控制。
接下来我们进一步来完善架构,引入SpringBoot、MybatisPlus等开发框架,来支撑具体业务的开发。
1、引入SpringBoot
我们在父项目统一管理引入的jar包的版本。
一般的SpringBoot项目是通过parent方式引入SpringBoott依赖,但是这样一来就违背了单个pom只有一个parent标签的标准。
    <parent>
        <groupId>org.springframework.boot</groupId>
        <artifactId>spring-boot-starter-parent</artifactId>
        <version>2.2.2.RELEASE</version>
        <relativePath/> <!-- lookup parent from repository -->
      </parent>
所以我们采用父项目中以depencyMangement方式引入spring-boot,子项目依赖parent父配置即可。
    <!--使用properties统一管理版本-->
    <properties>
        <java.version>1.8</java.version>
        <spring.boot.version>2.2.2.RELEASE</spring.boot.version>
    </properties>
   <!--统一管理项目依赖版本-->
    <dependencyManagement>
        <dependencies>
            <dependency>
                <groupId>org.springframework.boot</groupId>
                <artifactId>spring-boot-dependencies</artifactId>
                <version>${spring.boot.version}</version>
                <type>pom</type>
                <scope>import</scope>
            </dependency>
        </dependencies>
    </dependencyManagement>
2、引入MybatisPlus
关于MybatisPlus的基本使用,基本使用可以查看我的这篇博客:SpringBoot学习笔记(十七:MyBatis-Plus )。
MybatisPlus的官方文档做的也很不错,详细了解可以直接查看官方文档:https://mybatis.plus/
引入MybatisPlus依赖和MySQL驱动依赖:
<mybatis.plus.version>3.4.1</mybatis.plus.version>
            <!--mybatis-plus依赖-->
            <dependency>
                <groupId>com.baomidou</groupId>
                <artifactId>mybatis-plus-boot-starter</artifactId>
                <version>${mybatis.plus.version}</version>
            </dependency>
            <!--mybatis-plus代码生成器依赖-->
            <dependency>
                <groupId>com.baomidou</groupId>
                <artifactId>mybatis-plus-generator</artifactId>
                <version>${mybatis.plus.version}</version>
            </dependency>
            <!--模板引擎依赖,即使不需要生成模板,也需要引入-->
            <dependency>
                <groupId>org.apache.velocity</groupId>
                <artifactId>velocity-engine-core</artifactId>
                <version>2.2</version>
            </dependency>
            <!--mysql驱动-->
            <dependency>
                <groupId>mysql</groupId>
                <artifactId>mysql-connector-java</artifactId>
                <scope>runtime</scope>
            </dependency>
为了接口测试的方便,我们还引入了swagger2的增强工具knife4j
            <!--knife4j依赖-->
            <dependency>
                <groupId>com.github.xiaoymin</groupId>
                <artifactId>knife4j-spring-boot-starter</artifactId>
                <version>${knife4j-version}</version>
            </dependency>
3、使用MP代码生成器
接下来我们以用户模块为例,演示MybatisPlus代码生成器的使用。关于代码生成器的更多内容可以直接查看官方文档:https://mybatis.plus/guide/generator.html
在上面我们已经引进行了统一的依赖版本管理,在子模块里还需要引入依赖,不过可以免去版本号。
        <dependency>
            <groupId>org.springframework.boot</groupId>
            <artifactId>spring-boot-starter</artifactId>
        </dependency>
        <dependency>
            <groupId>com.baomidou</groupId>
            <artifactId>mybatis-plus-boot-starter</artifactId>
        </dependency>
        <dependency>
            <groupId>org.springframework.boot</groupId>
            <artifactId>spring-boot-starter-web</artifactId>
        </dependency>
        <dependency>
            <groupId>com.baomidou</groupId>
            <artifactId>mybatis-plus-generator</artifactId>
        </dependency>
        <!--模板引擎依赖,即使不需要生成模板,也需要引入-->
        <dependency>
            <groupId>org.apache.velocity</groupId>
            <artifactId>velocity-engine-core</artifactId>
            <version>2.2</version>
        </dependency>
        <!--mysql驱动-->
        <dependency>
            <groupId>mysql</groupId>
            <artifactId>mysql-connector-java</artifactId>
            <scope>runtime</scope>
        </dependency>
        <dependency>
            <groupId>com.github.xiaoymin</groupId>
            <artifactId>knife4j-spring-boot-starter</artifactId>
        </dependency>
        <!--lombok-->
        <dependency>
            <groupId>org.projectlombok</groupId>
            <artifactId>lombok</artifactId>
            <optional>true</optional>
        </dependency>
我们还引入了lombok用来简化代码,使用lombok可以省去生成大量getter/setter代码。在Idea中使用需要安装插件,在插件里自行搜索安装即可。
- 由于代码生成器与业务无关,所以将代码生成类建在测试目录下:
- 代码生成器类的相关代码
public class MySQLCodeGenerator {
    /**
     * <p>
     * 读取控制台内容
     * </p>
     */
    public static String scanner(String tip) {
        Scanner scanner = new Scanner(System.in);
        StringBuilder help = new StringBuilder();
        help.append("请输入" + tip + ":");
        System.out.println(help.toString());
        if (scanner.hasNext()) {
            String ipt = scanner.next();
            if (StringUtils.isNotBlank(ipt)) {
                return ipt;
            }
        }
        throw new MybatisPlusException("请输入正确的" + tip + "!");
    }
    public static void main(String[] args) {
        // 代码生成器
        AutoGenerator mpg = new AutoGenerator();
        // 全局配置
        GlobalConfig gc = new GlobalConfig();
        //设置项目位置,这里直接设置为绝对路径
        String projectPath = "D:\\WorkSpace\\IdeaProjects\\eshop-project\\eshop-user";
        //输出目录
        gc.setOutputDir(projectPath + "/src/main/java");
        gc.setAuthor("三分恶");
        gc.setOpen(false);
        gc.setSwagger2(true);     //实体属性 Swagger2 注解
        mpg.setGlobalConfig(gc);
        // 数据源配置
        DataSourceConfig dsc = new DataSourceConfig();
        dsc.setUrl("jdbc:mysql://localhost:3306/shop_user?characterEncoding=utf-8&allowMultiQueries=true&serverTimezone=GMT%2B8");
        dsc.setDriverName("com.mysql.cj.jdbc.Driver");
        dsc.setUsername("root");
        dsc.setPassword("root");
        mpg.setDataSource(dsc);
        //包配置
        PackageConfig pc = new PackageConfig();
        //模块名配置
        //pc.setModuleName(scanner("模块名"));
        pc.setParent("cn.fighter3");
        mpg.setPackageInfo(pc);
        // 自定义配置
        InjectionConfig cfg = new InjectionConfig() {
            @Override
            public void initMap() {
                // to do nothing
            }
        };
        ///策略配置
        StrategyConfig strategy = new StrategyConfig();
        strategy.setNaming(NamingStrategy.underline_to_camel);
        strategy.setColumnNaming(NamingStrategy.underline_to_camel);
        //strategy.setSuperEntityClass("你自己的父类实体,没有就不用设置!");
        //【实体】是否为lombok模型
        strategy.setEntityLombokModel(true);
        //生成 @RestController 控制器
        strategy.setRestControllerStyle(true);
        // 公共父类
        //strategy.setSuperControllerClass("你自己的父类控制器,没有就不用设置!");
        // 写于父类中的公共字段
        //strategy.setSuperEntityColumns("id");
        strategy.setInclude(scanner("表名,多个英文逗号分割").split(","));
        strategy.setControllerMappingHyphenStyle(true);
        strategy.setTablePrefix(pc.getModuleName() + "_");
        mpg.setStrategy(strategy);
        mpg.execute();
    }
}
MP的代码生成器支持很多配置,包括基本配置、数据配置、数据库表配置等等。甚至可以自定义模板。具体可以查看:https://mybatis.plus/config/generator-config.html#%E5%9F%BA%E6%9C%AC%E9%85%8D%E7%BD%AE
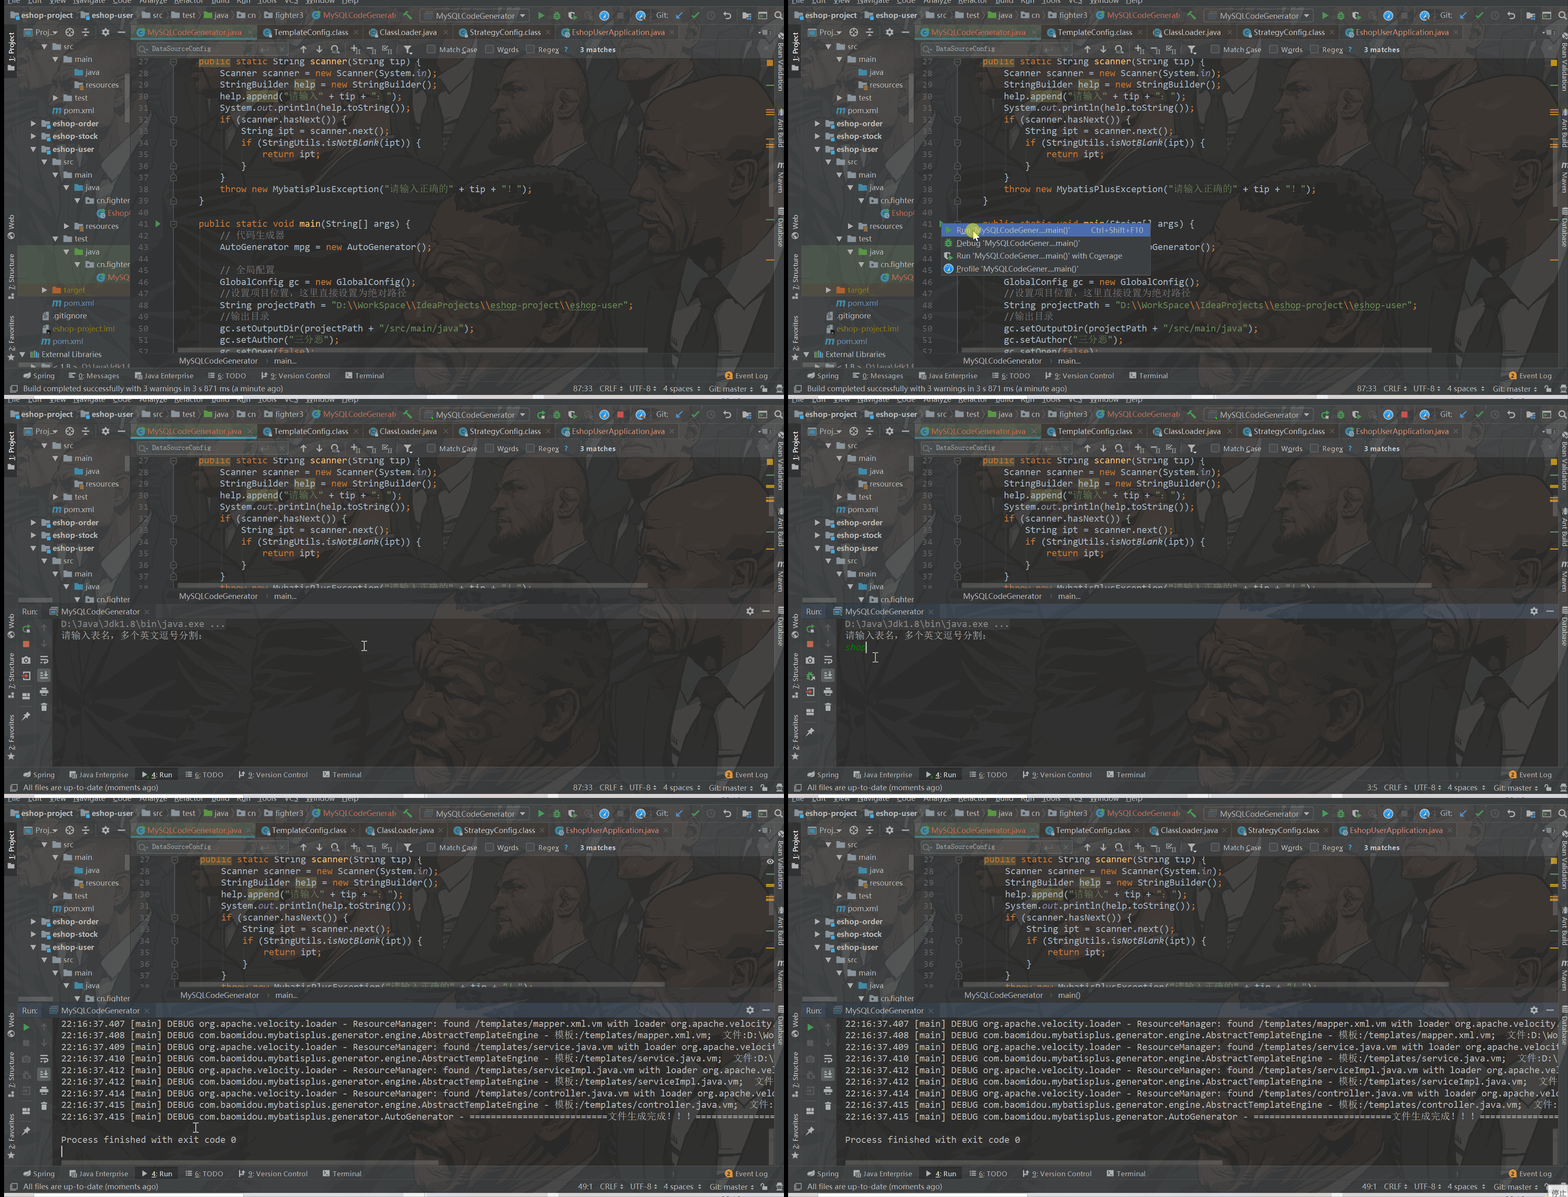
- 生成代码很简单,直接运行代码生成器类,输入表名就行了
- 生成的代码如下:
4、基本业务代码编写
接下来我们简单地在用户服务中编写一个基本的查看和增加的功能。
- 在resource目录下添加配置文件application.yml,写入相关配置:
# 数据源配置
spring:
  datasource:
    driver-class-name: com.mysql.cj.jdbc.Driver
    url: jdbc:mysql://localhost:3306/shop_user?characterEncoding=utf-8&allowMultiQueries=true&serverTimezone=GMT%2B8
    username: root
    password: root
- 在cn.fighter3包下手动创建启动类EshopUserApplication.java:
@SpringBootApplication
@MapperScan("cn.fighter3.mapper")
public class EshopUserApplication {
    public static void main(String[] args) {
        SpringApplication.run(EshopUserApplication.class, args);
    }
}
- 在pom.xml文件中添加对common模块的依赖
        <dependency>
            <groupId>cn.fighter3</groupId>
            <artifactId>eshop-common</artifactId>
            <version>1.0-SNAPSHOT</version>
        </dependency>
- 在common工程中创建统一的结果返回类
/**
 * @Author: 三分恶
 * @Date: 2021/5/16
 * @Description: 统一结果返回类
 **/
@Data
@Builder
@AllArgsConstructor
public class CommonResult<T> implements Serializable {
    private static final long serialVersionUID = 1L;
    @Tolerate
    public CommonResult() {
    }
    private Integer code;
    private String message;
    private T data;
    public static CommonResult ok() {
        return CommonResult.builder().code(200).message("请求成功").build();
    }
    public static CommonResult ok(Object data) {
        return CommonResult.builder().code(200).message("请求成功").data(data).build();
    }
    public static CommonResult error(String message) {
        return CommonResult.builder().code(500).message("响应异常").build();
    }
}
- 在ShopUserController.java中编写相关接口的代码
/**
 * <p>
 * 用户表 前端控制器
 * </p>
 *
 * @author 三分恶
 * @since 2021-05-16
 */
@RestController
@RequestMapping("/shop-user")
@Api(value = "用户信息接口", tags = "用户接口")
public class ShopUserController {
    @Autowired
    private IShopUserService shopUserService;
    @PostMapping("/user/add")
    @ApiOperation(value = "添加用户接口")
    public CommonResult addUser(@RequestBody ShopUser shopUser) {
        this.shopUserService.save(shopUser);
        return CommonResult.ok();
    }
    @GetMapping("/user/get-by-id")
    @ApiOperation(value = "根据id获取用户信息接口")
    public CommonResult getUserById(@RequestParam Integer id) {
        ShopUser shopUser = this.shopUserService.getById(id);
        return CommonResult.ok(shopUser);
    }
}
运行启动类,启动项目,我们来看看运行的结果。
访问 http://127.0.0.1:8080/doc.html ,我们可以看到knife4j接口文档页面:
接下来测试一下我们的添加接口,可以看到请求成功,查看数据库表,发现也多了数据。
测试根据ID获取用户信息接口:
5、小问题
在开发的过程中使用了一些Jdk1.8的语法,发现出现 Error:(66, 87) java: -source 1.5 中不支持方法引用 (请使用 -source 8 或更高版本以启用方法引用) ,解决这个问题需要修改两处:
- 在Idea中, 找到Build,Execution,Deployment >> Compiler >> Java Compiler ,把JDK版本改成8。
- 在Idea中, File->Project Structure,在source中将Language level 从5.0改为8。
好了,我们基本的业务开发到这就算是完成了,其它服务萧规曹随就行了。
“简单的事情重复做,重复的事情认真做,认真的事情有创造性地做!”——
我是三分恶,可以叫我老三/三分/三哥/三子,一个能文能武的全栈开发,咱们下期见!


