
勋章


我关注的人


粉丝
技术能力
- 数据库
- PostgreSQL
- PolarDB
- DuckDB
- ADB
-
-
 阿里云大模型高级工程师ACP认证
获得于2025-04-12 14:29:09
阿里云大模型高级工程师ACP认证
获得于2025-04-12 14:29:09 -
阿里云关系型数据库工程师ACP认证(Alibaba Cloud Certified Professional - Relational Database)
获得于2022-01-28 12:31:40
-
-
-
阿里云大模型工程师ACA认证
获得于2025-04-10 17:24:30
-
阿里云云数据库助理工程师认证(ACA)
获得于2021-04-25 13:55:35
-
公益是一辈子的事, I am digoal, just do it. 阿里云数据库团队, 擅长PolarDB, PostgreSQL, DuckDB, ADB等, 长期致力于推动开源数据库技术、生态在中国的发展与开源产业人才培养. 曾荣获阿里巴巴麒麟布道师称号、2018届OSCAR开源尖峰人物.
-
发表了文章 2025-02-21
PolarDB开源数据库进阶课18 通过pg_bulkload适配pfs实现批量导入提速
本文介绍了如何修改 `pg_bulkload` 工具以适配 PolarDB 的 PFS(Polar File System),从而加速批量导入数据。实验环境依赖于 Docker 容器中的 loop 设备模拟共享存储。通过对 `writer_direct.c` 文件的修改,替换了一些标准文件操作接口为 PFS 对应接口,实现了对 PolarDB 15 版本的支持。测试结果显示,使用 `pg_bulkload` 导入 1000 万条数据的速度是 COPY 命令的三倍多。此外,文章还提供了详细的步骤和代码示例,帮助读者理解和实践这一过程。
-
发表了文章 2025-02-21
PolarDB开源数据库进阶课17 集成数据湖功能
本文介绍了如何在PolarDB数据库中接入pg_duckdb、pg_mooncake插件以支持数据湖功能, 可以读写对象存储的远程数据, 支持csv, parquet等格式, 支持delta等框架, 并显著提升OLAP性能。
-
发表了文章 2025-02-21
PolarDB开源数据库进阶课16 接入PostGIS全功能及应用举例
本文介绍了如何在PolarDB数据库中接入PostGIS插件全功能,实现地理空间数据处理。此外,文章还提供了使用PostGIS生成泰森多边形(Voronoi diagram)的具体示例,帮助用户理解其应用场景及操作方法。
-
发表了文章 2025-02-21
PolarDB开源数据库进阶课15 集成DeepSeek等大模型
本文介绍了如何在PolarDB数据库中接入私有化大模型服务,以实现多种应用场景。实验环境依赖于Docker容器中的loop设备模拟共享存储,具体搭建方法可参考相关系列文章。文中详细描述了部署ollama服务、编译并安装http和openai插件的过程,并通过示例展示了如何使用这些插件调用大模型API进行文本分析和情感分类等任务。此外,还探讨了如何设计表结构及触发器函数自动处理客户反馈数据,以及生成满足需求的SQL查询语句。最后对比了不同模型的回答效果,展示了deepseek-r1模型的优势。
-
发表了文章 2025-02-21
PolarDB开源数据库进阶课14 纯享单机版
PolarDB不仅支持基于“共享存储+多计算节点”的集群版,还提供类似开源PostgreSQL的单机版。单机版部署简单,适合大多数应用场景,并可直接使用PostgreSQL生态插件。通过Docker容器、Git克隆代码、编译软件等步骤,即可完成PolarDB单机版的安装与配置。具体操作包括启动容器、进入容器、克隆代码、编译软件、初始化实例、配置参数及启动数据库。此外,还有多个相关教程和视频链接供参考,帮助用户更好地理解和使用PolarDB单机版。
-
发表了文章 2025-02-21
PolarDB开源数据库进阶课13 单机版转换为集群版
本文介绍如何将“本地存储实例”转换为“共享存储实例”,依赖于先前搭建的实验环境。主要步骤包括:准备PFS二进制文件、格式化共享盘为pfs文件系统、启动pfsd服务、停库并拷贝数据到pfs内、修改配置文件,最后启动实例。通过这些操作,成功实现了从本地存储到共享存储的转换,并验证了新实例的功能。相关系列文章和视频链接提供了更多背景信息和技术细节。
-
发表了文章 2025-02-21
PolarDB开源数据库进阶课12 集群版转换为单机版
本文介绍了如何将“共享存储实例”转换为“本地存储实例”,实验环境依赖于Docker容器中的loop设备模拟共享存储。具体步骤包括准备本地目录、停库、拷贝数据、修改配置文件并启动实例。通过这些操作,可以实现从共享存储到本地存储的平滑转换。相关系列文章详细记录了PolarDB RAC一写多读集群的搭建与管理,提供了丰富的实战经验。
-
发表了文章 2025-02-21
PolarDB开源数据库进阶课11 激活容灾(Standby)节点
本文介绍了如何激活PolarDB容灾(Standby)节点,实验环境依赖于Docker容器中用loop设备模拟共享存储。通过`pg_ctl promote`命令可以将Standby节点提升为主节点,使其能够接收读写请求。激活后,原Standby节点不能再成为PolarDB集群的Standby节点。建议删除对应的复制槽位以避免WAL文件堆积。相关操作和配置请参考系列文章及视频教程。
-
发表了文章 2025-02-21
PolarDB开源数据库进阶课9 读写分离
本文介绍了如何配置读写分离工具pgpool-II for PolarDB,使应用程序能够透明地实现读写分离。
-
发表了文章 2025-02-21
PolarDB开源数据库进阶课10 计算节点全毁, 灾难恢复
本文介绍了在PolarDB RAC一写多读集群中,当所有计算节点(主机)故障仅剩共享存储时的修复方法。实验基于Docker容器和loop设备模拟共享存储环境。通过重建计算节点、恢复PolarDB实例及配置相关参数,最终成功恢复RW和RO节点的功能,确保数据完整性和集群正常运行。视频回放可在B站和YouTube上查看。
-
发表了文章 2025-02-21
PolarDB开源数据库进阶课8 任意时间点恢复(PITR)
本文介绍了如何在PolarDB RAC一写多读集群中进行时间点恢复(PITR)。实验环境依赖于Docker容器中的loop设备模拟共享存储。首先,确保已开启实时归档并完成全量备份。接着,在主节点生成数据并创建恢复点。然后,通过修改配置文件和添加恢复标记文件,使用备份和归档日志将数据库恢复到指定的时间点。最后,验证数据是否已成功恢复,并关闭恢复库。参考了多个相关文档和系列文章,详细步骤和配置请参阅提供的链接。
-
发表了文章 2025-02-21
PolarDB开源数据库进阶课7 实时流式归档
本文介绍了如何在PolarDB RAC一写多读集群中实现实时归档,确保WAL日志的及时备份。实验依赖于Docker容器和loop设备模拟的共享存储环境。通过配置主节点的`pg_hba.conf`、创建复制槽以及使用`pg_receivewal`工具,实现实时接收并归档WAL文件。此外,还提供了详细的命令行帮助和相关文档链接,方便读者参考和操作。注意:如果已搭建容灾节点,则无需重复进行实时归档。
-
发表了文章 2025-02-21
PolarDB开源数据库进阶课6 在线归档
本文介绍了如何在PolarDB RAC一写多读集群中进行在线归档。实验环境依赖于Docker容器中的loop设备模拟共享存储,具体步骤包括创建虚拟磁盘、挂载loop设备、格式化设备、启动pfsd服务、配置归档参数等。通过调整`archive_mode`和`archive_command`,确保WAL日志能够正确归档到指定路径。遇到跨pbdnames拷贝失败的问题后,确认需使用`-S disk -D disk`选项解决。最终实现将WAL日志归档到PFS或本地文件系统,并建议使用`pg_receivewal`进行实时归档。
-
发表了文章 2025-02-21
PolarDB开源数据库进阶课5 在线备份
本文介绍了如何在PolarDB RAC一写多读集群中进行在线备份,特别针对共享存储模式。通过使用`polar_basebackup`工具,可以将实例的本地数据和共享数据备份到本地盘中。实验环境依赖于Docker容器中用loop设备模拟的共享存储。
-
发表了文章 2025-02-21
PolarDB开源数据库进阶课4 计算节点 Switchover
本文介绍了如何在PolarDB RAC一写多读集群中进行计算节点的Switchover操作。实验环境依赖于Docker容器中的loop设备模拟共享存储,确保Primary节点停止写入后,再将Replica节点提升为Primary节点,避免多节点同时写入导致的数据异常。文中详细描述了Switchover的具体步骤、常见问题及解决方案,并提供了相关配置和命令示例。通过这些步骤,可以顺利完成节点角色的切换,确保集群的高可用性和数据一致性。
-
发表了文章 2025-02-21
PolarDB开源数据库进阶课3 共享存储在线扩容
本文继续探讨穷鬼玩PolarDB RAC一写多读集群系列,介绍如何在线扩容共享存储。实验环境依赖《在Docker容器中用loop设备模拟共享存储》搭建。主要步骤包括:1) 扩容虚拟磁盘;2) 刷新loop设备容量;3) 使用PFS工具进行文件系统扩容;4) 更新数据库实例以识别新空间。通过这些步骤,成功将共享存储从20GB扩容至30GB,并确保所有节点都能使用新的存储空间。
-
发表了文章 2025-02-21
PolarDB开源数据库进阶课1 搭建共享存储集群
在笔记本上构建PolarDB RAC环境,本文介绍了一种适用于Windows、macOS和Linux的方法:通过将宿主机上的文件模拟为块设备,并在多个Docker容器中使用loop设备共享该文件。此方法解决了macOS不支持直接挂载块设备的问题。
-
发表了文章 2025-02-21
PolarDB开源数据库进阶课2 创建容灾(standby)节点
本文介绍了如何在macOS中搭建PolarDB的容灾(standby)节点,作为“穷鬼玩PolarDB RAC一写多读集群”系列的一部分。基于前一篇通过Docker和loop设备模拟共享存储的经验,本文详细描述了创建虚拟磁盘、启动容器、配置网络、格式化磁盘、备份数据及配置standby节点的具体步骤。
-
发表了文章 2025-02-10
PolarDB 开源基础教程系列 9 开源社区合作和共建
本文介绍了玩转 PolarDB 开源社区指南:如何搭建 PolarDB 开发环境及参与开源社区。 主要内容: 1. **搭建开发环境**:提供多种 Docker 镜像供开发者选择,支持 x86_64 和 ARM64 架构,适配 CentOS、Debian、Ubuntu 等多个 Linux 发行版。 2. **编译与部署**:通过 Docker 容器克隆 PolarDB 源码并编译安装,支持构建一写多读集群测试 ePQ MPP 优化器功能。 3. **参与开源社区**:介绍个人、生态伙伴和用户如何从社区中获取技能、建立连接、积累战绩并提升影响力。社区活动涵盖公开课、训练营、编程大赛、企业行等。
-
发表了文章 2025-02-10
PolarDB 开源基础教程系列 8 数据库生态
PolarDB是一款开源的云原生分布式数据库,源自阿里云商业产品。为降低使用门槛,PolarDB携手伙伴打造了完整的开源生态,涵盖操作系统、芯片、存储、集成管控、监控、审计、开发者工具、数据同步、超融合计算、ISV软件、开源插件、人才培养、社区合作及大型用户合作等领域。通过这些合作伙伴,PolarDB提供了丰富的功能和服务,支持多种硬件和软件环境,满足不同用户的需求。更多信息请访问[PolarDB开源官方网站](https://openpolardb.com/home)。
-
发表了文章 2025-02-10
PolarDB 开源基础教程系列 7.5 应用实践之 TPCH性能优化
PolarDB在复杂查询、大数据量计算与分析场景的测试和优化实践.
-
发表了文章 2025-02-10
PolarDB 开源基础教程系列 7.4 应用实践之 AI大模型外脑
PolarDB向量数据库插件通过实现通义大模型AI的外脑,解决了通用大模型无法触达私有知识库和产生幻觉的问题。该插件允许用户将新发现的知识和未训练的私有知识分段并转换为向量,存储在向量数据库中,并创建索引以加速相似搜索。当用户提问时,系统将问题向量化并与数据库中的向量进行匹配,找到最相似的内容发送给大模型,从而提高回答的准确性和相关性。此外,PolarDB支持多种编程语言接口,如Python,使数据库具备内置AI能力,极大提升了数据处理和分析的效率。
-
发表了文章 2025-02-10
PolarDB 开源基础教程系列 7.3 应用实践之 精准营销场景
本文介绍了基于用户画像的精准营销技术,重点探讨了如何通过标签组合快速圈选目标人群。实验分为三部分: 1. **传统方法**:使用字符串存储标签并进行模糊查询,但性能较差,每次请求都需要扫描全表。 2. **实验1**:引入`pg_trgm`插件和GIN索引,显著提升了单个模糊查询条件的性能。 3. **实验2**:改用数组类型存储标签,并结合GIN索引加速包含查询,性能进一步提升。 4. **实验3**:利用`smlar`插件实现近似度过滤,支持按标签重合数量或比例筛选。
-
发表了文章 2025-02-10
PolarDB 开源基础教程系列 7.2 应用实践之 跨境电商场景
本文介绍了如何在跨境电商场景中快速判断商标或品牌侵权,避免因侵权带来的法律纠纷。通过创建品牌表并使用PostgreSQL的pg_trgm插件和GIN索引,实现了高性能的字符串相似匹配功能。与传统方法相比,PolarDB|PostgreSQL的方法不仅提升了上万倍的查询速度,还解决了传统方法难以处理的相似问题检索。具体实现步骤包括创建品牌表、插入随机品牌名、配置pg_trgm插件及索引,并设置相似度阈值进行高效查询。此外,文章还探讨了字符串相似度计算的原理及应用场景,提供了进一步优化和扩展的方向。
-
发表了文章 2025-02-10
PolarDB 开源基础教程系列 7.1 快速构建“海量逼真”数据
本文介绍了如何使用PostgreSQL和PolarDB快速生成“海量且逼真”的测试数据,以满足不同业务场景的需求。传统数据库测试依赖标准套件(如TPC-C、TPC-H),难以生成符合特定业务特征的复杂数据。通过自定义函数(如`gen_random_int`、`gen_random_string`等)、SRF函数(如`generate_series`)和pgbench工具,可以高效生成大规模、高仿真度的数据,并进行压力测试。文中还提供了多个示例代码展示.
-
发表了文章 2025-02-10
PolarDB 开源基础教程系列 6 开源插件扩展
1、当前环境已安装并支持哪些插件 2、AI外脑插件: vector 3、营销场景目标人群圈选插件: smlar 4、地理信息搜索插件: PostGIS 5、中文分词插件: pg_jieba 6、融合计算插件: duckdb_fdw 7、读写分离工具: pgpool-II
-
发表了文章 2025-02-10
PolarDB 开源基础教程系列 5 高级特性体验
PolarDB 特性解读与体验涵盖多项关键技术,包括预读/预扩展、Shared Server(建议使用连接池)、闪回表和闪回日志、弹性跨机并行查询(ePQ)及TDE透明数据加密。预读/预扩展通过批量I/O操作显著提升Vacuum、SeqScan等场景性能;Shared Server优化高并发短连接处理;闪回功能可恢复表至指定时间点;ePQ支持跨机并行查询以提高复杂查询效率;TDE确保数据存储层的安全加密。
-
发表了文章 2025-02-10
PolarDB 开源基础教程系列 4 日常运维
PolarDB日常运维指南涵盖了多个关键操作,包括读写节点故障切换、增加只读节点、配置WAL日志归档、备份与恢复、创建容灾实例以及排查CPU负载高等。通过详细的步骤和代码示例,本文档帮助用户在本地环境中体验和学习PolarDB的高级功能,如共享存储架构下的集群管理。特别地,文档提供了如何使用`polar_basebackup`工具进行备份和恢复,确保数据安全;并通过`pg_stat_statements`插件定位慢查询,优化数据库性能。此外,还介绍了常见问题的排查方法,如业务量上涨或长时间执行的SQL语句导致的CPU高负载。更多内容和进阶课程可参考提供的GitHub链接和官方文档。
-
发表了文章 2025-02-10
PolarDB 开源基础教程系列 3 安装部署
PolarDB 安装部署指南涵盖了从单机版到集群版的详细步骤。内容包括: 1. **单机版安装**:通过Docker镜像`polardb_pg_local_instance`,提供快速搭建PolarDB学习或开发环境的方法,支持多种操作系统。 2. **集群版安装(ECS + ESSD)**:在阿里云ECS上部署两台计算节点,并使用ESSD作为共享存储,通过PFS(PolarDB File System)实现存算分离和读写分离的集群架构。
-
发表了文章 2025-02-10
PolarDB 开源基础教程系列 1 架构解读
PolarDB 是阿里云研发的云原生分布式数据库,基于 PostgreSQL 开源版本,旨在解决传统数据库在大规模数据和高并发场景下的性能和扩展性问题。其主要特点包括: 1. **存储计算分离架构**:通过将计算与存储分离,实现极致弹性、共享一份数据以降低成本、透明读写分离。 2. **HTAP 架构**:支持混合事务处理和分析处理(HTAP),能够在同一系统中高效执行 OLTP 和 OLAP 查询。 3. **优化的日志复制机制**:采用只复制元数据的方式减少网络传输量,优化页面回放和 DDL 锁回放过程。 4. **并行查询与索引创建**:引入 MPP 分布式执行引擎。
-
发表了文章 2023-02-03
PolarDB 开源版通过 duckdb_fdw 支持 parquet 列存数据文件以及高效OLAP
背景PolarDB 的云原生存算分离架构, 具备低廉的数据存储、高效扩展弹性、高速多机并行计算能力、高速数据搜索和处理; PolarDB与计算算法结合, 将实现双剑合璧, 推动业务数据的价值产出, 将数据变成生产力.本文将介绍PolarDB 开源版通过duckdb_fdw 支持 parquet 列存...
-
发表了文章 2023-02-03
PolarDB 开源版通过 postgresql_hll 实现高效率 UV滑动分析、实时推荐已读列表过滤
背景PolarDB 的云原生存算分离架构, 具备低廉的数据存储、高效扩展弹性、高速多机并行计算能力、高速数据搜索和处理; PolarDB与计算算法结合, 将实现双剑合璧, 推动业务数据的价值产出, 将数据变成生产力.本文将介绍PolarDB 开源版通过 postgresql_hll 实现高效率 UV...
-
发表了文章 2023-02-03
0 PolarDB 开源版通过pg_similarity实现17种文本相似搜索 - token归一切分, 根据文本相似度检索相似文本
背景PolarDB 的云原生存算分离架构, 具备低廉的数据存储、高效扩展弹性、高速多机并行计算能力、高速数据搜索和处理; PolarDB与计算算法结合, 将实现双剑合璧, 推动业务数据的价值产出, 将数据变成生产力.本文将介绍PolarDB 开源版通过pg_similarity实现17种文本相似搜索...
-
发表了文章 2023-02-03
PolarDB 开源版 使用PostGIS 数据寻龙点穴(空间聚集分析)- 大数据与GIS分析解决线下店铺选址问题
背景PolarDB 的云原生存算分离架构, 具备低廉的数据存储、高效扩展弹性、高速多机并行计算能力、高速数据搜索和处理; PolarDB与计算算法结合, 将实现双剑合璧, 推动业务数据的价值产出, 将数据变成生产力.本文将介绍PolarDB 开源版 使用PostGIS 数据寻龙点穴(空间聚集分析)-...
-
发表了文章 2023-02-03
PolarDB 开源版 使用TimescaleDB 实现时序数据高速写入、压缩、实时聚合计算、自动老化等
背景PolarDB 的云原生存算分离架构, 具备低廉的数据存储、高效扩展弹性、高速多机并行计算能力、高速数据搜索和处理; PolarDB与计算算法结合, 将实现双剑合璧, 推动业务数据的价值产出, 将数据变成生产力.本文将介绍PolarDB 开源版 使用TimescaleDB 实现时序数据高速写入、...
-
发表了文章 2023-02-03
配置 pgcat for PolarDB 读写分离连接池
背景PolarDB 开源数据库支持云原生存算分离分布式架构, 一份存储支持多个计算节点, 目前是一写多读的架构. 内核已经很强大了, 怎么实现业务透明的读写分离, 还缺一个连接池, pgcat是不错的选择.pgcat支持连接池、sharding、读写负载均衡等, 更多功能请参考其官网https://...
-
发表了文章 2023-02-03
配置 madlib for PolarDB 实现数据库机器学习功能
背景PolarDB 的云原生存算分离架构, 具备低廉的数据存储、高效扩展弹性、高速多机并行计算能力、高速数据搜索和处理; PolarDB与计算算法结合, 将实现双剑合璧, 推动业务数据的价值产出, 将数据变成生产力.本文将介绍PolarDB结合madlib, 让PolarDB具备机器学习功能.mad...
-
发表了文章 2023-02-03
配置 jieba结巴分词 for PolarDB 实现数据库高性能文本分词搜索
背景PolarDB 的云原生存算分离架构, 具备低廉的数据存储、高效扩展弹性、高速多机并行计算能力、高速数据搜索和处理; PolarDB与计算算法结合, 将实现双剑合璧, 推动业务数据的价值产出, 将数据变成生产力.本文将介绍PolarDB结合jieba分词, 实现高效率的中文分词以及中文分词搜索....
-
发表了文章 2023-02-03
PolarDB 开源版通过 parray_gin 实现高效率 数组、JSON 内元素的模糊搜索
背景PolarDB 的云原生存算分离架构, 具备低廉的数据存储、高效扩展弹性、高速多机并行计算能力、高速数据搜索和处理; PolarDB与计算算法结合, 将实现双剑合璧, 推动业务数据的 价值产出, 将数据变成生产力.本文将介绍PolarDB 开源版通过 parray_gin 实现高效率 数组、JS...
-
发表了文章 2023-02-03
PolarDB 开源版通过 vrpRouting 解决 快递、出行、餐饮配送、旅游等商旅问题的最优解问题
背景PolarDB 的云原生存算分离架构, 具备低廉的数据存储、高效扩展弹性、高速多机并行计算能力、高速数据搜索和处理; PolarDB与计算算法结合, 将实现双剑合璧, 推动业务数据的价值产出, 将数据变成生产力.本文将介绍PolarDB 开源版通过 vrpRouting 解决 快递、出行、餐饮配...
-
发表了文章 2023-02-03
PolarDB 开源版 轨迹应用实践 - 出行、配送、快递等业务的调度; 传染溯源; 刑侦
背景PolarDB 的云原生存算分离架构, 具备低廉的数据存储、高效扩展弹性、高速多机并行计算能力、高速数据搜索和处理,PolarDB与计算算法结合, 将实现双剑合璧, 推动业务数据的价值产出,将数据变成生产力。本文将介绍PolarDB 开源版 轨迹应用实践,例如:出行、配送、快递等业务的调度快递员...
-
发表了文章 2022-11-30
基于阿里云RDS PostgreSQL打造实时用户画像推荐系统(varbitx))
用户画像在市场营销的应用重建中非常常见,已经不是什么新鲜的东西,比较流行的解决方案是给用户贴标签,根据标签的组合,圈出需要的用户。通常画像系统会用到宽表,以及分布式的系统。宽表的作用是存储标签,例如每列代表一个标签。但实际上这种设计不一定是最优或唯一的设计,本文将以PostgreSQL数据库为基础,给大家讲解一下更加另类的设计思路,并且看看效率如何。
-
发表了文章 2023-02-03
使用 PolarDB 开源版 bloom filter index 实现任意字段组合条件过滤
背景PolarDB 的云原生存算分离架构, 具备低廉的数据存储、高效扩展弹性、高速多机并行计算能力、高速数据搜索和处理; PolarDB与计算算法结合, 将实现双剑合璧, 推动业务数据的价值产出, 将数据变成生产力.本文将介绍使用 PolarDB 开源版 bloom filter index 实现任...
-
发表了文章 2023-02-03
使用 PolarDB 开源版 smlar 插件进行高效率相似文本搜索、自助选药、相似人群圈选等业务
背景PolarDB 的云原生存算分离架构, 具备低廉的数据存储、高效扩展弹性、高速多机并行计算能力、高速数据搜索和处理; PolarDB与计算算法结合, 将实现双剑合璧, 推动业务数据的价值产出, 将数据变成生产力。本文将介绍使用 PolarDB 开源版 smlar 插件进行高效率相似文本搜索、自助...
-
发表了文章 2023-02-03
使用 PolarDB 开源版 部署 PostGIS 支撑时空轨迹|地理信息|路由等业务
背景PolarDB 的云原生存算分离架构,,具备低廉的数据存储、高效扩展弹性、高速多机并行计算能力、高速数据搜索和处理;;PolarDB与计算算法结合,,将实现双剑合璧,推动业务数据的价值产出,将数据变成生产力。本文将介绍使用 PolarDB 开源版 部署 PostGIS 支撑时空轨迹|地理信息|路...
-
发表了文章 2023-02-03
使用 PolarDB 开源版 部署 pgrouting 支撑出行、快递、配送等商旅问题的路径规划业务
背景PolarDB 的云原生存算分离架构, 具备低廉的数据存储、高效扩展弹性、高速多机并行计算能力、高速数据搜索和处理; PolarDB与计算算法结合, 将实现双剑合璧, 推动业务数据的价值产出, 将数据变成生产力.本文将介绍使用 PolarDB 开源版 部署 pgrouting 支撑出行、快递、配...
-
发表了文章 2023-02-03
PolarDB 开源版通过orafce支持Oracle兼容性
背景PolarDB 的云原生存算分离架构, 具备低廉的数据存储、高效扩展弹性、高速多机并行计算能力、高速数据搜索和处理; PolarDB与计算算法结合, 将实现双剑合璧, 推动业务数据的价值产出, 将数据变成生产力.本文将介绍PolarDB开源版通过orafce支持Oracle兼容性 .测试环境为m...
-
发表了文章 2023-02-03
PolarDB 开源版通过roaringbitmap支持高效用户画像等标签操作
背景PolarDB 的云原生存算分离架构, 具备低廉的数据存储、高效扩展弹性、高速多机并行计算能力、高速数据搜索和处理; PolarDB与计算算法结合, 将实现双剑合璧, 推动业务数据的价值产出, 将数据变成生产力.本文将介绍PolarDB开源版通过roaringbitmap支持用户画像等标签操作场...
-
发表了文章 2023-02-03
PolarDB 开源版通过 pg_trgm GIN 索引实现高效率 `like '%xxx%'` 模糊查询
背景PolarDB 的云原生存算分离架构, 具备低廉的数据存储、高效扩展弹性、高速多机并行计算能力、高速数据搜索和处理; PolarDB与计算算法结合, 将实现双剑合璧, 推动业务数据的 价值产出, 将数据变成生产力.本文将介绍PolarDB 开源版通过 pg_trgm GIN 索引实现高效率lik...
-
发表了文章 2023-02-03
PolarDB 开源版通过 rum 实现高效率搜索和高效率排序的解决方案
背景PolarDB 的云原生存算分离架构, 具备低廉的数据存储、高效扩展弹性、高速多机并行计算能力、高速数据搜索和处理; PolarDB与计算算法结合, 将实现双剑合璧, 推动业务数据的 价值产出, 将数据变成生产力.本文将介绍PolarDB 开源版通过 rum 实现高效率搜索和高效率排序的解决方案...
-
 发表了文章
2025-02-21
发表了文章
2025-02-21
PolarDB开源数据库进阶课18 通过pg_bulkload适配pfs实现批量导入提速
-
发表了文章
2025-02-21
PolarDB开源数据库进阶课17 集成数据湖功能
-
发表了文章
2025-02-21
PolarDB开源数据库进阶课16 接入PostGIS全功能及应用举例
-
发表了文章
2025-02-21
PolarDB开源数据库进阶课15 集成DeepSeek等大模型
-
发表了文章
2025-02-21
PolarDB开源数据库进阶课14 纯享单机版
-
发表了文章
2025-02-21
PolarDB开源数据库进阶课13 单机版转换为集群版
-
发表了文章
2025-02-21
PolarDB开源数据库进阶课12 集群版转换为单机版
-
发表了文章
2025-02-21
PolarDB开源数据库进阶课11 激活容灾(Standby)节点
-
发表了文章
2025-02-21
PolarDB开源数据库进阶课9 读写分离
-
发表了文章
2025-02-21
PolarDB开源数据库进阶课10 计算节点全毁, 灾难恢复
-
发表了文章
2025-02-21
PolarDB开源数据库进阶课8 任意时间点恢复(PITR)
-
发表了文章
2025-02-21
PolarDB开源数据库进阶课7 实时流式归档
-
发表了文章
2025-02-21
PolarDB开源数据库进阶课6 在线归档
-
发表了文章
2025-02-21
PolarDB开源数据库进阶课5 在线备份
-
发表了文章
2025-02-21
PolarDB开源数据库进阶课4 计算节点 Switchover
-
发表了文章
2025-02-21
PolarDB开源数据库进阶课3 共享存储在线扩容
-
发表了文章
2025-02-21
PolarDB开源数据库进阶课1 搭建共享存储集群
-
发表了文章
2025-02-21
PolarDB开源数据库进阶课2 创建容灾(standby)节点
-
发表了文章
2025-02-10
PolarDB 开源基础教程系列 9 开源社区合作和共建
-
发表了文章
2025-02-10
PolarDB 开源基础教程系列 8 数据库生态

-
 回答了问题
2023-03-16
回答了问题
2023-03-16
开发者参与开源软件项目有哪些好处?
1、使用开源项目, 帮助公司节省软件费用. 2、参与开源项目的社区活动, 了解前沿技术, 与社区专家建立连接, 提升职场人脉. 3、贡献开源项目, 提升自我技术能力, 如果这是个流行或者头部企业开源的重点开源项目, 通过贡献开源成就开源项目的同时, 自身的技术影响力也能得到飞跃成长. 提升职场竞争力. Linus Torvalds:Linux 操作系统的发明人和主要维护者,通过开源项目成为了世界上最有名的程序员之一。 Eric Raymond:自由软件运动的倡导者,主要贡献了众多的开源项目,如 Fetchmail、GNU Emacs 等。 Chris Wanstrath:GitHub 创始人之一,是 Ruby on Rails 开源项目的贡献者和核心开发者。 Jeremy Ashkenas:Backbone.js 框架的创建者,也是 CoffeeScript语言的创建者和 Backbone.js 开源项目的核心开发者。 总之,开发者参与开源项目可以获得很多好处,如提高个人技能、可见度和人际关系,同时也可以为未来的就业创造机会。通过开源项目,很多开发者也成为了知名的程序员和技术领袖。赞1 踩0 评论0 -
回答了问题
2019-07-17
PostgreSQL的高级SQL用法
https://github.com/digoal/blog/blob/master/201802/20180226_05.md 高级用法(《PostgreSQL SELECT 的高级用法(CTE, LATERAL, ORDINALITY, WINDOW, SKIP LOCKED, DISTINCT, GROUPING SETS, ...) - 珍藏级》)赞1 踩0 评论0 -
回答了问题
2019-07-17
PostgreSQL是否在PDB CDB方面进行了部分开发?是哪部分涉及了
https://github.com/digoal/blog/blob/master/201605/20160510_01.mdPG 除了不支持database级的wal,其他都比较完备了。赞0 踩0 评论0 -
回答了问题
2019-07-17
运行web工程报postgresql错误ERROR: permission denied to create extension "uuid-ossp"
你需要使用数据库超级用户创建EXTENSION;赞0 踩0 评论0 -
回答了问题
2019-07-17
PHP页面有一个浏览量统计每秒有200并发,造成insert给mysql造成很大压力
可以考虑PostgreSQLhttps://github.com/digoal/blog/blob/master/201711/readme.md赞0 踩0 评论0 -
回答了问题
2019-07-17
cmax,cmin在会话中更新数据后,变为0
cmin, cmax代表的是这条记录在一个事务中的第几条SQL被写入或更新赞1 踩1 评论0 -
回答了问题
2019-07-17
机器学习如何使用 阿里的myql 数据库
使用jdbc接口或者其他的应用开发接口。你也可以使用PostgreSQL赞0 踩0 评论0 -
回答了问题
2019-07-17
云服务器是否支持 Oracle 数据库?
你可以使用阿里云的RDS FOR PPAS数据库,高度兼容ORACLE的SQL语法和存储过程语法。甚至在某些方面性能超越了ORACLE。赞0 踩0 评论0 -
回答了问题
2019-07-17
云服务器上是否可以搭建数据库?
可以,但是你需要将整个数据库的生命周期管理起来。https://github.com/digoal/blog/blob/master/201711/20171125_01.md赞0 踩0 评论0 -
回答了问题
2019-07-17
elasticsearch5.6.4如何导入MySQL数据库
如果你需要使用搜索服务,可以考虑用RDS FOR POSTGRESQL,支持全文检索、模糊查询、相似查询、正则查询等功能。亿级别数据量,毫秒级响应。赞0 踩0 评论0 -
回答了问题
2019-07-17
关于大数据认证学习
https://github.com/digoal/blog/blob/master/201706/20170601_02.md你可以参考一下赞0 踩0 评论0 -
回答了问题
2019-07-17
您好,咨询一个问题:关于数据库或者产品选型的问题
推荐你使用HybridDB for PostgreSQL,或 rds pgsql,都支持直接读写OSS,通过OSS 外部表。阿里内部今年双十一也使用了RDG PGSQL和HDB PG。https://github.com/digoal/blog/blob/master/201706/20170601_02.mdhttps://github.com/digoal/blog/blob/master/201711/20171111_01.md赞0 踩0 评论0 -
回答了问题
2019-07-17
一个关于乐观锁的问题
秒杀例子,30万 tpshttps://github.com/digoal/blog/blob/master/201711/20171107_31.mdskip locked row例子https://github.com/digoal/blog/blob/master/201610/20161018_01.md赞0 踩0 评论0 -
回答了问题
2019-07-17
Postgres数据库文件在linux主机被删除后如何恢复
恢复手段优先级:1、如果有增量备份,建议从增量备份+归档文件进行时间点恢复。2、如果没有增量备份,建议使用dump文件逻辑恢复,恢复到某个备份的时间点。3、如果以上都没有,可以从文件系统层恢复,如果文件是在数据库停库状态下被删的,恢复后建议先备份一下数据文件。然后使用VACUUM 检查一下全库。3.1 如果文件是在数据库启动状态下被删,数据库处于不一致状态,或者数据文件没有完全恢复时,需要reset control file才能启动数据库。3.2 如果数据文件恢复程度不足以启动数据库,那么可以使用pg filedump,从仅有的数据文件中导出数据内容,并进行人为的恢复。赞0 踩0 评论0 -
回答了问题
2019-07-17
pipelinedb 安装时是否可选用已有postgresql库?
不可,暂时还没有插件化。赞0 踩0 评论0 -
回答了问题
2019-07-17
PG10支持建立默认分区表吗?
不支持,PG 11支持https://www.postgresql.org/docs/devel/static/sql-createtable.html如果你需要在PG 10支持这个语法,可以用insert on conflict插入,在遇到报错时do update,然后再目标表添加update rule,将update转成insert到default table。赞1 踩0 评论0 -
回答了问题
2019-07-17
postgresql内存一直增长,两个session占用150G内存
请参考:https://github.com/digoal/blog/blob/master/201607/20160709_01.md赞0 踩0 评论0 -
回答了问题
2019-07-17
oracle与postgresql数据存储过程的转换
例子 https://www.postgresql.org/docs/10/static/plpgsql-porting.html 或者你可以使用 阿里云RDS for PPAS产品,高度兼容Oracle大多数plsql函数不需要转换赞0 踩0 评论0 -
回答了问题
2019-07-17
如何调查解决postgresql死锁问题
不需要,这个是事务锁。你需要排查的是业务逻辑。这个文章对你会有帮助https://github.com/digoal/blog/blob/master/201705/20170521_01.md赞0 踩0 评论0 -
回答了问题
2019-07-17
安装imgsmlr 插件失败
你需要先编译安装imgsmlr插件。赞0 踩0 评论0
-
 我用PolarDB验证了“股神”巴菲特的投资理念!发布时间:2022-09-23 10:32:14 视频时长:15分38秒 播放量:21854巴菲特的投资理念是什么? 长线定投, 长线定投的理论支撑是什么?长期定投不是投机倒靶, 长期定投是有社会价值的, 可以帮助上市公司筹集资金, 加大研发投入和生产. 投资人则在这中间获取企业业务发展带来的红利.长线定投赚钱背后的逻辑(理论依据)是什么呢?1、首先是代际转移理论: 资源(生产资料、生产力)有限, 但是我们整个社区都假设并坚信通过未来的科技进步将获得更高的资源利用能力、生产效率; 例如石油、煤炭的过度开采虽然会造成环境破坏, 但是我们相信未来的科技进步会找到新的能源, 并填补过度开采造成的破坏. (这点和递弱代偿理论异曲同工)。2、第二个是经济周期, 以及宏观调控手段, 维持适度的通胀, 有利于经济的发展. 需要刺激经济的时候通常会有降低商业银行在央行的存款准备金率, 让商业银行可以贷出去更多钱, 可能引起通胀. (货币总量增加. 参考阅读:金融简史.). 但是有些国计民生相关商品并不是完全市场化的, 所以这些商品通胀率比较可控, 否则会引发动乱.银行放水时也需要有法律法规和相关监管配合, 防止投机倒把贷一堆钱去炒作钱滚钱. 失去了放水的意义. 放水可能希望的是去消费、投入研发或采购生产资料、促进生产....3、第三是数学支撑: 微笑曲线参考 《德说-第56期, 微笑曲线 - 基金定投》4、严格的止盈线. 可不要太贪, 过了止盈线就卖掉, 重新开始定投.5、不要过于分散, 例如就选一个投资对象(例如50, 500指数), 而且你的钱要能cover这只对象的整微笑周期.有了理论支撑, 我将使用真实数据以及PolarDB来证明巴菲特的投资理念.
 -
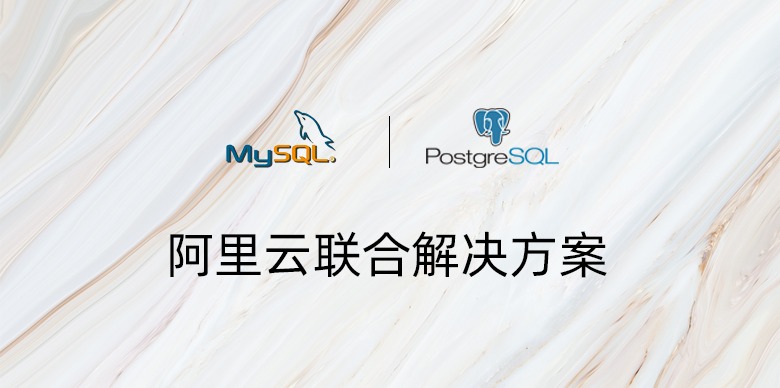 PG+MySQL联合解决方案-第13课-高级SQL学习-提升生产效率发布时间:2020-01-18 00:18:49 视频时长:88分51秒 播放量:2503MySQL是最流行的开源数据库,PG是最先进的开源数据库。 两者结合,发挥1+1大于2的超级效果,解决应用无法解决的问题。课程安排一期开课计划(MySQL结合PG使用,提升应用价值):PG+MySQL联合解决方案-第1课-PG介绍、联合应用场景说明PG+MySQL联合解决方案-第2课-PG连接(pgadmin,dms,psql)PG+MySQL联合解决方案-第3课-PG bench mark(压测,模拟测试,test case)PG+MySQL联合解决方案-第4课-PG与MySQL对比学习(面向开发者)PG+MySQL联合解决方案-第5课-MySQL同步到PG(采用DTS)PG+MySQL联合解决方案-第6课-PG外部表、归档存储、冷热分离应用(mysql_fdw,oss_fdw)PG+MySQL联合解决方案-第7课-PG并行计算PG+MySQL联合解决方案-第8课-PG时空GIS应用实践PG+MySQL联合解决方案-第9课-实时精准营销(精准圈选、相似扩选、用户画像)PG+MySQL联合解决方案-第10课-任意字段维度组合搜索PG+MySQL联合解决方案-第11课-多维向量相似搜索-图像识别等PG+MySQL联合解决方案-第12课-全文检索、中文分词、模糊查询、相似查询PG+MySQL联合解决方案-第13课-高级SQL学习-提升生产效率
 -
PG+MySQL联合解决方案-第12课-全文检索、中文分词、模糊查询、相似查询发布时间:2020-01-16 20:27:00 视频时长:45分48秒 播放量:3738MySQL是最流行的开源数据库,PG是最先进的开源数据库。 两者结合,发挥1+1大于2的超级效果,解决应用无法解决的问题。课程安排一期开课计划(MySQL结合PG使用,提升应用价值):PG+MySQL联合解决方案-第1课-PG介绍、联合应用场景说明PG+MySQL联合解决方案-第2课-PG连接(pgadmin,dms,psql)PG+MySQL联合解决方案-第3课-PG bench mark(压测,模拟测试,test case)PG+MySQL联合解决方案-第4课-PG与MySQL对比学习(面向开发者)PG+MySQL联合解决方案-第5课-MySQL同步到PG(采用DTS)PG+MySQL联合解决方案-第6课-PG外部表、归档存储、冷热分离应用(mysql_fdw,oss_fdw)PG+MySQL联合解决方案-第7课-PG并行计算PG+MySQL联合解决方案-第8课-PG时空GIS应用实践PG+MySQL联合解决方案-第9课-实时精准营销(精准圈选、相似扩选、用户画像)PG+MySQL联合解决方案-第10课-任意字段维度组合搜索PG+MySQL联合解决方案-第11课-多维向量相似搜索-图像识别等PG+MySQL联合解决方案-第12课-全文检索、中文分词、模糊查询、相似查询PG+MySQL联合解决方案-第13课-高级SQL学习-提升生产效率
-
PG+MySQL联合解决方案-第11课-多维向量相似搜索-图像识别等发布时间:2020-01-15 21:55:59 视频时长:33分58秒 播放量:2543MySQL是最流行的开源数据库,PG是最先进的开源数据库。 两者结合,发挥1+1大于2的超级效果,解决应用无法解决的问题。课程安排一期开课计划(MySQL结合PG使用,提升应用价值):PG+MySQL联合解决方案-第1课-PG介绍、联合应用场景说明PG+MySQL联合解决方案-第2课-PG连接(pgadmin,dms,psql)PG+MySQL联合解决方案-第3课-PG bench mark(压测,模拟测试,test case)PG+MySQL联合解决方案-第4课-PG与MySQL对比学习(面向开发者)PG+MySQL联合解决方案-第5课-MySQL同步到PG(采用DTS)PG+MySQL联合解决方案-第6课-PG外部表、归档存储、冷热分离应用(mysql_fdw,oss_fdw)PG+MySQL联合解决方案-第7课-PG并行计算PG+MySQL联合解决方案-第8课-PG时空GIS应用实践PG+MySQL联合解决方案-第9课-实时精准营销(精准圈选、相似扩选、用户画像)PG+MySQL联合解决方案-第10课-任意字段维度组合搜索PG+MySQL联合解决方案-第11课-多维向量相似搜索-图像识别等PG+MySQL联合解决方案-第12课-全文检索、中文分词、模糊查询、相似查询PG+MySQL联合解决方案-第13课-高级SQL学习-提升生产效率
-
PG+MySQL联合解决方案-第10课-任意字段维度组合搜索发布时间:2020-01-14 20:27:13 视频时长:52分54秒 播放量:5767MySQL是最流行的开源数据库,PG是最先进的开源数据库。 两者结合,发挥1+1大于2的超级效果,解决应用无法解决的问题。课程安排一期开课计划(MySQL结合PG使用,提升应用价值):PG+MySQL联合解决方案-第1课-PG介绍、联合应用场景说明PG+MySQL联合解决方案-第2课-PG连接(pgadmin,dms,psql)PG+MySQL联合解决方案-第3课-PG bench mark(压测,模拟测试,test case)PG+MySQL联合解决方案-第4课-PG与MySQL对比学习(面向开发者)PG+MySQL联合解决方案-第5课-MySQL同步到PG(采用DTS)PG+MySQL联合解决方案-第6课-PG外部表、归档存储、冷热分离应用(mysql_fdw,oss_fdw)PG+MySQL联合解决方案-第7课-PG并行计算PG+MySQL联合解决方案-第8课-PG时空GIS应用实践PG+MySQL联合解决方案-第9课-实时精准营销(精准圈选、相似扩选、用户画像)PG+MySQL联合解决方案-第10课-任意字段维度组合搜索PG+MySQL联合解决方案-第11课-多维向量相似搜索-图像识别等PG+MySQL联合解决方案-第12课-全文检索、中文分词、模糊查询、相似查询PG+MySQL联合解决方案-第13课-高级SQL学习-提升生产效率
-
PG+MySQL联合解决方案-第9课-实时精准营销(精准圈选、相似扩选、用户画像)发布时间:2020-01-13 20:25:27 视频时长:47分22秒 播放量:2602MySQL是最流行的开源数据库,PG是最先进的开源数据库。 两者结合,发挥1+1大于2的超级效果,解决应用无法解决的问题。课程安排一期开课计划(MySQL结合PG使用,提升应用价值):PG+MySQL联合解决方案-第1课-PG介绍、联合应用场景说明PG+MySQL联合解决方案-第2课-PG连接(pgadmin,dms,psql)PG+MySQL联合解决方案-第3课-PG bench mark(压测,模拟测试,test case)PG+MySQL联合解决方案-第4课-PG与MySQL对比学习(面向开发者)PG+MySQL联合解决方案-第5课-MySQL同步到PG(采用DTS)PG+MySQL联合解决方案-第6课-PG外部表、归档存储、冷热分离应用(mysql_fdw,oss_fdw)PG+MySQL联合解决方案-第7课-PG并行计算PG+MySQL联合解决方案-第8课-PG时空GIS应用实践PG+MySQL联合解决方案-第9课-实时精准营销(精准圈选、相似扩选、用户画像)PG+MySQL联合解决方案-第10课-任意字段维度组合搜索PG+MySQL联合解决方案-第11课-多维向量相似搜索-图像识别等PG+MySQL联合解决方案-第12课-全文检索、中文分词、模糊查询、相似查询PG+MySQL联合解决方案-第13课-高级SQL学习-提升生产效率
-
PG+MySQL联合解决方案-第8课-PG时空GIS应用实践发布时间:2020-01-10 20:59:35 视频时长:54分51秒 播放量:1228MySQL是最流行的开源数据库,PG是最先进的开源数据库。 两者结合,发挥1+1大于2的超级效果,解决应用无法解决的问题。课程安排一期开课计划(MySQL结合PG使用,提升应用价值):PG+MySQL联合解决方案-第1课-PG介绍、联合应用场景说明PG+MySQL联合解决方案-第2课-PG连接(pgadmin,dms,psql)PG+MySQL联合解决方案-第3课-PG bench mark(压测,模拟测试,test case)PG+MySQL联合解决方案-第4课-PG与MySQL对比学习(面向开发者)PG+MySQL联合解决方案-第5课-MySQL同步到PG(采用DTS)PG+MySQL联合解决方案-第6课-PG外部表、归档存储、冷热分离应用(mysql_fdw,oss_fdw)PG+MySQL联合解决方案-第7课-PG并行计算PG+MySQL联合解决方案-第8课-PG时空GIS应用实践PG+MySQL联合解决方案-第9课-实时精准营销(精准圈选、相似扩选、用户画像)PG+MySQL联合解决方案-第10课-任意字段维度组合搜索PG+MySQL联合解决方案-第11课-多维向量相似搜索-图像识别等PG+MySQL联合解决方案-第12课-全文检索、中文分词、模糊查询、相似查询PG+MySQL联合解决方案-第13课-高级SQL学习-提升生产效率
-
PG+MySQL联合解决方案-第7课-PG并行计算发布时间:2020-01-09 21:00:49 视频时长:57分17秒 播放量:1345MySQL是最流行的开源数据库,PG是最先进的开源数据库。 两者结合,发挥1+1大于2的超级效果,解决应用无法解决的问题。课程安排一期开课计划(MySQL结合PG使用,提升应用价值):PG+MySQL联合解决方案-第1课-PG介绍、联合应用场景说明PG+MySQL联合解决方案-第2课-PG连接(pgadmin,dms,psql)PG+MySQL联合解决方案-第3课-PG bench mark(压测,模拟测试,test case)PG+MySQL联合解决方案-第4课-PG与MySQL对比学习(面向开发者)PG+MySQL联合解决方案-第5课-MySQL同步到PG(采用DTS)PG+MySQL联合解决方案-第6课-PG外部表、归档存储、冷热分离应用(mysql_fdw,oss_fdw)PG+MySQL联合解决方案-第7课-PG并行计算PG+MySQL联合解决方案-第8课-PG时空GIS应用实践PG+MySQL联合解决方案-第9课-实时精准营销(精准圈选、相似扩选、用户画像)PG+MySQL联合解决方案-第10课-任意字段维度组合搜索PG+MySQL联合解决方案-第11课-多维向量相似搜索-图像识别等PG+MySQL联合解决方案-第12课-全文检索、中文分词、模糊查询、相似查询PG+MySQL联合解决方案-第13课-高级SQL学习-提升生产效率
-
PG+MySQL联合解决方案-第6课-PG外部表、归档存储、冷热分离应用(mysql_fdw,oss_fdw)发布时间:2020-01-08 23:03:10 视频时长:34分27秒 播放量:1323MySQL是最流行的开源数据库,PG是最先进的开源数据库。 两者结合,发挥1+1大于2的超级效果,解决应用无法解决的问题。课程安排一期开课计划(MySQL结合PG使用,提升应用价值):PG+MySQL联合解决方案-第1课-PG介绍、联合应用场景说明PG+MySQL联合解决方案-第2课-PG连接(pgadmin,dms,psql)PG+MySQL联合解决方案-第3课-PG bench mark(压测,模拟测试,test case)PG+MySQL联合解决方案-第4课-PG与MySQL对比学习(面向开发者)PG+MySQL联合解决方案-第5课-MySQL同步到PG(采用DTS)PG+MySQL联合解决方案-第6课-PG外部表、归档存储、冷热分离应用(mysql_fdw,oss_fdw)PG+MySQL联合解决方案-第7课-PG并行计算PG+MySQL联合解决方案-第8课-PG时空GIS应用实践PG+MySQL联合解决方案-第9课-实时精准营销(精准圈选、相似扩选、用户画像)PG+MySQL联合解决方案-第10课-任意字段维度组合搜索PG+MySQL联合解决方案-第11课-多维向量相似搜索-图像识别等PG+MySQL联合解决方案-第12课-全文检索、中文分词、模糊查询、相似查询PG+MySQL联合解决方案-第13课-高级SQL学习-提升生产效率
-
PG+MySQL联合解决方案-第5课-MySQL同步到PG(采用DTS)发布时间:2020-01-07 20:12:27 视频时长:20分30秒 播放量:1521MySQL是最流行的开源数据库,PG是最先进的开源数据库。 两者结合,发挥1+1大于2的超级效果,解决应用无法解决的问题。课程安排一期开课计划(MySQL结合PG使用,提升应用价值):PG+MySQL联合解决方案-第1课-PG介绍、联合应用场景说明PG+MySQL联合解决方案-第2课-PG连接(pgadmin,dms,psql)PG+MySQL联合解决方案-第3课-PG bench mark(压测,模拟测试,test case)PG+MySQL联合解决方案-第4课-PG与MySQL对比学习(面向开发者)PG+MySQL联合解决方案-第5课-MySQL同步到PG(采用DTS)PG+MySQL联合解决方案-第6课-PG外部表、归档存储、冷热分离应用(mysql_fdw,oss_fdw)PG+MySQL联合解决方案-第7课-PG并行计算PG+MySQL联合解决方案-第8课-PG时空GIS应用实践PG+MySQL联合解决方案-第9课-实时精准营销(精准圈选、相似扩选、用户画像)PG+MySQL联合解决方案-第10课-任意字段维度组合搜索PG+MySQL联合解决方案-第11课-多维向量相似搜索-图像识别等PG+MySQL联合解决方案-第12课-全文检索、中文分词、模糊查询、相似查询PG+MySQL联合解决方案-第13课-高级SQL学习-提升生产效率
-
PG+MySQL联合解决方案-第4课-PG与MySQL对比学习(面向开发者)发布时间:2020-01-06 20:44:20 视频时长:61分51秒 播放量:3774MySQL是最流行的开源数据库,PG是最先进的开源数据库。 两者结合,发挥1+1大于2的超级效果,解决应用无法解决的问题。课程安排一期开课计划(MySQL结合PG使用,提升应用价值):PG+MySQL联合解决方案-第1课-PG介绍、联合应用场景说明PG+MySQL联合解决方案-第2课-PG连接(pgadmin,dms,psql)PG+MySQL联合解决方案-第3课-PG bench mark(压测,模拟测试,test case)PG+MySQL联合解决方案-第4课-PG与MySQL对比学习(面向开发者)PG+MySQL联合解决方案-第5课-MySQL同步到PG(采用DTS)PG+MySQL联合解决方案-第6课-PG外部表、归档存储、冷热分离应用(mysql_fdw,oss_fdw)PG+MySQL联合解决方案-第7课-PG并行计算PG+MySQL联合解决方案-第8课-PG时空GIS应用实践PG+MySQL联合解决方案-第9课-实时精准营销(精准圈选、相似扩选、用户画像)PG+MySQL联合解决方案-第10课-任意字段维度组合搜索PG+MySQL联合解决方案-第11课-多维向量相似搜索-图像识别等PG+MySQL联合解决方案-第12课-全文检索、中文分词、模糊查询、相似查询PG+MySQL联合解决方案-第13课-高级SQL学习-提升生产效率
-
PG+MySQL联合解决方案-第3课-PG bench mark(压测,模拟测试,test case)发布时间:2020-01-03 20:42:46 视频时长:60分52秒 播放量:2177MySQL是最流行的开源数据库,PG是最先进的开源数据库。 两者结合,发挥1+1大于2的超级效果,解决应用无法解决的问题。课程安排一期开课计划(MySQL结合PG使用,提升应用价值):PG+MySQL联合解决方案-第1课-PG介绍、联合应用场景说明PG+MySQL联合解决方案-第2课-PG连接(pgadmin,dms,psql)PG+MySQL联合解决方案-第3课-PG bench mark(压测,模拟测试,test case)PG+MySQL联合解决方案-第4课-PG与MySQL对比学习(面向开发者)PG+MySQL联合解决方案-第5课-MySQL同步到PG(采用DTS)PG+MySQL联合解决方案-第6课-PG外部表、归档存储、冷热分离应用(mysql_fdw,oss_fdw)PG+MySQL联合解决方案-第7课-PG并行计算PG+MySQL联合解决方案-第8课-PG时空GIS应用实践PG+MySQL联合解决方案-第9课-实时精准营销(精准圈选、相似扩选、用户画像)PG+MySQL联合解决方案-第10课-任意字段维度组合搜索PG+MySQL联合解决方案-第11课-多维向量相似搜索-图像识别等PG+MySQL联合解决方案-第12课-全文检索、中文分词、模糊查询、相似查询PG+MySQL联合解决方案-第13课-高级SQL学习-提升生产效率
-
PG+MySQL联合解决方案-第2课-PG连接(pgadmin,dms,psql)发布时间:2019-12-31 23:07:06 视频时长:59分0秒 播放量:1172MySQL是最流行的开源数据库,PG是最先进的开源数据库。 两者结合,发挥1+1大于2的超级效果,解决应用无法解决的问题。课程安排一期开课计划(MySQL结合PG使用,提升应用价值):PG+MySQL联合解决方案-第1课-PG介绍、联合应用场景说明PG+MySQL联合解决方案-第2课-PG连接(pgadmin,dms,psql)PG+MySQL联合解决方案-第3课-PG bench mark(压测,模拟测试,test case)PG+MySQL联合解决方案-第4课-PG与MySQL对比学习(面向开发者)PG+MySQL联合解决方案-第5课-MySQL同步到PG(采用DTS)PG+MySQL联合解决方案-第6课-PG外部表、归档存储、冷热分离应用(mysql_fdw,oss_fdw)PG+MySQL联合解决方案-第7课-PG并行计算PG+MySQL联合解决方案-第8课-PG时空GIS应用实践PG+MySQL联合解决方案-第9课-实时精准营销(精准圈选、相似扩选、用户画像)PG+MySQL联合解决方案-第10课-任意字段维度组合搜索PG+MySQL联合解决方案-第11课-多维向量相似搜索-图像识别等PG+MySQL联合解决方案-第12课-全文检索、中文分词、模糊查询、相似查询PG+MySQL联合解决方案-第13课-高级SQL学习-提升生产效率
-
PG+MySQL联合解决方案-第1课-PG介绍、联合应用场景说明发布时间:2019-12-30 20:42:34 视频时长:45分32秒 播放量:3575MySQL是最流行的开源数据库,PG是最先进的开源数据库。 两者结合,发挥1+1大于2的超级效果,解决应用无法解决的问题。课程安排一期开课计划(MySQL结合PG使用,提升应用价值):PG+MySQL联合解决方案-第1课-PG介绍、联合应用场景说明PG+MySQL联合解决方案-第2课-PG连接(pgadmin,dms,psql)PG+MySQL联合解决方案-第3课-PG bench mark(压测,模拟测试,test case)PG+MySQL联合解决方案-第4课-PG与MySQL对比学习(面向开发者)PG+MySQL联合解决方案-第5课-MySQL同步到PG(采用DTS)PG+MySQL联合解决方案-第6课-PG外部表、归档存储、冷热分离应用(mysql_fdw,oss_fdw)PG+MySQL联合解决方案-第7课-PG并行计算PG+MySQL联合解决方案-第8课-PG时空GIS应用实践PG+MySQL联合解决方案-第9课-实时精准营销(精准圈选、相似扩选、用户画像)PG+MySQL联合解决方案-第10课-任意字段维度组合搜索PG+MySQL联合解决方案-第11课-多维向量相似搜索-图像识别等PG+MySQL联合解决方案-第12课-全文检索、中文分词、模糊查询、相似查询PG+MySQL联合解决方案-第13课-高级SQL学习-提升生产效率