文章系列目录
Wechat development series 1 – setup your development environment
Wechat development series 2 – development Q&A service using nodejs
Wechat development series 3 – Trigger C4C Account creation in Wechat app
Wechat development series 4 – Send C4C Data change notification to Wechat app
Wechat development series 5 – embedded your UI5 application to Wechat app
Wechat development series 6 – Retrieve Wechat User info via oAuth2 and display it in UI5 application
Wechat development series 7 – use Redis to store Wechat conversation history
Wechat development series 8 – Map integration
Wechat development series 9 – Create C4C Social Media Message and Service within Wechat app
Wechat development series 10 – Use Wechat app to receive Service Request reply made from C4C
In previous blog Wechat development series 5 – embedded your UI5 application to Wechat app we have successfully embedded one UI5 application within app. Now we go one step further: suppose in our UI5 application we need to retrieve some basic information of current user who has subscribed our Wechat account, for example the nick name of Wechat user, we should follow some special process defined by Wechat, as those user information is sensitive and should never be returned by Wechat API unless Wechat users have explicitly approved that it could be retrieved, that is, the operation to access Wechat user information must explicitly be authorized.
From Wechat official API document the authorization process is defined according to oAuth2 protocol.
Implemented feature
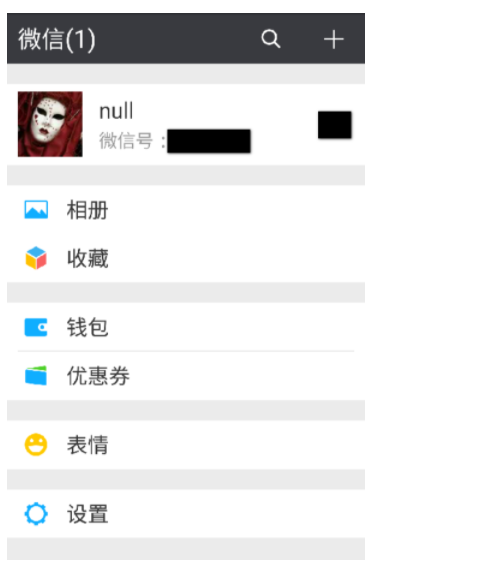
My Wechat account has nick name: “null”.
When I subscribe the test Wechat account below using my Wechat account and access the same UI5 application used in the fifth blog of this series,
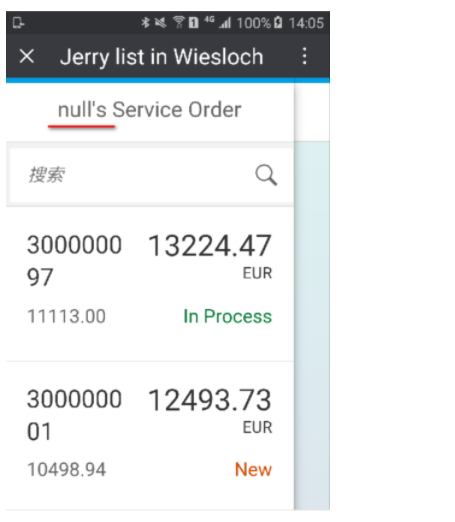
I can see my nick name is successfully retrieved and displayed in this UI5 application:
Here below is implementation detail.
Implementation detail
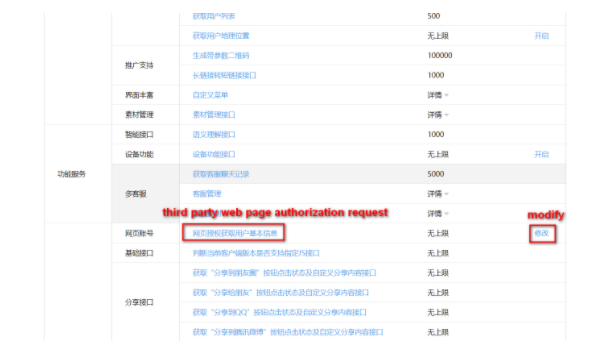
(1) Go to the development work center of your test Wechat subscription account,
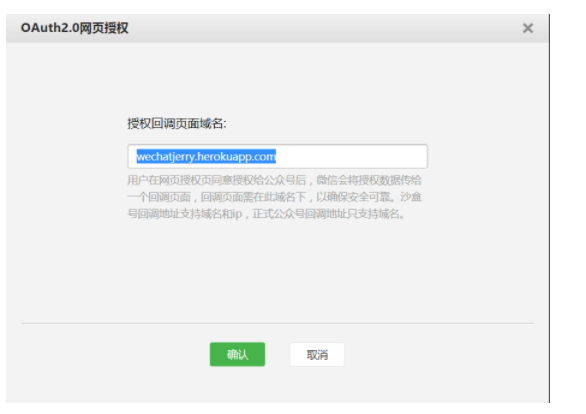
click “modify” button to configure a string to represent the site name of the url which acts as oauth2 callback.
In my example my oauth2 callback url ishttps://wechatjerry.herokuapp.com/tokenCallback so I must maintain wechatjerry.herokuapp.com here.
(2) The initial step is to guide Wechat user to access the url with below format to get the necessary code. This code is used to get the access token in next step.
In my example, since my callback url is https://wechatjerry.herokuapp.com/tokenCallback, so the final url is:https://open.weixin.qq.com/connect/oauth2/authorize?appid=wx73b49bfe02fd3a17&redirect_uri=https://wechatjerry.herokuapp.com/tokenCallback&response_type=code&scope=snsapi_userinfo&state=1#wechat_redirect
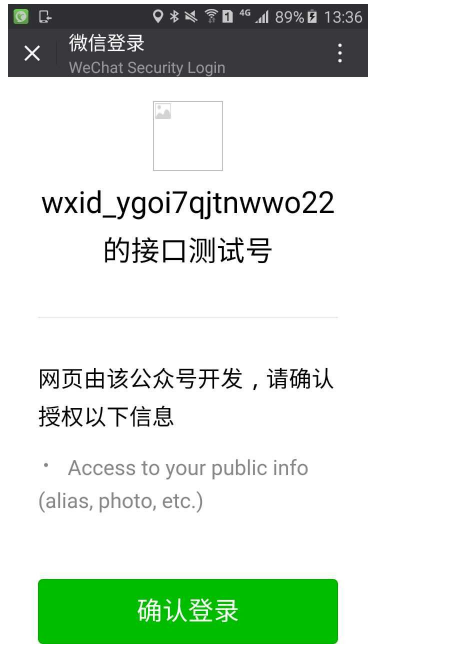
When a Wechat user clicks this url in his/her Wechat application, the following dialog will popup, which notifies current user that the third party application is trying to access your public information such as gender, nickname and avatar. If the Wechat user accepts such access, he/she could press “确认登录”(Accept) button.
Once the button is clicked, the code will be generated by Wechat platform and send to the page specified by the callback url, in my example it is https://wechatjerry.herokuapp.com/tokenCallback.
So two tasks needed to be done in this step:
(1) guide Wechat user to click the hyperlinkhttps://open.weixin.qq.com/connect/oauth2/authorize?appid=wx73b49bfe02fd3a17&redirect_uri=https://wechatjerry.herokuapp.com/tokenCallback&response_type=code&scope=snsapi_userinfo&state=1#wechat_redirect
(2) Implement the logic in https://wechatjerry.herokuapp.com/tokenCallback to react to this code.
Implementation for task one
So far you should know how to implement a custom menu in Wechat app, which is described in Wechat development series 5 – embedded your UI5 application to Wechat app.
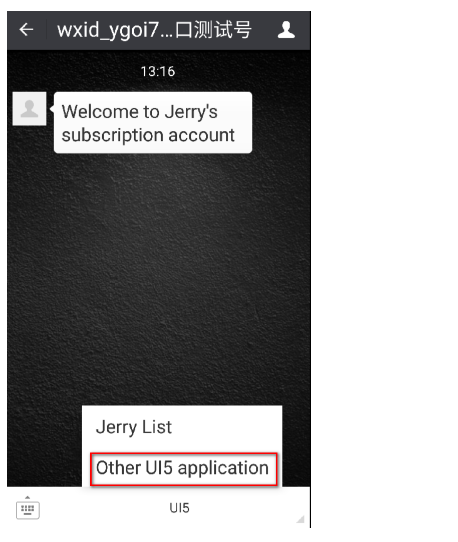
Now create a new menu for Wechat user and once it is pressed, send out a html tag with corresponding url.
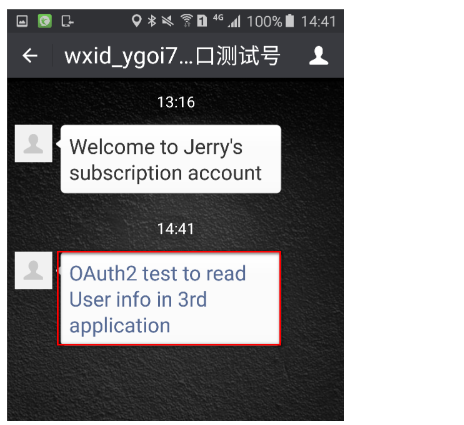
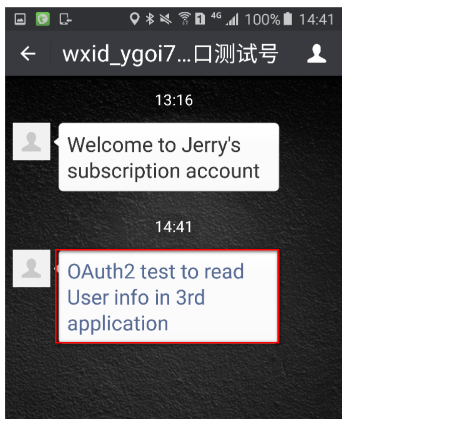
When this menu is pressed, Wechat user will see the tag is rendered as a hyperlink within Wechat app:
This hyperlink is replied to end user via below code:
app.route('/').post(function(req,res){ var _da; req.on("data",function(data){ _da = data.toString("utf-8"); }); req.on("end",function(){ var msgType = formattedValue(getXMLNodeValue('MsgType',_da)); if( msgType === "text"){ // handle text message, detail source code see previous blog } else if( msgType === "voice"){ // handle voice message, detail source code see previous blog } else if( msgType === "event"){ var event = formattedValue(getXMLNodeValue('Event',_da)); if( event === "subscribe"){ // handle subscribe event, detail source code see previous blog } else if( event === "CLICK"){ /* < < > > " : & & */ var redirect = "https://open.weixin.qq.com/connect/oauth2/authorize?appid=wx73b49bfe02fd3a17&redirect_uri=https://wechatjerry.herokuapp.com/tokenCallback&response_type=code&scope=snsapi_userinfo&state=1#wechat_redirect"; var reply = "<a href="" + encodeURI(redirect) + "">" + "OAuth2 test to read User info in 3rd application" + "<" + "/a" + ">"; var eventtext = replyMessage(_da, reply); res.send(eventtext); }; } }); });
Implementation for task two
If user has pressed “Accept” button, the code will be send to the callback url, whose value is stored in req.query.code.
 app.route("/tokenCallback").get(function(req,res){
    if( req.query && req.query.code) {
      authorizeAndRedirect(req.query.code, res);
    }
    else{
      res.send("no code");
    }
  });
The function authorizeAndRedirect is implemented in nodejs module with below source code:
var config = require("../../config.js");
var request = require('request');
function getAccessToken(code) {
  var url = "https://api.weixin.qq.com/sns/oauth2/access_token?appid=" +
  config.testAccountAppid + "&secret=" + config.testAccountSecret + "&code=" + code + "&grant_type=authorization_code";
  var getTokenOptions = {
        url: url,
        method: "GET",
        json:true,
        headers: {
            "content-type": "application/json"
        }
  };
  return new Promise(function(resolve,reject){
      var requestC = request.defaults({jar: true});
      requestC(getTokenOptions,function(error,response,body){
       if(error){
          reject({message: error});
          return;
       }
      resolve(body);
      }); // end of requestC
     });
}
function getUserinfo(tokenResponse, res){
    var userinfourl = "https://api.weixin.qq.com/sns/userinfo?access_token="
    + tokenResponse.access_token + "&openid=" + tokenResponse.openid;
  var userOptions = {
        url: userinfourl,
        method: "GET",
        json:true,
        headers: {
            "content-type": "application/json"
        }
  };
  return new Promise(function(resolve,reject){
      var requestC = request.defaults({jar: true});
      requestC(userOptions,function(error,response,body){
       if(error){
          reject({message: error});
          return;
       }
        var url = "https://wechatjerry.herokuapp.com/ui5?nickname=" + body.nickname;
        res.redirect(url);
      }); // end of requestC
     });
}
module.exports = function(code, res){
  getAccessToken(code).then(function(tokenResponse) {
      getUserinfo(tokenResponse, res);
  });
};
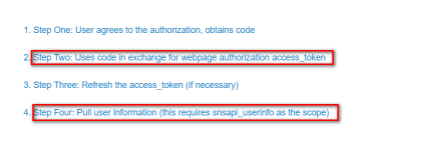
This module basically finishes the highlighted two steps in Wechat document.The following tasks are done in this module:
(1) get access token via code ( input parameter of this module )
(2) get user information via API plus the access token got in previous task
(3) redirect to the UI5 application with url https://wechatjerry.herokuapp.com/ui5?nickname=<nick name got from previous task)
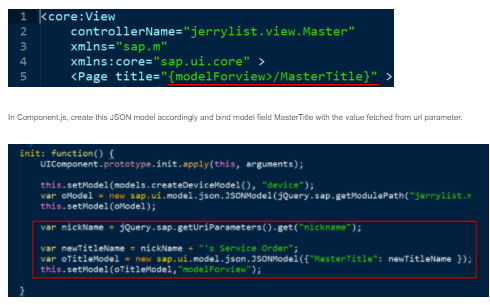
3. Nothing new now: previously the list title is bound to an i18n model, now I change the binding to bind title field to a JSON model field instead.
