
我们知道VMware的网络适配器类型有多种,例如E1000、VMXNET、 VMXNET 2 (Enhanced)、VMXNET3等,就性能而言,一般VMXNET3要优于E1000,下面介绍如果将Linux虚拟机的网络适配器类型从 E1000改为VMXNET3。本文测试环境如下
操作系统 :Oracle Linux Server release 5.7
虚拟机版本 :Vmware 5.1
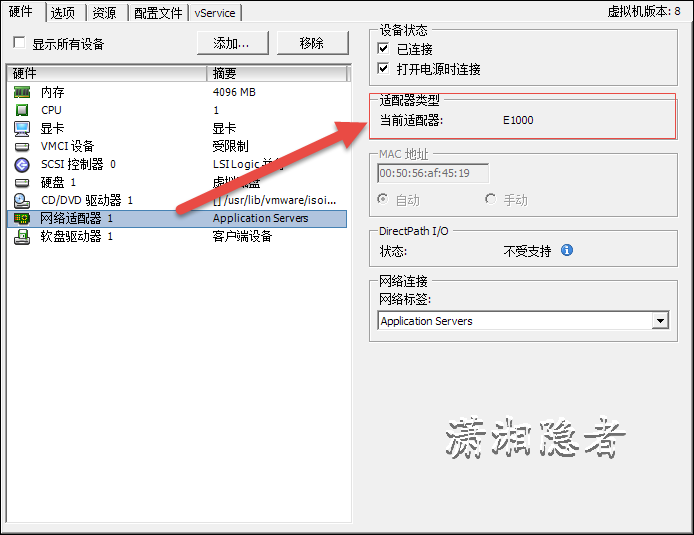
如下所示,测试前,我们可以先看看网卡类型为e1000, 此版本的Linux似乎没有配置文件/etc/udev/rules.d/70-persistent-net.rules。只有配置文件60-net.rules.具体信息请见下图


方法1:在vSphere Client中更改适配器类型
我们通过vSphere Client客户端,添加网络适配器2(适配器类型为VMXNET3),然后删除网络适配器1,重启服务器

重启后,在/etc/sysconfig/network-scripts/下,你会看到有ifcfg-eth0和ifcfg-eth0.bak两个配置文件,系统自动生成了新的配置文件并将原来的配置文件重命名了

如下所示,新生成的配置文件ifcfg-eth0是动态获取IP,需要重新配置网络信息,重启网络服务即可即可解决问题。
[root@localhost ~]# more /etc/sysconfig/network-scripts/ifcfg-eth0
# VMware VMXNET3 Ethernet Controller
DEVICE=eth0
BOOTPROTO=dhcp
ONBOOT=yes
HWADDR=00:50:56:af:09:7b
[root@localhost ~]# more /etc/sysconfig/network-scripts/ifcfg-eth0.bak
# Intel Corporation 82545EM Gigabit Ethernet Controller (Copper)
DEVICE=eth0
BOOTPROTO=static
HWADDR=00:50:56:AF:45:19
ONBOOT=yes
IPADDR=192.168.9.24
GATEWAY=192.168.9.8
NETMASK=255.255.255.0
注意,在我多次测试验证过程中,如果服务器没有安装Vmware Tools,那么在操作过程中就会遇到“Device eth0 does not seem to be present, delaying initialization”,查看当前的eth设备,你会发现只有lo设备。怎么都搞不定。这个可不像Linux 克隆虚拟机引起的“Device eth0 does not seem to be present, delaying initialization”那样轻松搞定
[root@localhost1 ~]# ls /sys/class/net/
lo
[root@localhost ~]#

方法2:修改.vmx 文件来更改适配器类型
1:关闭LNTEST虚拟机。
2:选择LNTEST,单击右键选择“从清单中移除”

3:在数据存储浏览器中找到LNTest对应的目录,找到LNTest.vmx文件。找到参数ethernet1.virtualDev(有可能为ethernet0)将其值从"e1000"改为"vmxnet3"


vmotion.checkpointFBSize = "4194304"
softPowerOff = "TRUE"
tools.syncTime = "FALSE"
unity.wasCapable = "FALSE"
tools.remindInstall = "TRUE"
migrate.hostlog = "./LNTest-d958ff0f.hlog"
ethernet1.virtualDev = "vmxnet3"
ethernet1.pciSlotNumber = "32"
ethernet1.startConnected = "TRUE"
ethernet1.allowGuestConnectionControl = "TRUE"
ethernet1.features = "1"
ethernet1.wakeOnPcktRcv = "TRUE"
ethernet1.networkName = "VM Network"
ethernet1.dvs.switchId = ""
ethernet1.present = "TRUE"
ethernet1.addressType = "generated"
config.readOnly = "FALSE"
ethernet1.generatedAddress = "00:0c:29:0f:63:7e"
ethernet1.generatedAddressOffset = "10"
ethernet0.present = "FALSE"
4: 选择vmx文件,将其“添加到清单”,然后重启电源,一切搞定,都不需要修改任何网络配置信息。

方法3:使用PowerCLI修改网络适配器类型
PowerCLI,即VMware vSphere PowerCLI 是一款功能强大的命令行工具来修改。 这个方法没有实际验证过,不过看其介绍,似乎是最简单的一种方法。
Change the Adapter Type with PowerCLI
The easiest method to change the adapter type is by using this little PowerCLI command. Just replace <VM> with your virtual machines name. You can run this script without disruption while the virtual machine is running but it’s not active until you have powered off the virtual machine. A reboot does not activate the configuration.
Get-VM -name "<VM>" | Get-NetworkAdapter | Where { $_.Type -eq "E1000"} | Set-NetworkAdapter -Type "vmxnet3"
Prior to change please make sure that your operating system contains the vmxnet3 driver or you have installed the VMware Tools. To check the required kernel module type “modprobe vmxnet3“. If you don’t get an error message you should be fine.


