
WPF可以提供的3D模型使我们可以轻松地创建3D实体,虽然目前来看还很有一些性能上的问题,不过对于一些简单的3D应用应该是可取的,毕竟其开发效率高,而且也容易上手。
下面给大家演示的是使用在WPF 3D上实现视角变换,通过鼠标拖动来变换观察视角,通过滚轮来放缩视距。
有关3D的基础知识可以参考MSDN文档: 三维图形概述
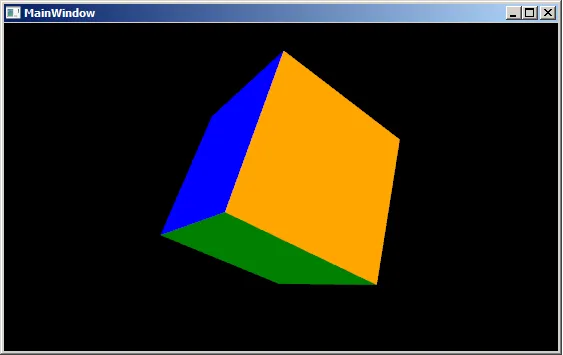
首先创建一个3D立方体,立方体是由六个面构成(F1, F2 ....F6)其XAML代码如下:
<Viewport3D>
<Viewport3D.Camera>
<PerspectiveCamera Position="8,8,8" LookDirection="-1 -1 -1" FieldOfView="75" UpDirection="-1 1 -1" x:Name="camera"></PerspectiveCamera>
</Viewport3D.Camera>
<Viewport3D.Children>
<ModelVisual3D x:Name="light">
<ModelVisual3D.Content>
<AmbientLight />
</ModelVisual3D.Content>
</ModelVisual3D>
<ModelVisual3D x:Name="magicCube">
<ModelVisual3D.Content>
<!-- 0: 0,0,0 1: 0,0,2 2: 2,0,2 3: 2,0,0 4: 2,2,0 5: 0,2,0 6: 0,2,2 7: 2,2,2 -->
<Model3DGroup x:Name="cube">
<Model3DGroup.Transform>
<TranslateTransform3D OffsetX="-1" OffsetY="-1" OffsetZ="-1" />
</Model3DGroup.Transform>
<!--F1: 0,3,2,1-->
<GeometryModel3D x:Name="F1">
<GeometryModel3D.Material>
<DiffuseMaterial Brush="Blue"/>
</GeometryModel3D.Material>
<GeometryModel3D.Geometry>
<MeshGeometry3D Positions="0,0,0 2,0,0 2,0,2 0,0,2" TriangleIndices="0,1,2 0,2,3"></MeshGeometry3D>
</GeometryModel3D.Geometry>
</GeometryModel3D>
<!--F2: 0,1,6,5-->
<GeometryModel3D x:Name="F2">
<GeometryModel3D.Material>
<DiffuseMaterial Brush="Green"/>
</GeometryModel3D.Material>
<GeometryModel3D.Geometry>
<MeshGeometry3D Positions="0,0,0 0,0,2 0,2,2 0,2,0" TriangleIndices="0 1 2 0 2 3"></MeshGeometry3D>
</GeometryModel3D.Geometry>
</GeometryModel3D>
<!--F3: 4,5,6,7-->
<GeometryModel3D x:Name="F3">
<GeometryModel3D.Material>
<DiffuseMaterial Brush="Red"/>
</GeometryModel3D.Material>
<GeometryModel3D.Geometry>
<MeshGeometry3D Positions="2,2,0 0,2,0 0,2,2 2,2,2" TriangleIndices="0 1 2 0 2 3"></MeshGeometry3D>
</GeometryModel3D.Geometry>
</GeometryModel3D>
<!--F4: 2,3,4,7-->
<GeometryModel3D x:Name="F4">
<GeometryModel3D.Material>
<DiffuseMaterial Brush="Yellow"/>
</GeometryModel3D.Material>
<GeometryModel3D.Geometry>
<MeshGeometry3D Positions="2,0,2 2,0,0 2,2,0 2,2,2" TriangleIndices="0 1 2 0 2 3" TextureCoordinates="0,0 0,1 1,1 1,0">
</MeshGeometry3D>
</GeometryModel3D.Geometry>
</GeometryModel3D>
<!--F5: 1,2,7,6-->
<GeometryModel3D x:Name="F5">
<GeometryModel3D.Material>
<DiffuseMaterial Brush="White"/>
</GeometryModel3D.Material>
<GeometryModel3D.Geometry>
<MeshGeometry3D Positions=" 0,0,2 2,0,2 2,2,2 0,2,2" TriangleIndices="0 1 2 0 2 3"></MeshGeometry3D>
</GeometryModel3D.Geometry>
</GeometryModel3D>
<!--F6: 0,5,4,3-->
<GeometryModel3D x:Name="F6">
<GeometryModel3D.Material>
<DiffuseMaterial Brush="Orange"/>
</GeometryModel3D.Material>
<GeometryModel3D.Geometry>
<MeshGeometry3D Positions=" 0,0,0 0,2,0 2,2,0 2,0,0" TriangleIndices="0 1 2 0 2 3"></MeshGeometry3D>
</GeometryModel3D.Geometry>
</GeometryModel3D>
</Model3DGroup>
</ModelVisual3D.Content>
</ModelVisual3D>
</Viewport3D.Children>
</Viewport3D>
在Viewport中用六个面构成一个立方体, 每一个面都是一个GeometryModel3D。
下面就是如何来实现通过鼠标拖动来变换视角的功能。首先给Window对象添加几个有关的鼠标的事件:MouseMove、MouseLeftButtonDown和MouseWheel。
<Window x:Class="MagicCube.MainWindow"
xmlns="http://schemas.microsoft.com/winfx/2006/xaml/presentation"
xmlns:x="http://schemas.microsoft.com/winfx/2006/xaml"
Title="MainWindow" Height="295" Width="525" Background="Black"
MouseMove="Viewport3D_MouseMove"
MouseLeftButtonDown="Viewport3D_MouseLeftButtonDown"
MouseWheel="Viewport3D_MouseWheel"
KeyDown="Window_KeyDown">
<Viewport3D …>
</Window>
说明一下使用到的几个变量:
其中MouseLeftButtonDown是用来获取鼠标在进入拖动状态之前的位置,这样我们就可以根据鼠标位置的改变类变换视角。
Point mouseLastPosition;
private void Viewport3D_MouseLeftButtonDown(object sender, MouseButtonEventArgs e)
{
mouseLastPosition = e.GetPosition(this);
}
下面是MouseMove事件,实现视角的变换。首先鼠标在拖动的过程中,可能发生水平方向上的变化和垂直方向上的变化,所以,我们将对不同的变化方向进行不同的变换。这里我将水平变换和垂直变换已经分别封装至两个方法中:HorizontalTransform(水平变换)和VerticalTransform(垂直变换)
private void Viewport3D_MouseMove(object sender, MouseEventArgs e)
{
if (Mouse.LeftButton == MouseButtonState.Pressed)
{
Point newMousePosition = e.GetPosition(this);
if (mouseLastPosition.X != newMousePosition.X)
{
HorizontalTransform(mouseLastPosition.X < newMousePosition.X, mouseDeltaFactor);//水平变换
}
if (mouseLastPosition.Y != newMousePosition.Y)// change position in the horizontal direction
{
VerticalTransform(mouseLastPosition.Y > newMousePosition.Y, mouseDeltaFactor);//垂直变换
}
mouseLastPosition = newMousePosition;
}
}
接下来我们就来看一下这两个变换方法的具体实现:
垂直变换:
{
Vector3D postion = new Vector3D(camera.Position.X, camera.Position.Y, camera.Position.Z);
Vector3D rotateAxis = Vector3D.CrossProduct(postion, camera.UpDirection);
RotateTransform3D rt3d = new RotateTransform3D();
AxisAngleRotation3D rotate = new AxisAngleRotation3D(rotateAxis, angleDeltaFactor * (upDown ? - 1 : 1 ));
rt3d.Rotation = rotate;
Matrix3D matrix = rt3d.Value;
Point3D newPostition = matrix.Transform(camera.Position);
camera.Position = newPostition;
camera.LookDirection = new Vector3D( - newPostition.X, - newPostition.Y, - newPostition.Z);
// update the up direction
Vector3D newUpDirection = Vector3D.CrossProduct(camera.LookDirection, rotateAxis);
newUpDirection.Normalize();
camera.UpDirection = newUpDirection;
}
private void HorizontalTransform( bool leftRight, double angleDeltaFactor)
{
Vector3D postion = new Vector3D(camera.Position.X, camera.Position.Y, camera.Position.Z);
Vector3D rotateAxis = camera.UpDirection;
RotateTransform3D rt3d = new RotateTransform3D();
AxisAngleRotation3D rotate = new AxisAngleRotation3D(rotateAxis, angleDeltaFactor * (leftRight ? - 1 : 1 ));
rt3d.Rotation = rotate;
Matrix3D matrix = rt3d.Value;
Point3D newPostition = matrix.Transform(camera.Position);
camera.Position = newPostition;
camera.LookDirection = new Vector3D( - newPostition.X, - newPostition.Y, - newPostition.Z);
}
最后还有一个鼠标滚轮调节视距的变换,如下:
{
double scaleFactor = 3 ;
// 120 near , -120 far
System.Diagnostics.Debug.WriteLine(e.Delta.ToString());
Point3D currentPosition = camera.Position;
Vector3D lookDirection = camera.LookDirection; // new Vector3D(camera.LookDirection.X, camera.LookDirection.Y, camera.LookDirection.Z);
lookDirection.Normalize();
lookDirection *= scaleFactor;
if (e.Delta == 120 ) // getting near
{
if ((currentPosition.X + lookDirection.X) * currentPosition.X > 0 )
{
currentPosition += lookDirection;
}
}
if (e.Delta == - 120 ) // getting far
{
currentPosition -= lookDirection;
}
Point3DAnimation positionAnimation = new Point3DAnimation();
positionAnimation.BeginTime = new TimeSpan( 0 , 0 , 0 );
positionAnimation.Duration = TimeSpan.FromMilliseconds( 100 );
positionAnimation.To = currentPosition;
positionAnimation.From = camera.Position;
positionAnimation.Completed += new EventHandler(positionAnimation_Completed);
camera.BeginAnimation(PerspectiveCamera.PositionProperty, positionAnimation, HandoffBehavior.Compose);
}
有了这个小程序之后,我们以后如果需要制作WPF 3D实体,也可以通过它来360度全方位地观测构建的3D实体。

