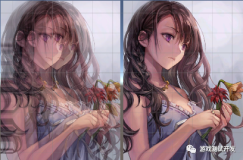
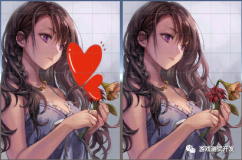
效果图如下

属性栏如下
带Shine Mask效果,可以实现Tex的部分Shine。

完整代码如下
Shader "XKB/Shine"
{
    Properties
    {
        _MainTex ("Main Texture", 2D) = "white" {}
    _Color("Main Color", Color) = (1,1,1,1)
    _Alpha("General Alpha",  Range(0,1)) = 1
        _ShineColor("Shine Color", Color) = (1,1,1,1)
        _ShineLocation("Shine Location", Range(0,1)) = 0.5
        _ShineRotate("Rotate Angle(radians)", Range(0, 6.2831)) = 0
        _ShineWidth("Shine Width", Range(0.05,1)) = 0.1
        _ShineGlow("Shine Glow", Range(0,100)) = 1
    [NoScaleOffset] _ShineMask("Shine Mask", 2D) = "white" {}
    }

    SubShader
    {
        Tags {"Queue" = "Transparent" "RenderType"="Opaque" "IgnoreProjector" = "True" }
        Blend SrcAlpha OneMinusSrcAlpha
        ZWrite Off
        Cull Off
        Pass
        {
            CGPROGRAM
            #pragma vertex vert
            #pragma fragment frag
            #include "UnityCG.cginc"

            struct appdata
            {
                float4 vertex : POSITION;
                float2 uv : TEXCOORD0;
        half4 color : COLOR;
            };

            struct v2f
            {
                float2 uv : TEXCOORD0;
                float4 vertex : SV_POSITION;
        half4 color : COLOR;
            };

            sampler2D _MainTex;
            half4 _MainTex_ST, _MainTex_TexelSize, _Color;
      half _Alpha;
            float _RandomSeed;
      sampler2D _ShineMask;
      half4 _ShineColor;
      half _ShineLocation, _ShineRotate, _ShineWidth, _ShineGlow;

            v2f vert (appdata v)
            {
                v2f o;
        o.vertex = UnityObjectToClipPos(v.vertex);
                o.uv = TRANSFORM_TEX(v.uv, _MainTex);
        o.color = v.color;
                return o;
            }

            half4 frag (v2f i) : SV_Target
            {
        float2 uvRect = i.uv;
        half2 center = half2(0.5, 0.5);
        half2 centerTiled = half2(center.x *  _MainTex_ST.x, center.y *  _MainTex_ST.y);
        half4 col = tex2D(_MainTex, i.uv) * i.color;
        half originalAlpha = col.a;
        half2 uvShine = uvRect;
        half cosAngle = cos(_ShineRotate);
        half sinAngle = sin(_ShineRotate);
        half2x2 rot = half2x2(cosAngle, -sinAngle, sinAngle, cosAngle);
        uvShine -= half2(0.5, 0.5);
        uvShine = mul(rot, uvShine);
        uvShine += half2(0.5, 0.5);
        half shineMask = tex2D(_ShineMask, i.uv).a;
        half currentDistanceProjection = (uvShine.x + uvShine.y) / 2;
        half whitePower = 1 - (abs(currentDistanceProjection - _ShineLocation) / _ShineWidth);
        col.rgb +=  col.a * whitePower * _ShineGlow * max(sign(currentDistanceProjection - (_ShineLocation - _ShineWidth)), 0.0)
        * max(sign((_ShineLocation + _ShineWidth) - currentDistanceProjection), 0.0) * _ShineColor * shineMask;
        col.a *= _Alpha;
        col *= _Color;
                return col;
            }
            ENDCG
        }
    }
  Fallback "Sprites/Default"
}