前言
之前用模板写了订单页面,由于需求改了导致这个页面做更新麻烦,弄了一下午,索性全部删除了自己写了,上面的tabs用的是b-ui框架写的,其他的都是原生写法。
🙏如果这篇文章对你有帮助还请收藏点赞+关注🙏
分析
根据我的需求,通过订单号查一个群组的商品数据,然后将订单状态以及点击事件、创建时间,商品数量总计 显示出来,在开发时,需要先了解uniapp小程序的开发流程和基本UI组件,以及订单页面的设计原则和需求分析。
布局
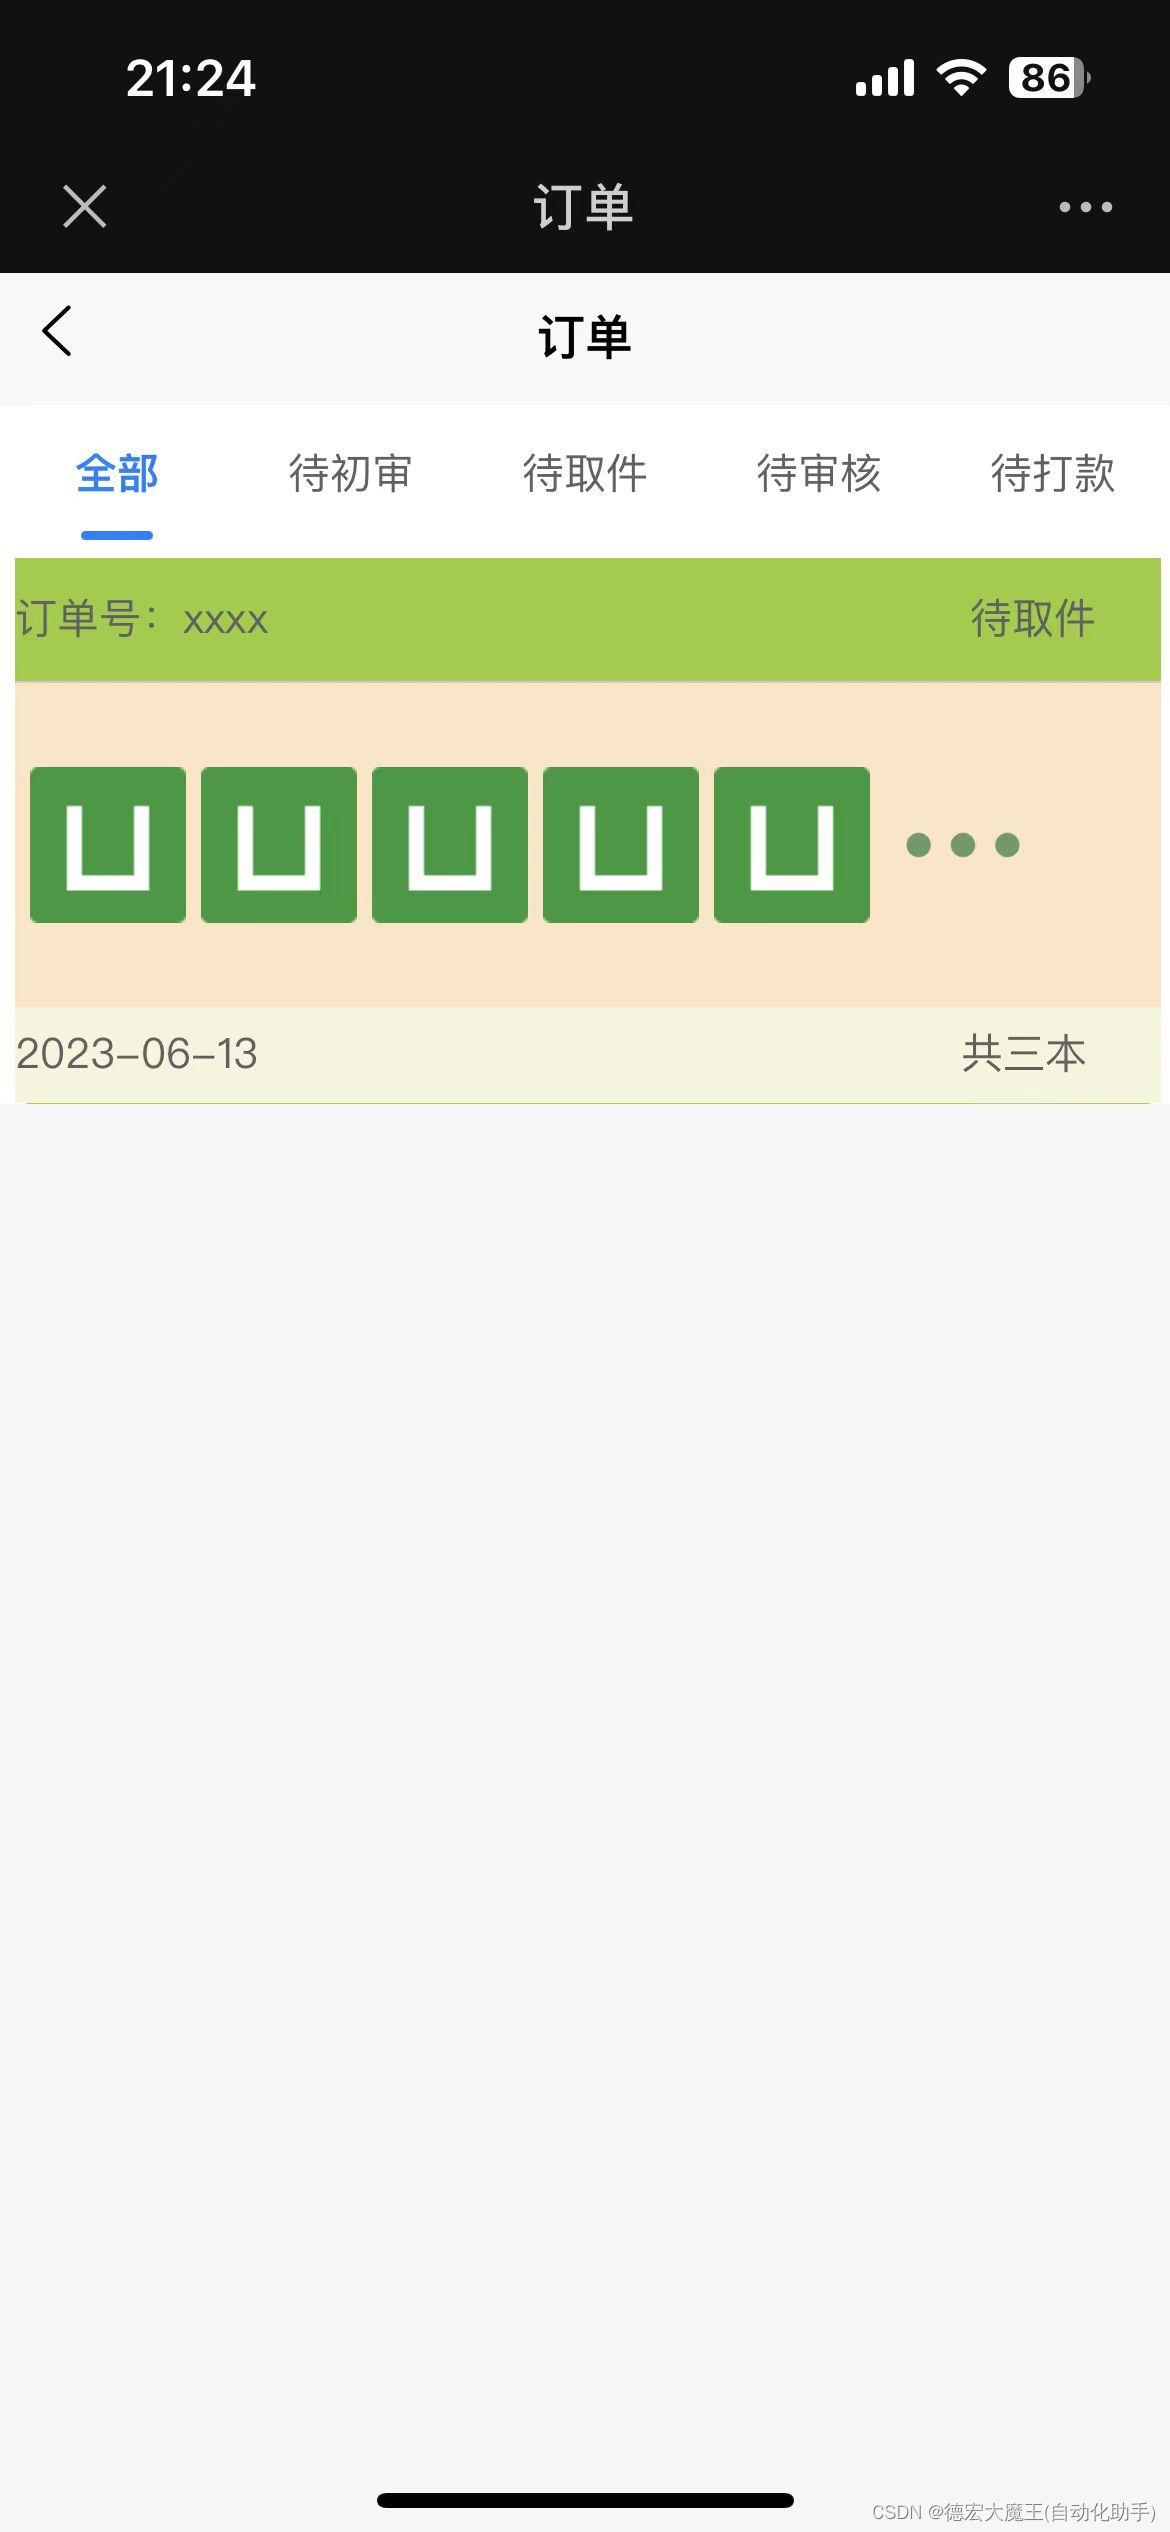
首先确定订单页面的整体布局,包括订单信息、商品列表、价格总计等内容。 通过颜色将大致的轮廓勾勒出来,可以使用不同的颜色来区分不同的内容区域,比如订单信息区域使用灰色背景,商品列表区域使用白色背景等。调整好每一本书的距离,可以使用margin和padding属性来控制每个商品之间的距离,保证页面整体美观。 对于商品列表中的每个商品,可以使用flex布局来实现自适应排列,同时使用图片和文字来展示商品信息。最后,根据实际需求添加一些交互效果,比如点击商品可以跳转到商品详情页面等。
代码:
由于我习惯先写在调整样式,所以现在看上去乱糟糟的,但这不是最终版
<template>
  <view>
    <view class="b-bg-white b-text-black-d">
      <!-- tabs -->
      <view class="b-tabs">
        <scroll-view scroll-x>
          <view class="b-tabs-container">
            <view class="b-tabs-item" v-for="(item,index) in tabs1" :key="index"
              :class="{'b-tabs-active':tabs1Current == index}"
              @click="tabs1Current = index"
            >
              {{item}}
            </view>
          </view>
        </scroll-view>
      </view>
      <!-- tabs -->
      <view style="width: 735rpx;height: 350rpx;background-color: yellowgreen;margin-top: 10rpx;margin-left: 10rpx;border-radius: 10rpx;display: flex;flex-direction: column;">
        <view style="width: 735rpx;height: 80rpx;background-color: yellowgreen;display: flex;flex-direction: row;align-items: center;justify-items: center;">
          <text>订单号:xxxx</text>
          <text style="margin-left: 450rpx;">待取件</text>
        </view>
        <span style="border: 1rpx solid #ccc;"></span>
        <view style="width: 735rpx;height: 208rpx;background-color: bisque;display: flex;flex-direction: row;align-items: center;">
          <image src="/static/logo.png"  style="height: 100rpx;width: 100rpx;margin-left: 10rpx;"></image>
          <image src="/static/logo.png"  style="height: 100rpx;width: 100rpx;margin-left: 10rpx;"></image>
          <image src="/static/logo.png"  style="height: 100rpx;width: 100rpx;margin-left: 10rpx;"></image>
          <image src="/static/logo.png"  style="height: 100rpx;width: 100rpx;margin-left: 10rpx;"></image>
          <image src="/static/logo.png"  style="height: 100rpx;width: 100rpx;margin-left: 10rpx;"></image>
          <image src="/static/slh.png"  style="height: 100rpx;width: 100rpx;margin-left: 10rpx;"></image>
        </view>
        <view style="width: 735rpx;height: 62rpx;background-color: beige;display: flex;flex-direction: row;align-items: center;">
          <text>2023-06-13</text>
          <text style="margin-left: 450rpx;">共三本</text>
        </view>
      </view>
    </view>
    </view>
</template>
<script>
  export default {
    data() {
      return {
        tabs1:["全部","待初审","待取件","待审核","待打款"],
        tabs1Current:0,
      }
    },
    onLoad() {
    },
    methods: {
    }
  }
</script>
<style lang="scss">
// 头像性别标签
.avatar-tags-sex{
  position: absolute;
  z-index: 1;
  width: 40rpx;
  height: 40rpx;
  right: 0;
  bottom: 0;
  border-radius: 50%;
}
// 头像VIP标签
.avatar-tags-vip{
  position: absolute;
  z-index: 1;
  width: 40rpx;
  height: 40rpx;
  right: 0;
  top: 0;
  border-radius: 50%;
}
</style>
通过短时间的修改,勉强能看得过去
实现
成品图:
这里我已经通过js事件将视图层渲染了一遍,有很多不足的地方在慢慢调整,由于功能急需上架,ui只能等后面调整了
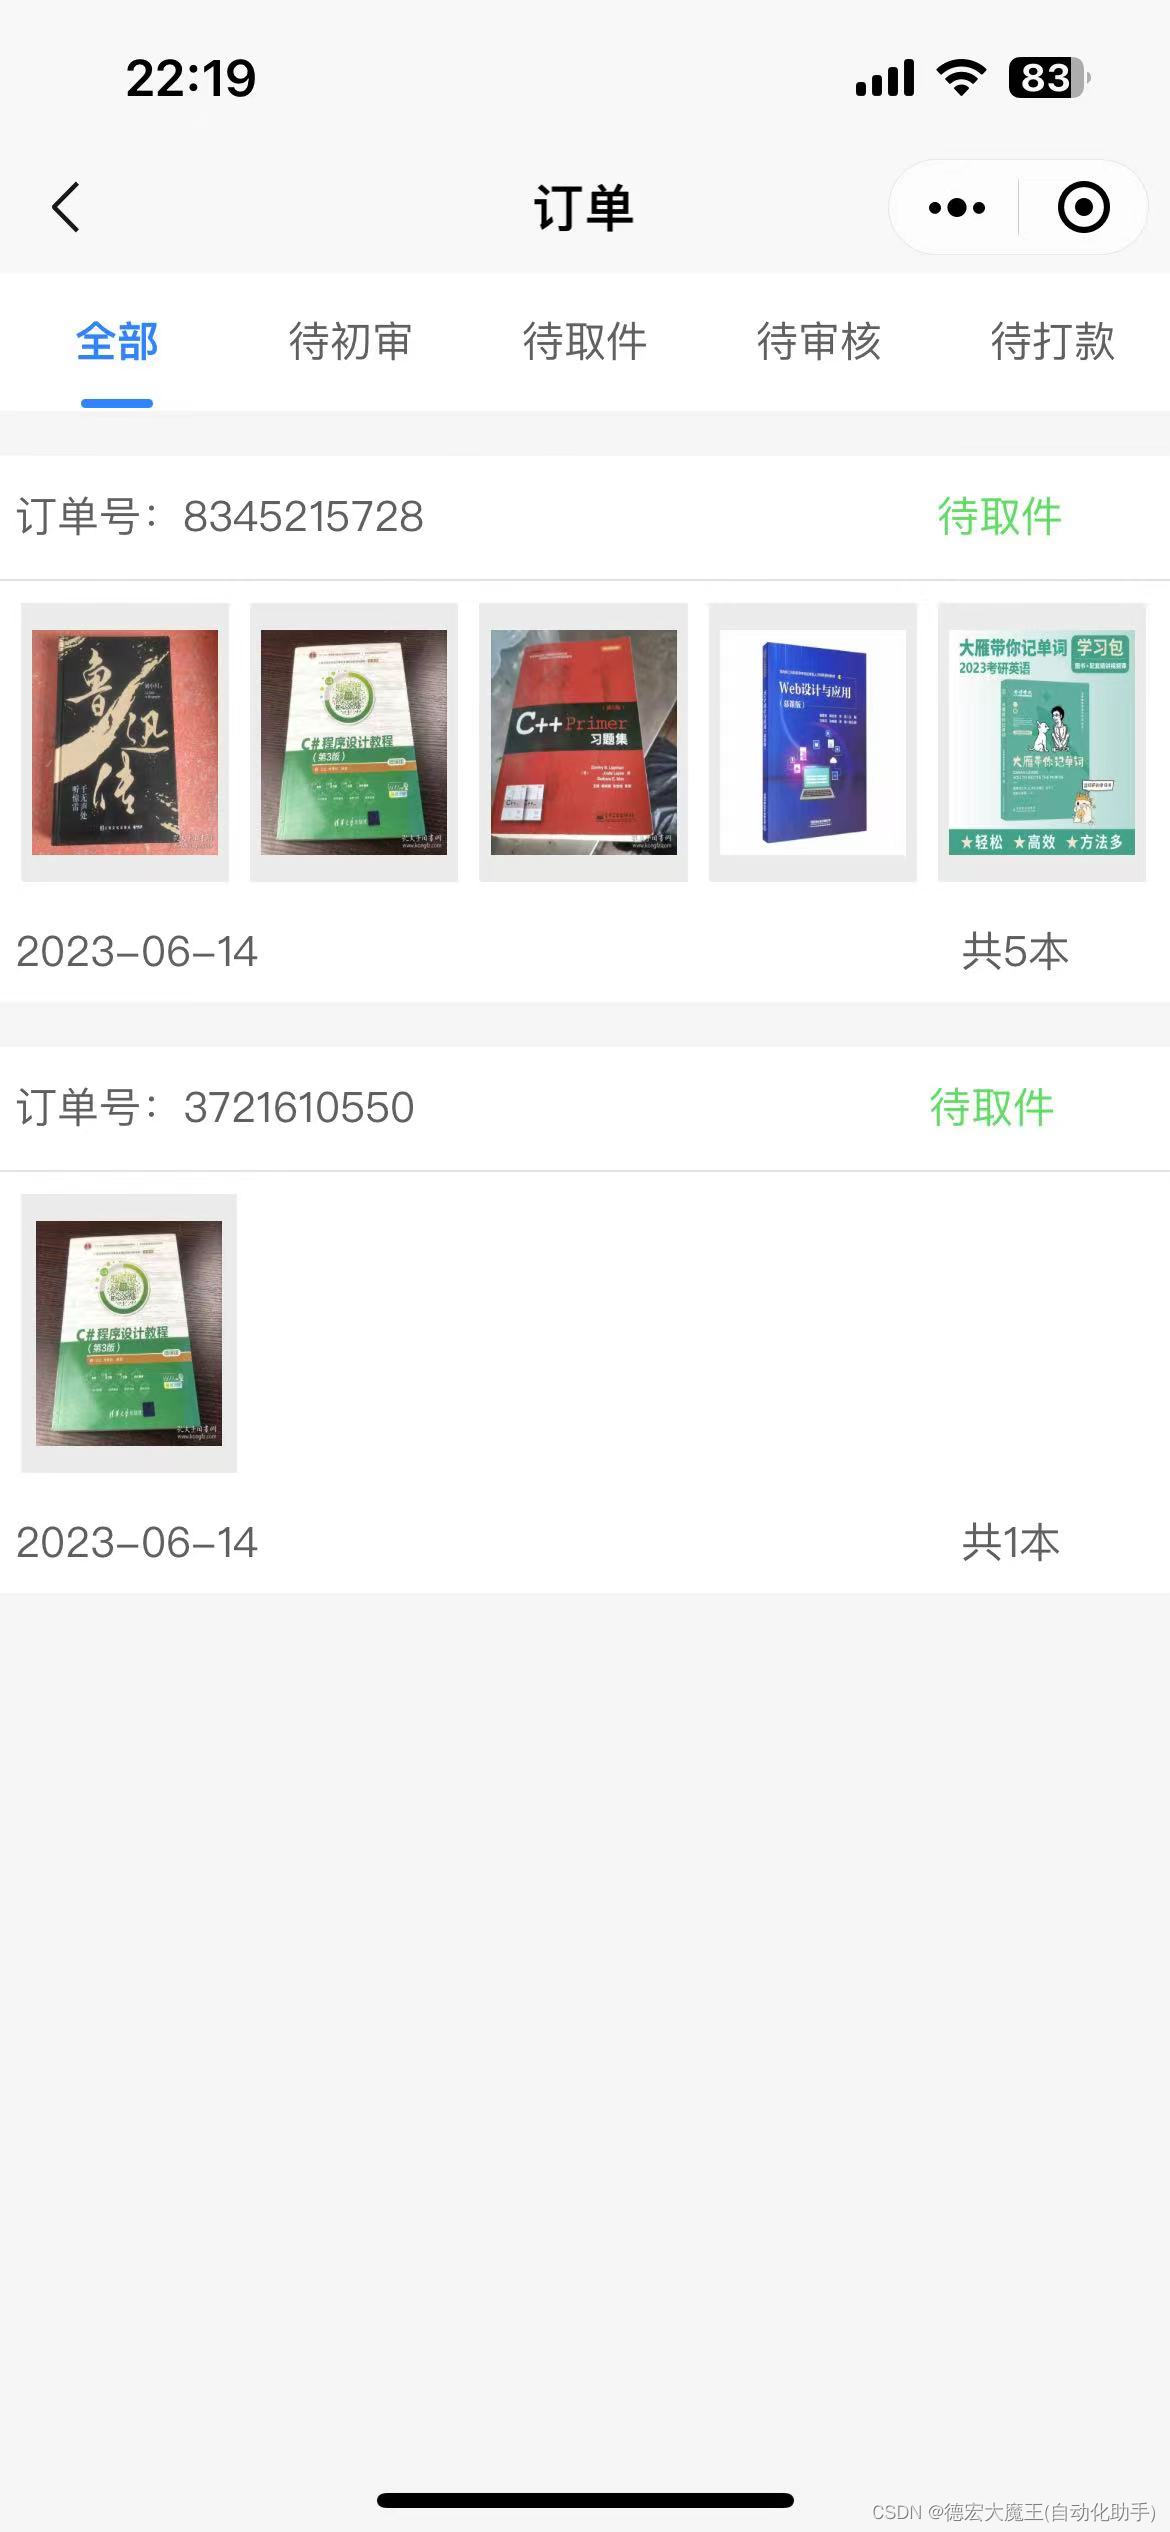
<template>
  <view class="page">
    <view class="b-bg-white b-text-black-d">
      <!-- tabs -->
      <view class="b-tabs">
        <scroll-view scroll-x>
          <view class="b-tabs-container">
            <view class="b-tabs-item" v-for="(item,index) in tabs1" :key="index"
              :class="{'b-tabs-active':tabs1Current == index}"
              @click="tabs1Current = index"
            >
              {{item}}
            </view>
          </view>
        </scroll-view>
      </view>
      <!-- tabs -->
        <view class="card" v-for="(item,index) in menuLists" :key="index">
          <view class="card_in_top">
          </view>
        <view class="card_in_center">
            <text style="margin-left: 10rpx;">订单号:{{item.sell_order_num}}</text>
            <text style="margin-left: 330rpx;color: #38dd5b;">待取件</text>
          </view>
          <span style="border: 1rpx solid #e1e1e1;"></span>
          <view class="card_in_b">
            <block v-for="(item2,index2) in item.book_data" :key="index2" v-if="index2 < 5">
              <view style="height: 180rpx;width: 140rpx;background-color: #ececec;margin-left: 15rpx;display: flex;flex-direction: column;align-items: center;justify-content: center;justify-self: center;">
                <image :src="item2.book_cover"  style="height: 145rpx;width: 120rpx;"></image>
              </view>
            </block>
            <!-- <image src="/static/slh.png"  style="height: 100rpx;width: 100rpx;margin-left: 10rpx;"></image> -->
          </view>
          <view class="result">
            <text style="margin-left: 10rpx;">{{item.cre_time}}</text>
            <text style="margin-left: 450rpx;">共{{item.book_data.length}}本</text>
          </view>
        </view>
      </view>
    </view>
</template>
<script>
  export default {
    data() {
      return {
        menuLists: [],
        tabs1:["全部","待初审","待取件","待审核","待打款"],
        tabs1Current:0,
      }
    },
    onLoad() {
    },
    methods: {
    }
  }
</script>
<style lang="scss">
  .page{
    // background-color: #f5f5f5;
    position: absolute;
    width: 100%;
    height: 100%;
    background-color: #f5f5f5;
  }
  .card{
    width: 750rpx;height: 380rpx;border-radius: 20rpx;display: flex;flex-direction: column;
  }
  .card_in_top{
    width: 100%;height: 30rpx;background-color: #f5f5f5;
  }
  .card_in_center{
    width: 735rpx;height: 80rpx;background-color: #ffffff;display: flex;flex-direction: row;align-items: center;justify-items: center;
  }
  .card_in_b{
    width: 735rpx;height: 208rpx;background-color: #ffffff;display: flex;flex-direction: row;align-items: center;
  }
  .result{
    width: 735rpx;height: 62rpx;background-color: #ffffff;display: flex;flex-direction: row;align-items: center;
  }
</style>
总结
在本文中,我们介绍了如何使用uniapp框架开发小程序订单页面UI。我们首先讲解了订单页面的设计原则和注意事项,然后介绍了uniapp框架的基本使用方法。接着,我们详细讲解了订单页面的UI设计,包括订单列表、订单详情、订单支付等。最后,我们总结了本文的主要内容,强调了订单页面UI设计的重要性,并提供了一些优化建议,希望能够帮助开发者更好地设计和开发小程序订单页面。
