使用 release-it 实现自动管理发布组件库
上一篇文章已经打包好我们的组件库了,而本篇文章将介绍如何发布一个组件库。当然本篇文章介绍的肯定不单单只是发布那么简单。
组件库发布
我们要发布的包名为打包后的 easyest,因此在 easyest 下执行pnpm init生成package.json
{
  "name": "easyest",
  "version": "1.0.0",
  "main": "lib/index.js",
  "module": "es/index.mjs",
  "files": [
    "es",
    "lib"
  ],
  "keywords": [
    "easyest",
    "vue3组件库"
  ],
  "sideEffects": [
    "**/*.css"
  ],
  "author": "小月",
  "license": "MIT",
  "description": "",
  "typings": "lib/index.d.ts",
}
解释一下其中的几个字段
- main
组件库入口文件
- module
如果使用组件库的环境支持 esmodule 则入口文件变成这个字段
- files
发布到 npm 上的文件目录
- sideEffects
忽略 tree shaking 带来副作用的代码,比如打包后组件代码中包含了
import "./xxx.css"
这样会使得构建工具无法知道这段代码是否有副作用(也就是会不会用到其它引入的文件中的代码),所以构建的时候就会全量打包代码从而失去 esmodule 的自动按需引入功能。因此加上 sideEffects 字段就可以告诉构建工具这段代码不会产生副作用,可以放心的 tree shaking
- typings
声明文件入口
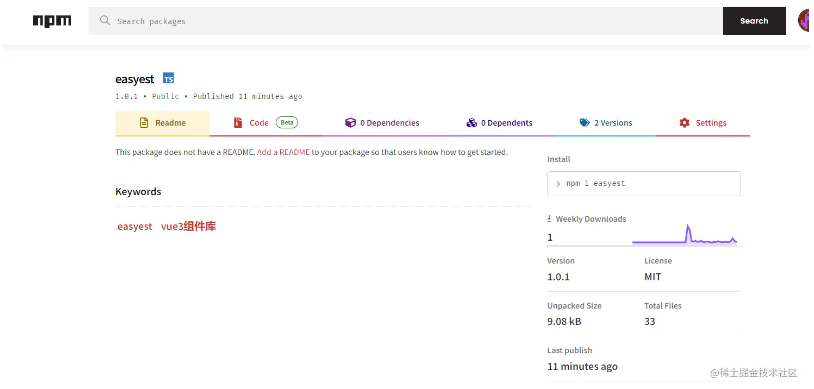
然后在打包目录下执行pnpm publish,注意此时会让你登录 npm 账户,如果没有的话直接去官网注册即可,发布之前要将代码提交到仓库或者加上后缀pnpm publish --no-git-checks即可,登录 npm 即可看到自己刚刚发布的包
自动发布
上面的发布每次更新我们需要手动去提升版本,手动去打 tag 等,非常不方便,接下来我们将使用release-it来管理这些
首先全局安装release-it
pnpm add release-it -D -w
然后在打包后文件 easyest 下的 package.json 中加入 script 脚本以及 git 仓库地址
{
  "name": "easyest",
  "version": "1.0.1",
  "main": "lib/index.js",
  "module": "es/index.mjs",
  "files": [
    "es",
    "lib"
  ],
  "keywords": [
    "easyest",
    "vue3组件库"
  ],
  "sideEffects": [
    "**/*.css"
  ],
  "author": "小月",
  "license": "MIT",
  "description": "",
  "typings": "lib/index.d.ts",
    "scripts": {
    "release": "release-it"
  },
  "repository": {
    "type": "git",
    "url": "https://github.com/qddidi/easyest"
  }
}
在 script 目录下新建 publish/index.ts 用于发布任务
import run from "../utils/run";
import { pkgPath } from "../utils/paths";
import { series } from "gulp";
export const publishComponent = async () => {
  run("release-it", `${pkgPath}/easyest`);
};
export default series(async () => publishComponent());
在根目录的 package.json 文件中新增 scripts 命令 gulp 执行 publish/index.ts
"scripts": {
    "build:easyest": "gulp -f packages/components/script/build/index.ts",
    "publish:easyest": "gulp -f packages/components/script/publish/index.ts"
  },
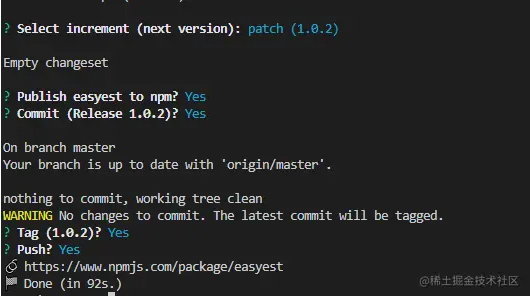
然后将我们的改动提交后执行pnpm run publish:easyest,就会发现他让我们选择如何提升版本,是否发布,是否加个tag等等
选择完之后我们的组件库就发布成功了,并且github上也成功加上了一个tag
本篇文章代码地址 使用 release-it 实现自动管理发布组件库


