Icon组件想必大家都不陌生,本篇文章将为大家详细介绍Icon组件是如何实现的。如果你想了解完整的组件库搭建,你可以点击使用Vite和TypeScript带你从零打造一个属于自己的Vue3组件库。
引入字体图标
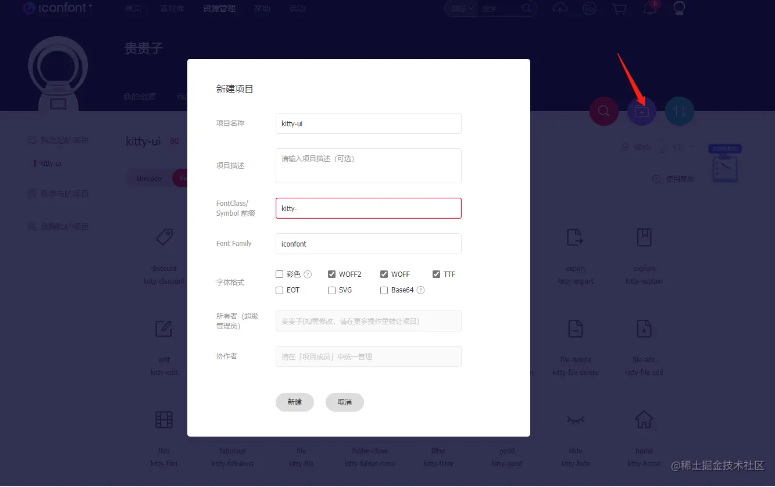
字体图标我们引用阿里的iconfont。首先注册登录然后进入 资源管理->我的项目->新建项目,如下图
我们将前缀改为我们组件库的名字(这里可以随便命名),后面我们的字体图标class前缀就是这里定义的。
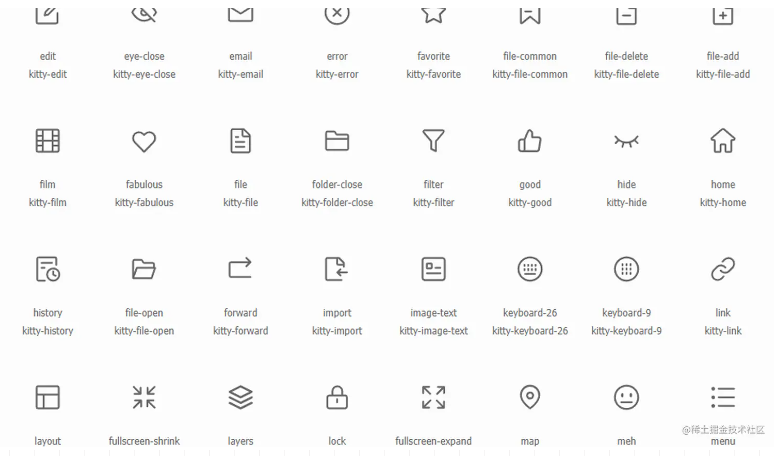
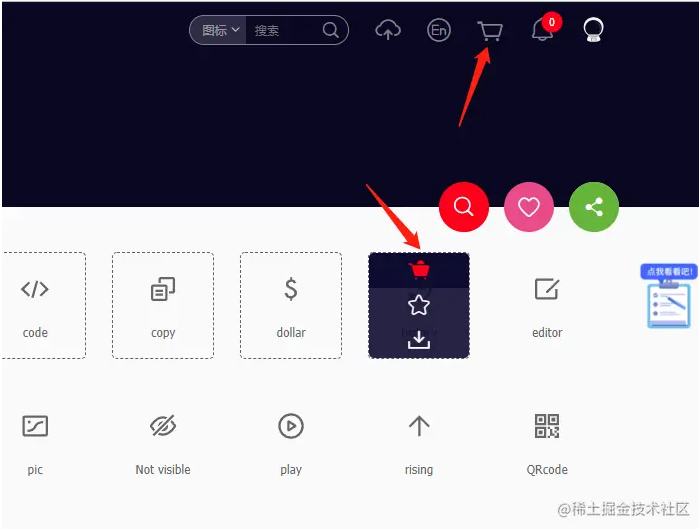
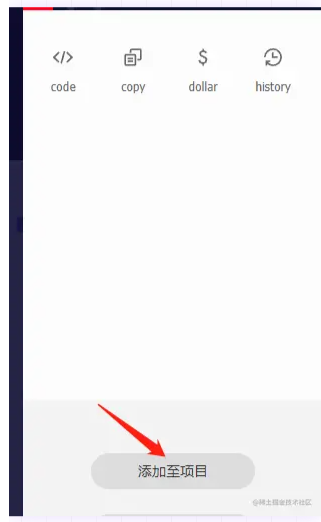
项目建好之后我们去 素材库下的图标库找一些自己喜欢的图标添加到购物车,然后再将我们购物车的图标添加至我们的项目中
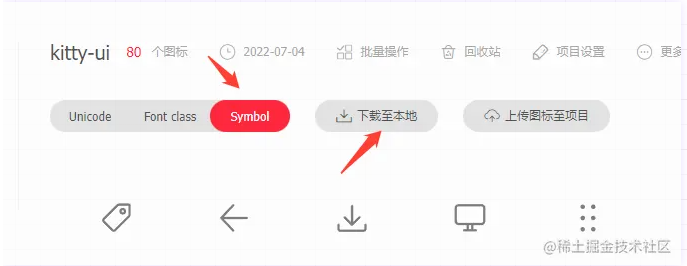
再回到我们的项目,将图标下载到我们本地,这里我们选择symbol方式引用
然后解压,这里我们只需要这些文件中的iconfont.js,我们将其复制放到我们的Icon项目下面,这里我将它放在Icon/font下。
Icon组件中使用图标
我们使用的是symbol方式引用,所以是使用是非常方便的。这是一种全新的使用方式,应该说这才是未来的主流,也是目前推荐的用法,它有以下特点
- 支持多色图标了,不再受单色限制。
- 通过一些技巧,支持像字体那样,通过font-size,color来调整样式。
- 兼容性较差,支持 ie9+,及现代浏览器。
- 浏览器渲染svg的性能一般,还不如png。
首先我们要先引入通用css样式
.icon {
       width: 1em; height: 1em;
       vertical-align: -0.15em;
       fill: currentColor;
       overflow: hidden;
    }
这里我们将其放在了Icon/style/index.less中
然后在组件中使用:
<svg class="icon" aria-hidden="true">
        <use xlink:href="kitty-xxx"></use>
    </svg>
动态渲染
因为我们的Icon需要支持传入不同name展示不同图标,所以我们需要将Icon组件完善一下
首先在Icon/types中定义我们的props类型
import { ExtractPropTypes } from 'vue'
export const iconProps = {
    name: {
        type: String
    }
}
export type IconProps = ExtractPropTypes<typeof iconProps>
然后将icon.vue修改为
<template>
    <svg class="icon" aria-hidden="true">
        <use :xlink:href="iconName"></use>
    </svg>
</template>
 <script lang="ts">
 import './font/iconfont.js'
 import './style/index.less'
 import { defineComponent, computed } from 'vue'
 import { iconProps } from './types'
 export default defineComponent({
     props: iconProps,
     setup(props) {
         const iconName = computed(() => {
             return `#kitty-${props.name}`
         })
         return {
             iconName
         };
     },
 });
 </script>
此时我们就能根据不同name展示不同图标了
组件引入Icon
引入一个Icon就很简单了,只需要传入一个name即可,比如我们在example/App.vue中使用如下
<template>
    <div>
        <Icon name="edit" />
        <Icon name="download" />
        <Icon name="forward" />
        <Icon name="history" />
        <Icon name="file" />
        <Icon name="link" />
        <Icon name="good" />
    </div>
</template>
<script lang="ts" setup>
import { Icon } from 'kitty-ui'
</script>
<style lang="less">
.icon {
    font-size: 36px;
    color: #666;
    margin-right: 20px;
}
</style>
显示效果如下图
徽标提示
我们可以设置dot属性后,让我们图标右上角展示一个小红点;设置badge属性后,会在图标右上角展示相应的徽标,所以我们先给我组件加两个属性:dot,badge。types.ts如下
import { ExtractPropTypes } from 'vue'
export const iconProps = {
    name: {
        type: String
    },
    dot: {
        type: Boolean
    },
    badge: {
        type: String
    }
}
export type IconProps = ExtractPropTypes<typeof iconProps>
然后我们根据这两个属性来展示我们不同的徽标,icon.vue修改如下
<template>
    <div class="kitty-icon">
        <svg class="icon" aria-hidden="true">
            <use :xlink:href="iconName"></use>
        </svg>
        <div v-if="dot" class="kitty-info" :class="styleDot">{{ badge }}</div>
    </div>
</template>
 <script lang="ts">
 import './font/iconfont.js'
 import './style/index.less'
 import { defineComponent, computed } from 'vue'
 import { iconProps } from './types'
 export default defineComponent({
     props: iconProps,
     setup(props) {
         const iconName = computed(() => {
             return `#kitty-${props.name}`
         })
         const styleDot = computed(() => {
             return {
                 [`kitty-dot`]: props.dot && !props.badge
             }
         })
         const badge = computed(() => {
             return props.badge
         })
         return {
             iconName,
             styleDot,
             badge
         };
     },
 });
 </script>
组件通过dot和badge来赋予徽标不同class,对应类名样式如下
.kitty-icon {
  display: inline-block;
  position: relative;
  .kitty-info {
    position: absolute;
    top: 8px;
    right: 0;
    box-sizing: border-box;
    min-width: 16px;
    padding: 0 3px;
    color: #fff;
    font-weight: 500;
    font-size: 12px;
    line-height: 1.2;
    text-align: center;
    border: 1px solid #fff;
    border-radius: 16px;
    background-color: #ee0a24;
    transform: translate(50%, -50%);
  }
  .kitty-dot {
    width: 8px;
    min-width: 0;
    height: 8px;
    background-color: #ee0a24;
    border-radius: 100%;
  }
}
App.vue中使用
<template>
    <div>
        <Icon name="comment" />
        <Icon name="comment" dot />
        <Icon name="comment" dot badge="1" />
    </div>
</template>
<script lang="ts" setup>
import { Icon } from 'kitty-ui'
</script>
<style lang="less">
.kitty-icon {
    font-size: 36px;
    color: #666;
    margin-right: 20px;
}
</style>
最终展示效果
图标颜色
Icon的color属性用来设置图标的颜色。这个比较好实现,这里直接通过style赋予图标颜色(不要忘记在types.ts中定义组件属性)
//icon.vue
<template>
    <div class="kitty-icon">
        <svg class="icon" :style="iconColor" aria-hidden="true">
            <use :xlink:href="iconName"></use>
        </svg>
    </div>
</template>
 <script lang="ts">
 import './font/iconfont.js'
 import './style/index.less'
 import { defineComponent, computed } from 'vue'
 import { iconProps } from './types'
 export default defineComponent({
     props: iconProps,
     setup(props) {
         const iconColor = computed(() => {
             return {
                 color: props.color
             }
         })
         return {
             iconColor
         };
     },
 });
 </script>
App.vue中使用
<template>
    <div>
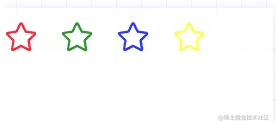
        <Icon name="favorite" color="red" />
        <Icon name="favorite" color="green" />
        <Icon name="favorite" color="blue" />
        <Icon name="favorite" color="yellow" />
    </div>
</template>
<script lang="ts" setup>
import { Icon } from 'kitty-ui'
</script>
<style lang="less">
.kitty-icon {
    font-size: 36px;
    color: #666;
    margin-right: 20px;
}
</style>
效果如下
最后
到这里一个Icon组件基本也就开发完了,如果你想了解更多组件的实现,你可以关注Vite+TypeScript从零搭建Vue3组件库 - 东方小月的专栏 - 掘金 (juejin.cn),将不定期的更新一些组件的实现。同时如果你发现文中有错误的地方或者有其它改进的地方欢迎指出,大家一起学习。
创作不易,你的点赞就是我的动力!如果感觉这篇文章对你有帮助的话就请点个赞吧,感谢~
