DeepSeek Harness(DSH)插件开发示例合集:最小插件、模型工具、事件监听、带 Config 配置与服务提供者五个可直接抄的示例,每个含目录结构、完整代码与运行方式。
本文转自 DSH Plugin Hub 插件市场
DSH plugin 开发示例比规范更好上手:五个示例(最小插件、模型工具、事件监听、带配置、提供服务)覆盖了插件开发的所有常见形态,每个都可以直接抄进 scratch-plugin/src/,用一个 --patch 覆盖层跑起来。 无论叫 DSH插件 还是 DeepSeek插件,跑的步骤完全一样。
五个示例共用同一套目录与运行方式,差别只在源码里注册了什么。先按三步把骨架跑通(来源):
- 建目录 —— 在检出根创建
scratch-plugin/src/。预期:目录结构如下。
deepseek-harness/            # 检出根(已完成 run-from-source)
└── scratch-plugin/
    ├── src/my-plugin.ts     # 下面五个示例都写在这里
    └── cordis.yml           # 覆盖层配置
- 写覆盖层配置 —— 创建
scratch-plugin/cordis.yml,name填插件源码的绝对路径:
# scratch-plugin/cordis.yml
- insert:
    - id: demo
      name: '/absolute/path/to/deepseek-harness/scratch-plugin/src/my-plugin.ts'
- 启动 —— 执行
pnpm dsh web --patch ./scratch-plugin/cordis.yml。预期:Web UI 起来,并把my-plugin.ts挂进插件树。
路径必须写绝对路径,patch 只贡献配置、不改变 loader 解析模块路径的 profile 目录。环境没搭好的先看 开发环境搭建。
DSH plugin 示例一:最小插件
用途:验证环境与加载链路。 只有一个会打日志的 apply:
import type {
    Context } from '@deepseek-ai/cordis'

export const name = 'hello-plugin'

export function apply(ctx: Context) {

  console.log('[hello-plugin] plugin loaded!')
}
预期结果:启动时终端打印 [hello-plugin] plugin loaded!。看不到这行就别往下走,先排查路径与构建。
DSH plugin 示例二:模型工具
用途:让模型能调用你的能力。 注意 inject 与 defineTool 三件套:
import type {
    Context } from '@deepseek-ai/cordis'
import {
    defineTool } from '@deepseek-ai/dsh-tools'

export const name = 'greet-tool'
export const inject = ['tools']

export function apply(ctx: Context) {

  ctx.tools.register(defineTool({

    name: 'greet',
    description: 'Greet someone by name.',
    parameters: {

      name: {
    type: 'string', required: true, description: 'The name to greet' },
    },
    output: {

      schema: {
    type: 'string' },
      render: (_args, value) => [{
    type: 'text', text: value }],
    },
    async execute(args) {

      return `Hello, ${
     args.name}!`
    },
  }))
}
预期结果:向模型输入「Use the greet tool to greet Ada.」,模型调用 greet 并拿到 Hello, Ada!。execute 契约与卡片渲染的完整规则见 怎么写工具插件。
DSH plugin 示例三:事件监听与自动清理
用途:在框架时机插入逻辑,并正确释放手动资源。 通过 ctx.on 注册监听、通过 ctx.effect 交出处置器:
import type {
    Context } from '@deepseek-ai/cordis'

export const name = 'heartbeat-plugin'

export function apply(ctx: Context) {

  ctx.effect(() => {

    const timer = setInterval(() => console.log('heartbeat'), 5000)
    // 返回的函数在插件卸载时执行。
    return () => clearInterval(timer)
  })
}
预期结果:插件运行后每 5 秒打印一次 heartbeat;卸载插件后定时器停止。把定时器直接写在 apply 里而不包 ctx.effect,插件卸载后仍会继续跑——这是最常见的资源泄漏来源。
DSH plugin 示例四:带配置的插件
用途:让用户能改你的行为。 声明 Config 类型与同名 schema,apply 接收第二个参数:
import type {
    Context } from '@deepseek-ai/cordis'
import Schema from '@deepseek-ai/schemastery'

export interface Config {

  greeting: string
  maxRetries: number
}

export const Config: Schema<Config> = Schema.object({

  greeting: Schema.string().default('Hello'),
  maxRetries: Schema.number().default(3),
})

export const name = 'configured-plugin'

export function apply(ctx: Context, config: Config) {

  console.log(`${
     config.greeting} (retries: ${
     config.maxRetries})`)
}
预期结果:不提供配置时打印默认值 Hello (retries: 3);提供部分配置时,未提供的字段被补上默认值。配置在界面上的展示见 插件配置怎么用。
DSH plugin 示例五:提供服务
用途:让其他插件调用你。 这时才需要类形态——构造函数里注册服务名,消费方用 inject 声明:
import {
    Service, type Context } from '@deepseek-ai/cordis'

export default class MetricsService extends Service {

  static inject = ['tools']

  constructor(ctx: Context) {

    super(ctx, 'metrics')
    // 在这里做同步初始化。
  }

  count(name: string) {

    console.log(`[metrics] ${
     name}`)
  }
}
预期结果:插件加载后,其他插件用 export const inject = ['metrics'] 即可在 apply 里拿到 ctx.metrics。只有对外提供服务时才用类形态,普通插件用函数形态更简单(来源)。
从 DSH plugin 示例到可安装的包
示例只在检出里跑通,还不能分发。 要变成可安装的包,需要补三样:package.json 里声明 main(指向入口)、type: module、files(包含入口与 cordis.patch.yml)与 dsh.bundle.patch(指向该 patch 文件),并把它放进一个带 cordis.patch.yml 的工程目录。
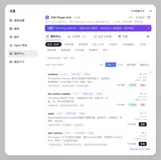
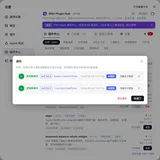
发布路径:先照 打包成 bundle 生成可安装产物,再用 发布到插件中心 提交收录;装好后可在 DSH Plugin Hub 的已安装列表核对插件与配置项。写代码时的硬性自检项见 开发规范。
常见问题
DSH plugin 开发示例里,哪个最适合先照着跑一遍?
DSH plugin 开发示例里先跑最小插件:只有 name 与一个会打日志的 apply,用 --patch 覆盖层挂进 Web UI,看到日志就说明环境与加载链路都通了。官方也把最小插件放在教程第一步,因为后面所有示例都只是往这个骨架里加注册代码(来源:官方「你的第一个插件」)。
DSH plugin 示例里的目录结构应该怎么摆?
DSH plugin 示例的目录结构分两阶段:本地调试阶段官方从仓库根创建 scratch-plugin/src/,用绝对路径挂载;准备分发时再把工程独立出来,带上 package.json(main、type: module、files、dsh.bundle.patch)与 cordis.patch.yml。两者不是二选一:先在检出里调通,再把它抽成可安装的包(来源:官方「你的第一个插件」与「打包与安装插件」)。
有没有一段示例能同时展示工具与配置?
想在一个 DSH plugin 里同时展示工具与配置,把工具示例与配置示例叠起来就是:先声明 inject = ['tools'] 与 Config schema,再在 apply(ctx, config) 里用 config 的值构造 defineTool 的 description 或行为。注意 apply 的第二个参数来自框架按 schema 补齐后的配置对象,可直接使用(来源:官方「构建一个工具」与「插件配置」)。
DSH plugin 服务示例里的类写法和普通插件有什么区别?
DSH plugin 的服务示例用类形态:export default class ... extends Service,在构造函数里 super(ctx, 'myService') 把服务名注册进上下文,其他插件通过 inject: ['myService'] 消费。普通插件注册能力就结束,服务插件还对外提供实例——所以只有「别的插件要调用你」时才用类形态(来源:官方「服务与依赖」)。
本文转自 DSH Plugin Hub 插件市场,版权归属 DSH Plugin Hub 插件市场。
分类:插件开发
原文地址:https://dsh-plugin.org/zh/tutorials/develop-plugin-example