一前言
这次是第三次发MVC了,也是最终版本,结合前两次的的MVC,出一期最终版本的增删改查,就是代码还是之前一样的代码,不过这一期是简易版的增删改查
防止有些宝子找不到,我把链接放这啦~
http://t.csdn.cn/N8OWb 这个里面是xml文件的内容和model类
http://t.csdn.cn/cjCLB 这个里面就是Dao方法的详解
http://t.csdn.cn/HCnz8 这个是分页的详解
http://t.csdn.cn/jbSqy 这个是自定义MVC的详解
大概的就是这样的啦~还有不懂得欢迎来评论区或者私信解答哦~
二.导出架包
把模型,就是我前面以model结尾命名的类和Action,ActionServlet,ModelDriver把这类导成架包,在第二篇也把这里面的东西做活数据了
大家根据下方图片进行操作即可
这样子就完成啦!!!
三.增删改查的方法
首先,在写方法这里我运用了BaseDao
3.1 BaseDao方法
package com.yinzi.utils;
import java.lang.reflect.Field;
import java.sql.Connection;
import java.sql.PreparedStatement;
import java.sql.ResultSet;
import java.util.ArrayList;
import java.util.List;
import com.yinzi.utils.DBAccess;
import com.yinzi.utils.PageBean;
public class BaseDao<T> {
  /**
   * 带分页的模糊查询
   * @param c
   * @param sql
   * @param pagebean
   * @return
   * @throws Exception
   */
  public List<T> executeQuery(Class c ,String sql,PageBean pagebean) throws Exception{
    //创建集合保存数据
    List<T> list = new ArrayList<>();
    //获取连接
    Connection conn =null;
    //执行SQL语句
    PreparedStatement ps = null;
    //结果集对象
    ResultSet rs =null;
    //判断是否需要分页
    if(pagebean!=null && pagebean.isPagination()) {//如果需要分页,就拼接SQL语句
      String Countsql=getCountsql(sql);//获取总数量
      conn = DBAccess.getConnection();
      ps = conn.prepareStatement(Countsql);//执行改变后的SQL语句
      rs = ps.executeQuery();
      if(rs.next()) {
        pagebean.setTotal(rs.getObject("n").toString());
      }
      String pagesql=getPagesql(sql,pagebean);
      conn = DBAccess.getConnection();
      ps = conn.prepareStatement(pagesql);//执行改变后的SQL语句
      rs = ps.executeQuery();
    }else {//否则不需要,就按照原sql语句执行
      conn = DBAccess.getConnection();
      ps = conn.prepareStatement(sql);
      rs = ps.executeQuery();
    }
    //循环遍历数据
    while(rs.next()) {
      T t = (T) c.newInstance();
      //拿到所有的属性
      Field[] fields = c.getDeclaredFields();
      for (Field field : fields) {
        //打开访问权限
        field.setAccessible(true);
        field.set(t,rs.getObject(field.getName()));
      }
      list.add(t);
    }
    return list;
  }
  /**
   * 最终SQL语句
   * @param sql
   * @param pagebean
   * @return
   */
  private String getPagesql(String sql, PageBean pagebean) {
    return sql+" limit "+pagebean.getStartIndex()+","+pagebean.getRows();
  }
  /**
   * 总记录数
   * @param sql
   * @return
   */
  private String getCountsql(String sql) {
    return "select count(1) as n from ("+sql+") t";
  }
  /**
   *  增删改的方法
   * @param sql sql语句
   * @param t 实体类
   * @param attr 实体类对应的属性
   * @return
   * @throws Exception
   */
  public int excuteUpdate(String sql ,T t,String[] attr) throws Exception {
    Connection conn=DBAccess.getConnection();//连接数据库
    PreparedStatement ps=conn.prepareStatement(sql);//执行sql语句
    //循环拿到属性
    for (int i = 0; i < attr.length; i++) {
      //一切反射从获取类类开始
      Field f = t.getClass().getDeclaredField(attr[i]);
      //打开访问权限
      f.setAccessible(true);
      ps.setObject(i+1, f.get(t));
    }
    return ps.executeUpdate();
  }
}
3.1.1详解BaseDao
查询的详解在上一篇了哦~嘿嘿~~~
3.2增删改查方法
这样子可以看到,增删改查的方法的代码就会的很少了,几乎两行代码就可以解决
package com.yinzi.dao;
import java.util.List;
import com.yinzi.entity.Book;
import com.yinzi.utils.BaseDao;
import com.yinzi.utils.PageBean;
import com.yinzi.utils.StringUtils;
/**
 * 增删改查
 * @author yinzi
 * @2023年7月3日
 *
 */
public class BookDao extends BaseDao<Book>{
  /**
   * 查询
   * @param book
   * @param pagebean
   * @return
   * @throws Exception
   */
  public List<Book> query(Book book, PageBean pagebean) throws Exception {
    String sql="select * from t_mvc_book where 1=1";
    //获取名字和id
    String bname = book.getBname();
    int bid = book.getBid();
    //判断加Sql语句(模糊查询)
    if(StringUtils.isNotBlank(bname)) {//如果名字不为空
      sql+=" and bname like '%"+bname+"%'";
    }
    if(bid!=0) {//如果id不等于0,说明前台传id了
      sql+=" and bid ="+bid;
    }
    return super.executeQuery(Book.class, sql, pagebean);
  }
  /**
   * 新增
   * @param book
   * @return
   * @throws Exception
   */
  public int add(Book book) throws Exception {
    //sql语句
    String sql="insert into t_mvc_book values(?,?,?)";
    //返回
    return super.excuteUpdate(sql, book, new String[] {"bid","bname","price"});
  }
  /**
   * 删除
   * @param book
   * @return
   * @throws Exception
   */
  public int del(Book book) throws Exception {
    //sql语句
    String sql="delete from t_mvc_book where bid=?";
    //返回
    return super.excuteUpdate(sql, book, new String[] {"bid"});
  }
  /**
   * 修改
   * @param book
   * @return
   * @throws Exception
   */
  public int edit(Book book) throws Exception {
    //sql语句
    String sql="update t_mvc_book set bname=?,price=? where bid=?";
    //返回
    return super.excuteUpdate(sql, book, new String[] {"bname","price","bid"});
  }
}
四.配置文件
4.1 mvc.xml文件
这个name就是增删改查方法里对应的返回的名字,根据这个去判断是否需要重定向还是转发,并跳转页面
<?xml version="1.0" encoding="UTF-8"?>
<config>
  <action path="/book" type="com.yinzi.Servlet.BookAction">
<!--   查询:BookList.jsp    返回值:list -->
<!--   * 增删改确定:book.action?methodName=list    返回值:toList -->
<!--   * 增加修改跳转对应界面:bookEdit.jsp      返回值:toEdit -->
    <forward name="list" path="/book.jsp" redirect="false" />
    <forward name="toList" path="/book.action?methodName=list" redirect="true" />
    <forward name="toEdit" path="/BookEdit.jsp" redirect="false" />
  </action>
</config>
4.2 web.xml文件
这个里面放入中央控制器,就是架包里面的东西
<?xml version="1.0" encoding="UTF-8"?>
<web-app xmlns:xsi="http://www.w3.org/2001/XMLSchema-instance"
  xmlns="http://xmlns.jcp.org/xml/ns/javaee"
  xsi:schemaLocation="http://xmlns.jcp.org/xml/ns/javaee http://xmlns.jcp.org/xml/ns/javaee/web-app_3_1.xsd"
  id="WebApp_ID" version="3.1">
  <display-name>mvc_crud</display-name>
  <welcome-file-list>
    <welcome-file>index.html</welcome-file>
    <welcome-file>index.htm</welcome-file>
    <welcome-file>index.jsp</welcome-file>
    <welcome-file>default.html</welcome-file>
    <welcome-file>default.htm</welcome-file>
    <welcome-file>default.jsp</welcome-file>
  </welcome-file-list>
  <servlet>
    <servlet-name>mvc</servlet-name>
    <servlet-class>com.zking.framework.DispatchServlet</servlet-class>
    <init-param>
      <param-name>configurationLocation</param-name>
      <param-value>/mvc.xml</param-value>
    </init-param>
  </servlet>
  <servlet-mapping>
    <servlet-name>mvc</servlet-name>
    <url-pattern>*.action</url-pattern>
  </servlet-mapping>
</web-app>
4.3 .tld文件
这个就是分页的标签
<?xml version="1.0" encoding="UTF-8" ?>
<taglib xmlns="http://java.sun.com/xml/ns/j2ee"
    xmlns:xsi="http://www.w3.org/2001/XMLSchema-instance"
    xsi:schemaLocation="http://java.sun.com/xml/ns/j2ee http://java.sun.com/xml/ns/j2ee/web-jsptaglibrary_2_0.xsd"
    version="2.0">
  <description>yinzi 1.1 core library</description>
  <display-name>yinzi core</display-name>
  <tlib-version>1.1</tlib-version>
  <short-name>y</short-name>
  <uri>http://yinzi</uri>
  <tag>
    <name>page</name>
    <tag-class>com.yinzi.Tag.PageTag</tag-class>
    <body-content>JSP</body-content>
    <attribute>
        <name>pageBean</name>
        <required>true</required>
        <rtexprvalue>true</rtexprvalue>
    </attribute>
  </tag>
</taglib>
最后在前端展示即可
<%@ page language="java" contentType="text/html; charset=UTF-8"
  pageEncoding="UTF-8"%>
<%@ taglib uri="http://java.sun.com/jsp/jstl/core" prefix="c" %>
<%@ taglib uri="http://yinzi" prefix="y" %>
<!DOCTYPE html PUBLIC "-//W3C//DTD HTML 4.01 Transitional//EN" "http://www.w3.org/TR/html4/loose.dtd">
<html>
<head>
<meta http-equiv="Content-Type" content="text/html; charset=UTF-8">
<link
  href="https://cdn.bootcdn.net/ajax/libs/twitter-bootstrap/4.5.0/css/bootstrap.css"
  rel="stylesheet">
<script
  src="https://cdn.bootcdn.net/ajax/libs/twitter-bootstrap/4.5.0/js/bootstrap.js"></script>
<title>书籍列表</title>
<style type="text/css">
.page-item input {
  padding: 0;
  width: 40px;
  height: 100%;
  text-align: center;
  margin: 0 6px;
}
.page-item input, .page-item b {
  line-height: 38px;
  float: left;
  font-weight: 400;
}
.page-item.go-input {
  margin: 0 10px;
}
</style>
</head>
<body>
  <!-- 搜索框 -->
  <form class="form-inline" action="${pageContext.request.contextPath }/book.action?methodName=list" method="post">
    <div class="form-group mb-2">
      <input type="text" class="form-control-plaintext" name="bname"
        placeholder="请输入书籍名称">
    </div>
    <button type="submit" class="btn btn-primary mb-2">查询</button>
  </form>
  <!-- 表格内容 -->
  <table class="table table-striped ">
    <thead>
      <tr>
        <th scope="col">书籍ID</th>
        <th scope="col">书籍名</th>
        <th scope="col">价格</th>
      </tr>
    </thead>
    <tbody>
      <c:forEach items="${query }" var="b">
      <tr>
        <td>${b.bid }</td>
        <td>${b.bname }</td>
        <td>${b.price }</td>
      </tr>
      </c:forEach>
    </tbody>
  </table>
  <y:page pageBean="${pageBean }"></y:page>
</body>
</html>
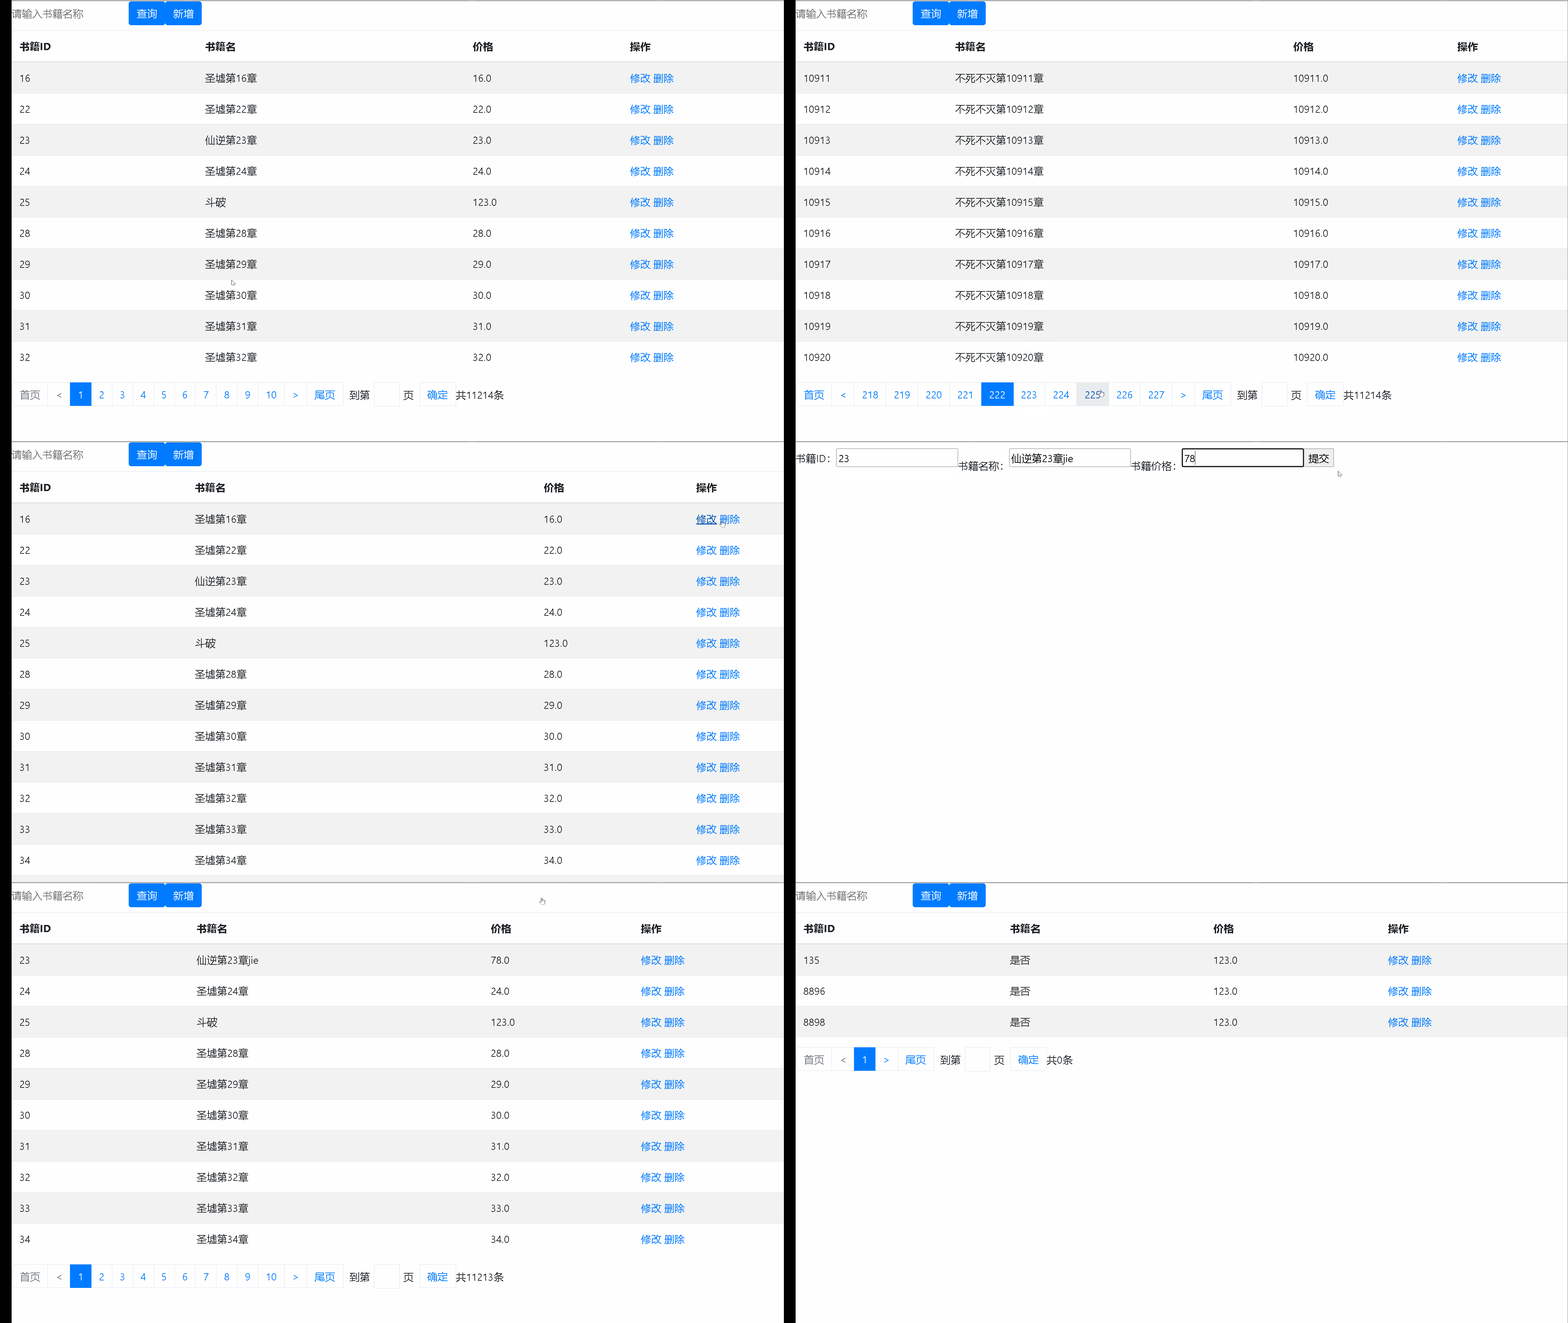
运行出来的结果为:
因为这篇文章是基于前面两次的文章写的,写的就是一些展示页面,主要的就是配置文件啦~,很多东西在前面已经写过啦~,所以这里就没有再写了,有不懂的宝子,欢迎私信或者评论区留下您的问题哦~都会一一回复的 ,里面的配置文件也是之前有提到过的,关注我了解更多知识~


