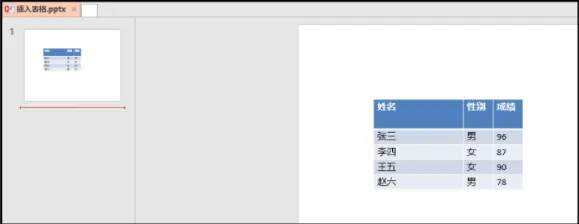
⑥ 添加表格
shapes.add_table(rows, cols, left, top, width, height)
from pptx import Presentation
from pptx.util import Cm, Pt
prs = Presentation()
# 使用第七个版式
black_slide_layout = prs.slide_layouts[6]
slide = prs.slides.add_slide(black_slide_layout)
shapes = slide.shapes
rows, cols = 5, 3
left = top = Cm(5)
width = Cm(18)
height = Cm(3)
table = shapes.add_table(rows, cols, left, top, width, height).table
table.columns[0].width = Cm(6)
table.columns[1].width = Cm(2)
table.columns[2].width = Cm(2)
table.rows[0].height = Cm(2)
data = [
    ["姓名","性别","成绩"],
    ["张三","男",96],
    ["李四","女",87],
    ["王五","女",90],
    ["赵六","男",78]
]
for row in range(rows):
    for col in range(cols):
        table.cell(row,col).text = str(data[row][col])
prs.save("插入表格.pptx")
结果如下:
5、PPT文档内容样式批量调整
1)文本框位置的调整
上面我们已经知道怎么添加文本框,现在我们需要做的就是,怎么调整文本框的位置。
from pptx import Presentation
from pptx.util import Cm, Pt
from pptx.enum.text import MSO_ANCHOR, MSO_AUTO_SIZE
prs = Presentation()
# 使用第七个版式
black_slide_layout = prs.slide_layouts[6]
slide = prs.slides.add_slide(black_slide_layout)
left = top = width = height = Cm(3)
text_box = slide.shapes.add_textbox(left, top, width, height)
tf = text_box.text_frame
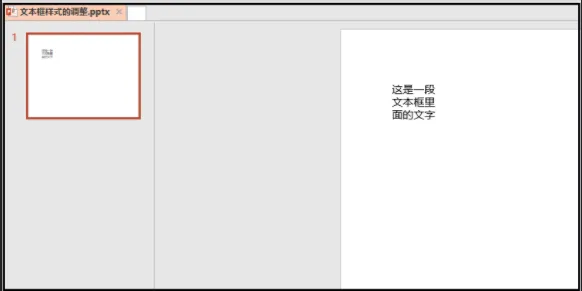
tf.text = "这是一段文本框里面的文字"
# ----------------------------------------- #
tf.margin_bottom = Cm(0.1) # 下边距
tf.margin_left = 0 # 下边距
# 一定要导入MSO_ANCHOR这个库
tf.vertical_anchor = MSO_ANCHOR.BOTTOM # 对齐文本方式:底端对齐
tf.word_wrap = True # 框中的文字自动换行
prs.save("文本框样式的调整.pptx")
结果如下:
2)文本框背景颜色调整
from pptx import Presentation
from pptx.util import Cm, Pt
from pptx.enum.text import MSO_ANCHOR, MSO_AUTO_SIZE
from pptx.dml.color import RGBColor
prs = Presentation()
# 使用第七个版式
black_slide_layout = prs.slide_layouts[6]
slide = prs.slides.add_slide(black_slide_layout)
left = top = width = height = Cm(3)
text_box = slide.shapes.add_textbox(left, top, width, height)
tf = text_box.text_frame
tf.text = "这是一段文本框里面的文字"
# -------------------------------------- #
tf.margin_bottom = Cm(0.1) # 下边距
tf.margin_left = 0 # 下边距
tf.vertical_anchor = MSO_ANCHOR.BOTTOM
tf.word_wrap = True # 框中的文字自动换行
# -------------------------------------- #
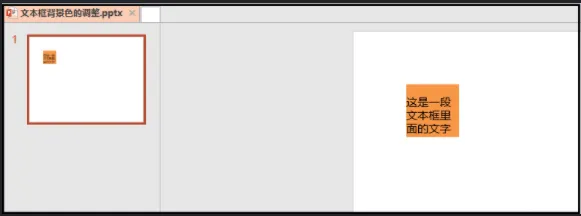
fill = text_box.fill
fill.solid()
# 使用之前一定要导入RGBColor这个库
fill.fore_color.rgb = RGBColor(247, 150, 70)
prs.save("文本框背景色的调整.pptx")
结果如下:
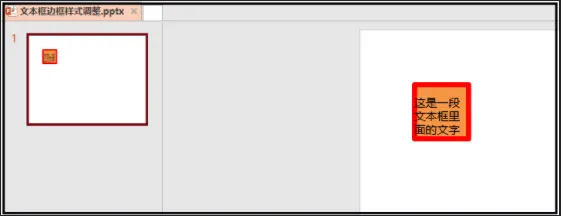
3)文本框边框样式调整
from pptx import Presentation
from pptx.util import Cm, Pt
from pptx.enum.text import MSO_ANCHOR, MSO_AUTO_SIZE
from pptx.dml.color import RGBColor
prs = Presentation()
# 使用第七个版式
black_slide_layout = prs.slide_layouts[6]
slide = prs.slides.add_slide(black_slide_layout)
left = top = width = height = Cm(3)
text_box = slide.shapes.add_textbox(left, top, width, height)
tf = text_box.text_frame
tf.text = "这是一段文本框里面的文字"
# -------------------------------------- #
tf.margin_bottom = Cm(0.1) # 下边距
tf.margin_left = 0 # 下边距
tf.vertical_anchor = MSO_ANCHOR.BOTTOM
tf.word_wrap = True # 框中的文字自动换行
# -------------------------------------- #
fill = text_box.fill
fill.solid()
# 使用之前一定要导入RGBColor这个库
fill.fore_color.rgb = RGBColor(247, 150, 70)
# -------------------------------------- #
line = text_box.line
line.color.rgb = RGBColor(255, 0, 0)
line.width = Cm(0.3)
prs.save("文本框边框样式调整.pptx")
结果如下:
4)段落对其调整
from pptx import Presentation
from pptx.enum.text import PP_ALIGN
prs = Presentation()
# 使用第七个版式
black_slide_layout = prs.slide_layouts[6]
slide = prs.slides.add_slide(black_slide_layout)
left = top = width = height = Cm(3)
text_box = slide.shapes.add_textbox(left, top, width, height)
tf = text_box.text_frame
# ---------------------------- #
p = tf.add_paragraph()
p.text = "这是第二段文字"
p.alignment = PP_ALIGN.LEFT
prs.save("段落对其调整.pptx")
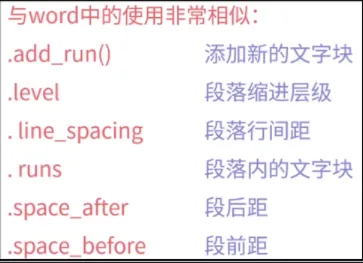
当然这里还有一些其他样式的调整,和word很类似,就不一一叙述了。
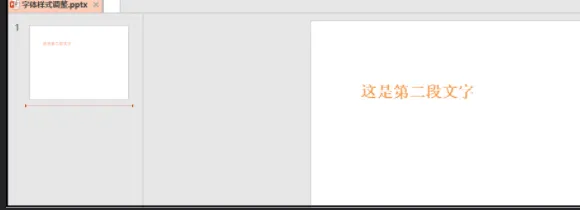
5)字体样式调整

代码如下:
from pptx import Presentation
from pptx.util import Cm, Pt
from pptx.enum.text import MSO_ANCHOR, MSO_AUTO_SIZE
from pptx.dml.color import RGBColor
from pptx.enum.text import PP_ALIGN
prs = Presentation()
# 使用第七个版式
black_slide_layout = prs.slide_layouts[6]
slide = prs.slides.add_slide(black_slide_layout)
left = top = width = height = Cm(3)
text_box = slide.shapes.add_textbox(left, top, width, height)
tf = text_box.text_frame
# ---------------------------- #
p = tf.add_paragraph()
p.text = "这是第二段文字"
p.alignment = PP_ALIGN.LEFT
# ------------------------------------- #
p.font.bold = True
p.font.name = "宋体"
p.font.color.rgb = RGBColor(247, 150, 70)
p.font.size = Pt(30)
prs.save("字体样式调整.pptx")
结果如下: