
目录
apt 包更新, 安装apt-transport-https\ca-certificates\curl
更新apt 包, 安装kubelet, kubeadm and kubectl
安装环境
vmware
参考在win10上使用VMware Pro16 安装 CentOS 7.9 设置静态IP 可以访问外网_琦彦-CSDN博客中安装vmware 部分
比较简单, 不再赘述
ubuntu
镜像下载
Ubuntu 20.04.3 LTS (Focal Fossa)
https://mirrors.bupt.edu.cn/ubuntu-releases/20.04.3/ubuntu-20.04.3-desktop-amd64.iso
安装过程比较简单, 不再赘述
我的虚拟机信息
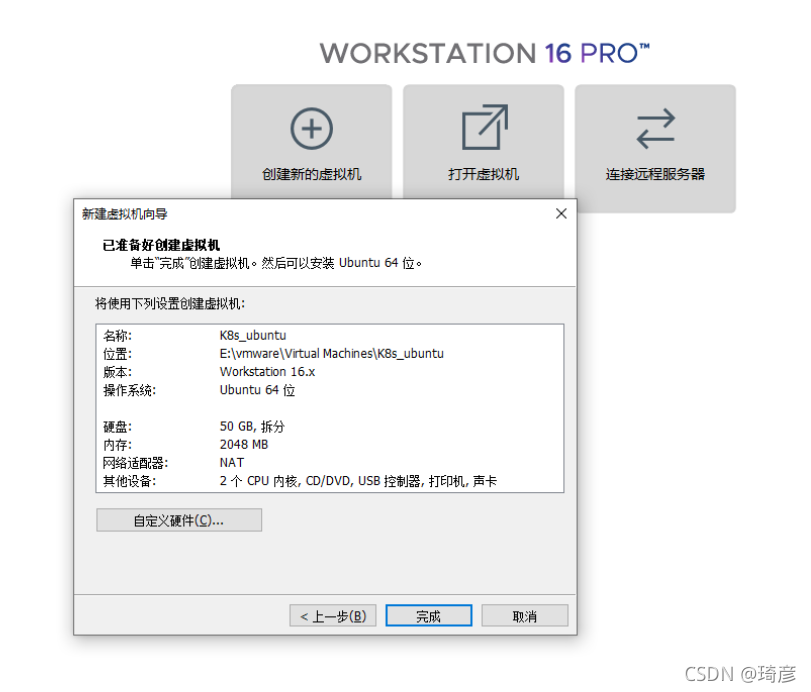
按照提示, 一步步安装

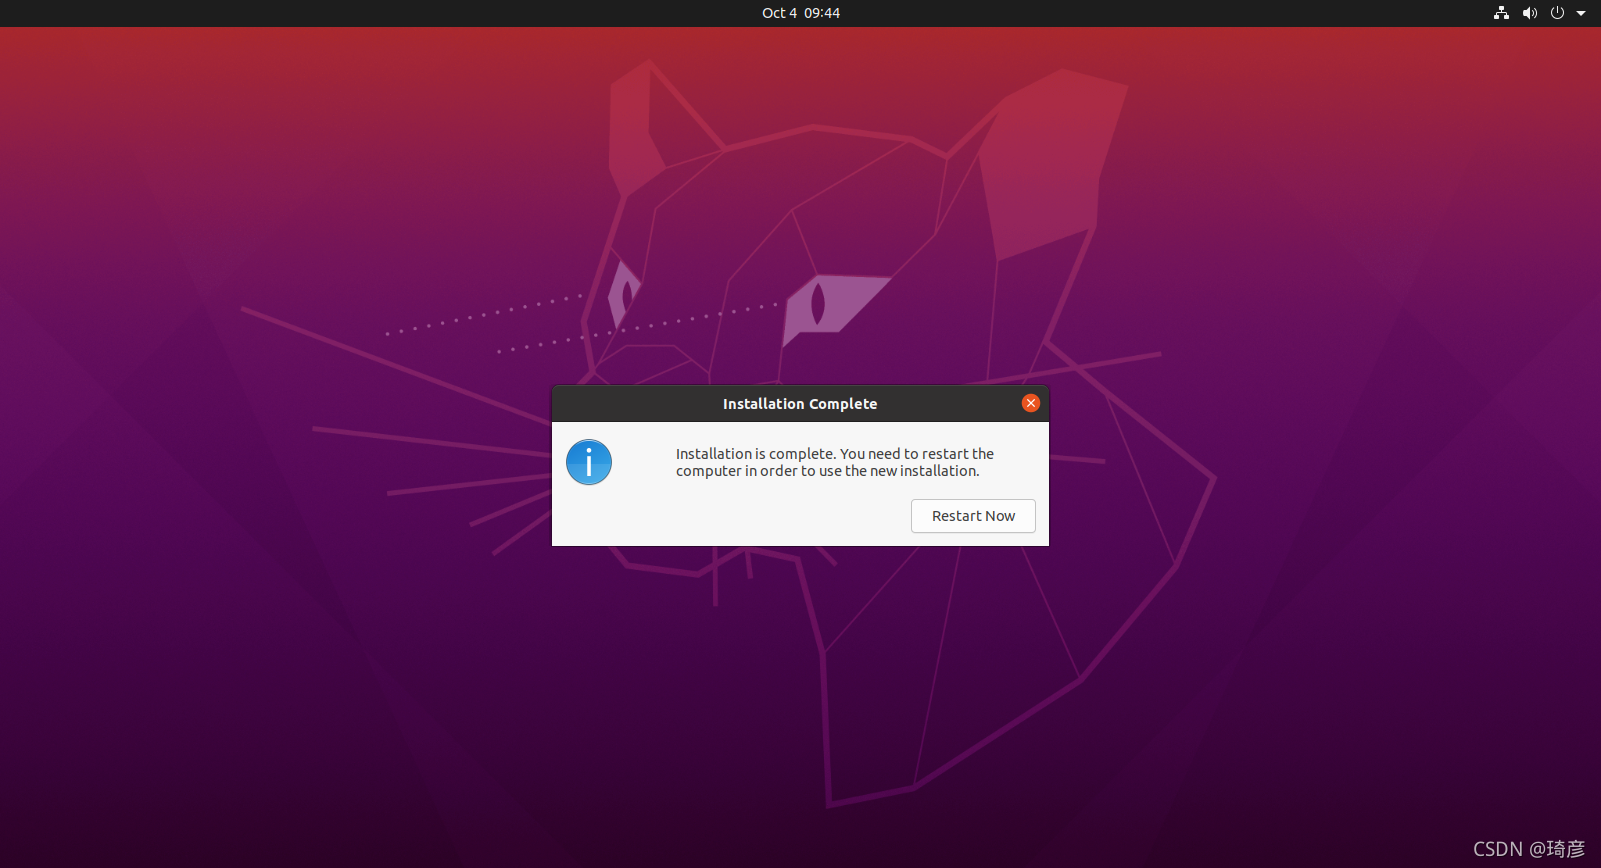
安装完成的画面
安装Ubuntu后必做的几件事情
静态IP
配置网络修改/etc/netplan/00-installer-config.yaml如下,我这网卡是ens33
# Let NetworkManager manage all devices on this system
network:
  version: 2
  renderer: NetworkManager
  ethernets:
    ens33:  # change your's
      dhcp4: yes
      addresses: [192.168.172.129/24]      # change your's
      gateway4: 192.168.172.2             # change your's
      nameservers:
        addresses: [114.114.114.114]      # change your's
保存后运行
netplan apply
可以使用ip a查看修改情况,然后取消系统自带的systemd-resolved.service这个dns解析服务,是可选的
允许root使用ssh远程登录终端
测试版本使用的Ubuntu 20.04,Ubuntu 16.4以上版本都可以这样配置。
最简单的方法:直接安装openssh-server,然后测试时候可以ssh登录,如果不可以,请使用下面的方法进行配置。
sudo apt install openssh-server
1. 设置root密码
执行命令后,依次输入当前登录用户密码,要设置的root密码,确认root密码
sudo passwd root
为了方便将密码设置为123456即可
 这样还不能远程登录,需要修改配置文件
2. 修改ssh配置文件
如果没有安装ssh-server,执行安装命令,已经安装的跳过即可
sudo apt install openssh-server
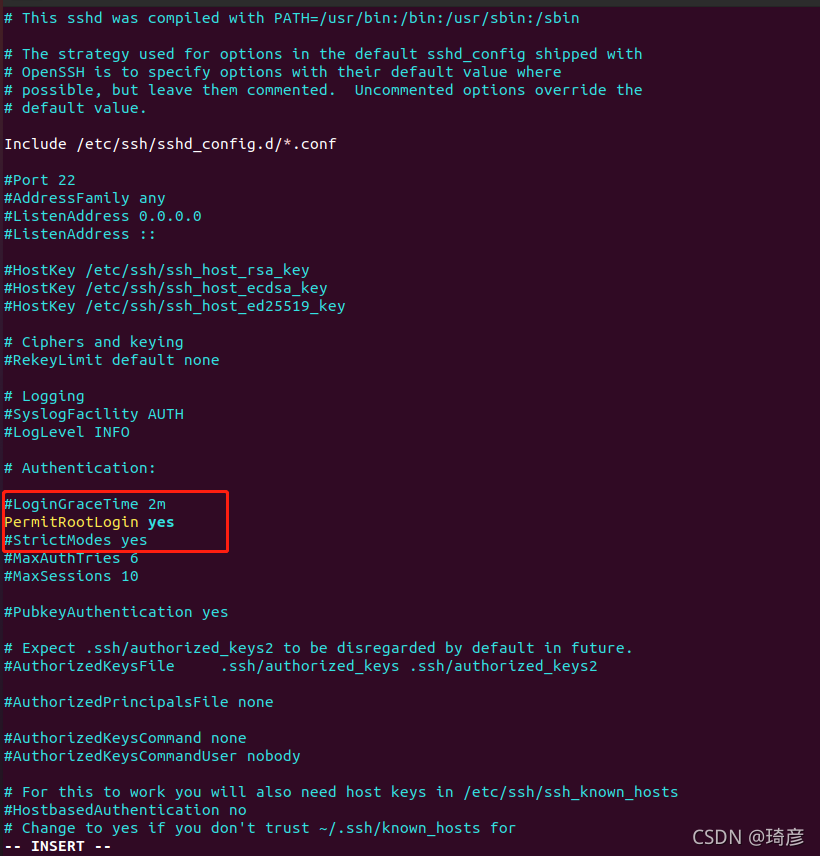
修改配置文件
在vim中搜索定位PermitRootLogin,可直接查找:
/PermitRootLogin
修改以下配置: 33 #LoginGraceTime 2m 34 #PermitRootLogin prohibit-password 35 #StrictModes yes 36 #MaxAuthTries 6 37 #MaxSessions 10
修改为:
 LoginGraceTime 2m
 PermitRootLogin yes
 StrictModes yes
 #MaxAuthTries 6
 #MaxSessions 10
3. 重启ssh,使配置生效
sudo service ssh restart
现在可是使用root用户登录ssh了!!!
A stop job is running for snappy daemon
关机或重启会遇到A stop job is running for snappy daemon这问题,
为了能够快速重启或关机修改配置文件
vim /etc/systemd/system.conf
修改
DefaultTimeoutStartSec=3s
DefaultTimeoutStopSec=3s
执行下面这条命令使其生效
systemctl daemon-reload
关闭防火墙
查看防火墙状态 inactive说明是未激活
sudo ufw status
开机不启动防火墙,重启即可生效
sudo ufw disable
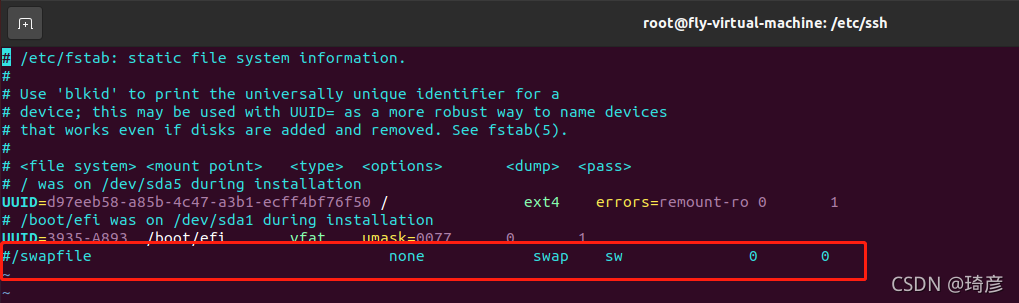
关闭Swap
Linux的Swap内存交换机制是一定要关闭的,否则会因为内存交换而影响性能以及稳定性。 Kubernetes 1.8开始要求关闭系统的Swap,如果不关闭,默认配置下kubelet将无法启动。 执行swapoff -a可临时关闭,但系统重启后恢复 编辑/etc/fstab,注释掉包含swap的那一行即可,重启后可永久关闭,如下所示
Cenos7
vim /etc/fstab /dev/mapper/centos-root / xfs defaults 0 0 UUID=20ca01ff-c5eb-47bc-99a0-6527b8cb246e /boot xfs defaults 0 0 # /dev/mapper/centos-swap swap
Ubuntu20.4
或直接执行
sed -i '/ swap / s/^/#/' /etc/fstab
备注
linux下通过sed命令直接修改文件内容
1、我想替换文件中的 11为 12,可以使用
*sed 's/11/12/g' xxx.log这种方式,其实并没有修改build.xml文件的内容。如果想保存修改,通常的做法就需要重定向到另外的一个文件
sed 's/11/12/g' xxx.log > xxx.log .tmp这样,xxx.log .tmp文件就是修改后的文件. 如果无误,那么就可以用mv xxx.log .tmp xxx.log覆盖原文件。*2、如果想直接修改源文件,而没有这样的过程,可以用下面的命令 sed -i 's/11/12/g' xxx.log
3、还有一个更简单的方法 sed -in-place -e 's/abc/cba/g' build.xml
关闭成功后,使用top命令查看,如下图所示表示正常
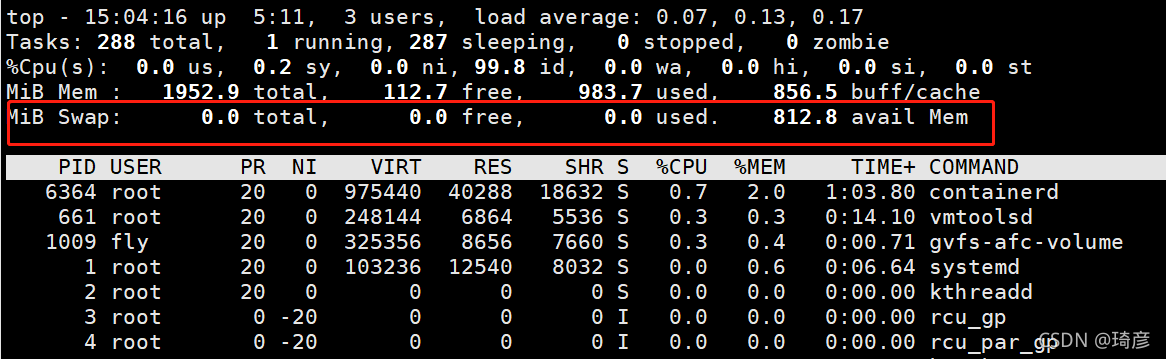
或者使用free -mh命令查看,如下图所示表示正常

Docker
安装 docker
apt install docker.io
更新 cgroupdriver 为systemd
sudo tee /etc/docker/daemon.json <<-'EOF' { "registry-mirrors": ["https://uy35zvn6.mirror.aliyuncs.com"], "exec-opts": ["native.cgroupdriver=systemd"] } EOF systemctl daemon-reload systemctl restart docker
备注
tee命令用法
用途说明
在执行Linux命令时,我们可以把输出重定向到文件中,比如 ls >a.txt,这时我们就不能看到输出了,如果我们既想把输出保存到文件中,又想在屏幕上看到输出内容,就可以使用tee命令了。tee命令读取标准输入,把这些内容同时输出到标准输出和(多个)文件中。要注意的是:在使用管道线时,前一个命令的标准错误输出不会被tee读取。
常用参数
格式:
tee只输出到标准输出,因为没有指定文件嘛
格式:
tee file输出到标准输出的同时,保存到文件file中。如果文件不存在,则创建;如果已经存在,则覆盖之
格式:
tee -a file输出到标准输出的同时,追加到文件file中。如果文件不存在,则创建;如果已经存在,就在末尾追加内容,而不是覆盖
格式:
tee -输出到标准输出两次
格式:
tee file1 file2 -输出到标准输出两次,同时保存到file1和file2中
<:输入重定向>:输出重定向>>:输出重定向,进行追加,不会覆盖之前内容
<<:标准输入来自命令行的一对分隔号的中间内容.
<<-:If the redirection operator is <<-, then all leading tab characters are stripped from input lines and the line containing delimiter. This allows here-documents within shell scripts to be indented in a natural fashion.“<< EOF ”的作用是在命令执行过程中用户自定义输入,它类似于起到一个临时文件的作用,只是比使用文件更方便灵活
初学者的Linux tee命令解释(6个例子)
/etc/docker/daemon.json 配置说明
Linux 上配置文件的默认位置是 /etc/docker/daemon.json. 该--config-file标志可用于指定非默认位置。
这是 Linux 上允许的配置选项的完整示例:
{
  "allow-nondistributable-artifacts": [],
  "api-cors-header": "",
  "authorization-plugins": [],
  "bip": "",
  "bridge": "",
  "cgroup-parent": "",
  "cluster-advertise": "",
  "cluster-store": "",
  "cluster-store-opts": {},
  "containerd": "/run/containerd/containerd.sock",
  "containerd-namespace": "docker",
  "containerd-plugin-namespace": "docker-plugins",
  "data-root": "",
  "debug": true,
  "default-address-pools": [
    {
      "base": "172.80.0.0/16",
      "size": 24
    },
    {
      "base": "172.90.0.0/16",
      "size": 24
    }
  ],
  "default-cgroupns-mode": "private",
  "default-gateway": "",
  "default-gateway-v6": "",
  "default-runtime": "runc",
  "default-shm-size": "64M",
  "default-ulimits": {
    "nofile": {
      "Hard": 64000,
      "Name": "nofile",
      "Soft": 64000
    }
  },
  "dns": [],
  "dns-opts": [],
  "dns-search": [],
  "exec-opts": [],
  "exec-root": "",
  "experimental": false,
  "features": {},
  "fixed-cidr": "",
  "fixed-cidr-v6": "",
  "group": "",
  "hosts": [],
  "icc": false,
  "init": false,
  "init-path": "/usr/libexec/docker-init",
  "insecure-registries": [],
  "ip": "0.0.0.0",
  "ip-forward": false,
  "ip-masq": false,
  "iptables": false,
  "ip6tables": false,
  "ipv6": false,
  "labels": [],
  "live-restore": true,
  "log-driver": "json-file",
  "log-level": "",
  "log-opts": {
    "cache-disabled": "false",
    "cache-max-file": "5",
    "cache-max-size": "20m",
    "cache-compress": "true",
    "env": "os,customer",
    "labels": "somelabel",
    "max-file": "5",
    "max-size": "10m"
  },
  "max-concurrent-downloads": 3,
  "max-concurrent-uploads": 5,
  "max-download-attempts": 5,
  "mtu": 0,
  "no-new-privileges": false,
  "node-generic-resources": [
    "NVIDIA-GPU=UUID1",
    "NVIDIA-GPU=UUID2"
  ],
  "oom-score-adjust": -500,
  "pidfile": "",
  "raw-logs": false,
  "registry-mirrors": [],
  "runtimes": {
    "cc-runtime": {
      "path": "/usr/bin/cc-runtime"
    },
    "custom": {
      "path": "/usr/local/bin/my-runc-replacement",
      "runtimeArgs": [
        "--debug"
      ]
    }
  },
  "seccomp-profile": "",
  "selinux-enabled": false,
  "shutdown-timeout": 15,
  "storage-driver": "",
  "storage-opts": [],
  "swarm-default-advertise-addr": "",
  "tls": true,
  "tlscacert": "",
  "tlscert": "",
  "tlskey": "",
  "tlsverify": true,
  "userland-proxy": false,
  "userland-proxy-path": "/usr/libexec/docker-proxy",
  "userns-remap": ""
}
docker-daemon.json各配置详解
{
“api-cors-header”:"", ——————在引擎API中设置CORS标头
“authorization-plugins”:[], ——————要加载的授权插件
“bridge”:"", ————将容器附加到网桥
“cgroup-parent”:"", ——————为所有容器设置父cgroup
“cluster-store”:"", ——————分布式存储后端的URL
“cluster-store-opts”:{}, ————————设置集群存储选项(默认map [])
“cluster-advertise”:"", ————————要通告的地址或接口名称
“debug”: true, ————————启用调试模式,启用后,可以看到很多的启动信息。默认false
“default-gateway”:"", ——————容器默认网关IPv4地址
“default-gateway-v6”:"", ——————容器默认网关IPv6地址
“default-runtime”:“runc”, ————————容器的默认OCI运行时(默认为“ runc”)
“default-ulimits”:{}, ——————容器的默认ulimit(默认[])
“dns”: [“192.168.1.1”], ——————设定容器DNS的地址,在容器的 /etc/resolv.conf文件中可查看。
“dns-opts”: [], ————————容器 /etc/resolv.conf 文件,其他设置
“dns-search”: [], ————————设定容器的搜索域,当设定搜索域为 .example.com 时,在搜索一个名为 host 的 主机时,DNS不仅搜索host,还会搜
索host.example.com 。 注意:如果不设置, Docker 会默认用主机上的 /etc/resolv.conf 来配置容器。
“exec-opts”: [], ————————运行时执行选项
“exec-root”:"", ————————执行状态文件的根目录(默认为’/var/run/docker‘)
“fixed-cidr”:"", ————————固定IP的IPv4子网
“fixed-cidr-v6”:"", ————————固定IP的IPv6子网
“data-root”:"/var/lib/docker", ————-Docker运行时使用的根路径,默认/var/lib/docker
“group”: “”, ——————UNIX套接字的组(默认为“docker”)
“hosts”: [], ——————设置容器hosts
“icc”: false, ——————启用容器间通信(默认为true)
“ip”:“0.0.0.0”, ————————绑定容器端口时的默认IP(默认0.0.0.0)
“iptables”: false, ———————启用iptables规则添加(默认为true)
“ipv6”: false, ——————启用IPv6网络
“ip-forward”: false, ————————默认true, 启用 net.ipv4.ip_forward ,进入容器后使用 sysctl -a | grepnet.ipv4.ip_forward 查看
“ip-masq”:false, ——————启用IP伪装(默认为true)
“labels”:[“nodeName=node-121”], ————————docker主机的标签,很实用的功能,例如定义:–label nodeName=host-121
“live-restore”: true, ——————在容器仍在运行时启用docker的实时还原
“log-driver”:"", ——————容器日志的默认驱动程序(默认为“ json-file”)
“log-level”:"", ——————设置日志记录级别(“调试”,“信息”,“警告”,“错误”,“致命”)(默认为“信息”)
“max-concurrent-downloads”:3, ——————设置每个请求的最大并发下载量(默认为3)
“max-concurrent-uploads”:5, ——————设置每次推送的最大同时上传数(默认为5)
“mtu”: 0, ——————设置容器网络MTU
“oom-score-adjust”:-500, ——————设置守护程序的oom_score_adj(默认值为-500)
“pidfile”: “”, ——————Docker守护进程的PID文件
“raw-logs”: false, ——————全时间戳机制
“selinux-enabled”: false, ——————默认 false,启用selinux支持
“storage-driver”:"", ——————要使用的存储驱动程序
“swarm-default-advertise-addr”:"", ——————设置默认地址或群集广告地址的接口
“tls”: true, ————————默认 false, 启动TLS认证开关
“tlscacert”: “”, ——————默认 ~/.docker/ca.pem,通过CA认证过的的certificate文件路径
“tlscert”: “”, ————————默认 ~/.docker/cert.pem ,TLS的certificate文件路径
“tlskey”: “”, ————————默认~/.docker/key.pem,TLS的key文件路径
“tlsverify”: true, ————————默认false,使用TLS并做后台进程与客户端通讯的验证
“userland-proxy”:false, ——————使用userland代理进行环回流量(默认为true)
“userns-remap”:"", ————————用户名称空间的用户/组设置
“bip”:“192.168.88.0/22”, ——————————指定网桥IP
“registry-mirrors”: [“https://192.498.89.232:89”], ————————设置镜像加速
“insecure-registries”: [“120.123.122.123:12312”], ———————设置私有仓库地址可以设为http
“storage-opts”: [
“overlay2.override_kernel_check=true”,
“overlay2.size=15G”
], ————————存储驱动程序选项
“log-opts”: {
“max-file”: “3”,
“max-size”: “10m”,
}, ————————容器默认日志驱动程序选项
“iptables”: false ————————启用iptables规则添加(默认为true)
}
验证
root@fly-virtual-machine:~# docker version Client: Version: 20.10.7 API version: 1.41 Go version: go1.13.8 Git commit: 20.10.7-0ubuntu1~20.04.1 Built: Wed Aug 4 22:52:25 2021 OS/Arch: linux/amd64 Context: default Experimental: true Server: Engine: Version: 20.10.7 API version: 1.41 (minimum version 1.12) Go version: go1.13.8 Git commit: 20.10.7-0ubuntu1~20.04.1 Built: Wed Aug 4 19:07:47 2021 OS/Arch: linux/amd64 Experimental: false containerd: Version: 1.5.2-0ubuntu1~20.04.2 GitCommit: runc: Version: 1.0.0~rc95-0ubuntu1~20.04.2 GitCommit: docker-init: Version: 0.19.0 GitCommit:
Kubernetes
iptables配置
将桥接的IPv4/IPv6流量传递到iptables的链
cat <<EOF | sudo tee /etc/modules-load.d/k8s.conf br_netfilter EOF cat <<EOF | sudo tee /etc/sysctl.d/k8s.conf net.bridge.bridge-nf-call-ip6tables = 1 net.bridge.bridge-nf-call-iptables = 1 EOF sudo sysctl --system
bridge-nf
bridge-nf 使得 netfilter 可以对 Linux 网桥上的 IPv4/ARP/IPv6 包过滤。比如,设置net.bridge.bridge-nf-call-iptables=1后,二层的网桥在转发包时也会被 iptables的 FORWARD 规则所过滤。常用的选项包括:
net.bridge.bridge-nf-call-arptables:是否在arptables的FORWARD中过滤网桥的 ARP 包net.bridge.bridge-nf-call-ip6tables:是否在ip6tables链中过滤 IPv6 包net.bridge.bridge-nf-call-iptables:是否在iptables链中过滤 IPv4 包net.bridge.bridge-nf-filter-vlan-tagged:是否在iptables/arptables中过滤打了 vlan 标签的包。
防火墙是保护服务器和基础设施安全的重要工具。在 Linux 生态系统中,iptables 是使 用很广泛的防火墙工具之一,它基于内核的包过滤框架(packet filtering framework) netfilter。
Linux 上最常用的防火墙工具是 iptables。iptables 与协议栈内有包过滤功能的 hook 交 互来完成工作。这些内核 hook 构成了 netfilter 框架。
每个进入网络系统的包(接收或发送)在经过协议栈时都会触发这些 hook,程序 可以通过注册 hook 函数的方式在一些关键路径上处理网络流量。iptables 相关的内核模 块在这些 hook 点注册了处理函数,因此可以通过配置 iptables 规则来使得网络流量符合 防火墙规则。
apt 包更新, 安装apt-transport-https\ca-certificates\curl
Update the apt package index and install packages needed to use the Kubernetes apt repository:
sudo apt-get update
sudo apt-get install -y apt-transport-https ca-certificates curl
添加GPG 密钥
sudo curl -s https://mirrors.aliyun.com/kubernetes/apt/doc/apt-key.gpg | sudo apt-key add -
备注:
GnuPG,简称 GPG,来自 http://www.gnupg.org,是 GPG 标准的一个免费实现。不管是 Linux 还是 Windows 平台,都可以使用。GPGneng 可以为文件生成签名、管理密匙以及验证签名。
添加 Kubernetes apt 存储库
sudo tee /etc/apt/sources.list.d/kubernetes.list <<-'EOF'
deb https://mirrors.aliyun.com/kubernetes/apt kubernetes-xenial main
EOF
更新apt 包, 安装kubelet, kubeadm and kubectl
Update apt package index, install kubelet, kubeadm and kubectl
sudo apt-get update
sudo apt-get install -y kubelet kubeadm kubectl
sudo apt-mark hold kubelet kubeadm kubectl
备注:
apt-mark用法
apt-mark [选项] {auto|manual} 软件包1 [软件包2 …]
apt-mark常用命令
- auto – 标记指定软件包为自动安装
- manual – 标记指定软件包为手动安装
- minimize-manual – Mark all dependencies of meta packages as automatically installed.
- hold – 标记指定软件包为保留(held back),阻止软件自动更新
- unhold – 取消指定软件包的保留(held back)标记,解除阻止自动更新
- showauto – 列出所有自动安装的软件包
- showmanual – 列出所有手动安装的软件包
- showhold – 列出设为保留的软件包
使用kubeadm init初始化集群
kubeadm init \
 --image-repository registry.aliyuncs.com/google_containers \
 --kubernetes-version v1.22.2 \
 --pod-network-cidr=192.168.0.0/16 \
 --apiserver-advertise-address=192.168.172.129
成功输出信息
root@fly-virtual-machine:/etc/netplan# kubeadm init \ > --image-repository registry.aliyuncs.com/google_containers \ > --kubernetes-version v1.22.2 \ > --pod-network-cidr=192.168.0.0/16 \ > --apiserver-advertise-address=192.168.172.129 [init] Using Kubernetes version: v1.22.2 [preflight] Running pre-flight checks [preflight] Pulling images required for setting up a Kubernetes cluster [preflight] This might take a minute or two, depending on the speed of your internet connection [preflight] You can also perform this action in beforehand using 'kubeadm config images pull' [certs] Using certificateDir folder "/etc/kubernetes/pki" [certs] Generating "ca" certificate and key [certs] Generating "apiserver" certificate and key [certs] apiserver serving cert is signed for DNS names [fly-virtual-machine kubernetes kubernetes.default kubernetes.default.svc kubernetes.default.svc.cluster.local] and IPs [10.96.0.1 192.168.172.129] [certs] Generating "apiserver-kubelet-client" certificate and key [certs] Generating "front-proxy-ca" certificate and key [certs] Generating "front-proxy-client" certificate and key [certs] Generating "etcd/ca" certificate and key [certs] Generating "etcd/server" certificate and key [certs] etcd/server serving cert is signed for DNS names [fly-virtual-machine localhost] and IPs [192.168.172.129 127.0.0.1 ::1] [certs] Generating "etcd/peer" certificate and key [certs] etcd/peer serving cert is signed for DNS names [fly-virtual-machine localhost] and IPs [192.168.172.129 127.0.0.1 ::1] [certs] Generating "etcd/healthcheck-client" certificate and key [certs] Generating "apiserver-etcd-client" certificate and key [certs] Generating "sa" key and public key [kubeconfig] Using kubeconfig folder "/etc/kubernetes" [kubeconfig] Writing "admin.conf" kubeconfig file [kubeconfig] Writing "kubelet.conf" kubeconfig file [kubeconfig] Writing "controller-manager.conf" kubeconfig file [kubeconfig] Writing "scheduler.conf" kubeconfig file [kubelet-start] Writing kubelet environment file with flags to file "/var/lib/kubelet/kubeadm-flags.env" [kubelet-start] Writing kubelet configuration to file "/var/lib/kubelet/config.yaml" [kubelet-start] Starting the kubelet [control-plane] Using manifest folder "/etc/kubernetes/manifests" [control-plane] Creating static Pod manifest for "kube-apiserver" [control-plane] Creating static Pod manifest for "kube-controller-manager" [control-plane] Creating static Pod manifest for "kube-scheduler" [etcd] Creating static Pod manifest for local etcd in "/etc/kubernetes/manifests" [wait-control-plane] Waiting for the kubelet to boot up the control plane as static Pods from directory "/etc/kubernetes/manifests". This can take up to 4m0s [apiclient] All control plane components are healthy after 11.020909 seconds [upload-config] Storing the configuration used in ConfigMap "kubeadm-config" in the "kube-system" Namespace [kubelet] Creating a ConfigMap "kubelet-config-1.22" in namespace kube-system with the configuration for the kubelets in the cluster [upload-certs] Skipping phase. Please see --upload-certs [mark-control-plane] Marking the node fly-virtual-machine as control-plane by adding the labels: [node-role.kubernetes.io/master(deprecated) node-role.kubernetes.io/control-plane node.kubernetes.io/exclude-from-external-load-balancers] [mark-control-plane] Marking the node fly-virtual-machine as control-plane by adding the taints [node-role.kubernetes.io/master:NoSchedule] [bootstrap-token] Using token: 6igmn8.d4zk3hmr0rr0j7k2 [bootstrap-token] Configuring bootstrap tokens, cluster-info ConfigMap, RBAC Roles [bootstrap-token] configured RBAC rules to allow Node Bootstrap tokens to get nodes [bootstrap-token] configured RBAC rules to allow Node Bootstrap tokens to post CSRs in order for nodes to get long term certificate credentials [bootstrap-token] configured RBAC rules to allow the csrapprover controller automatically approve CSRs from a Node Bootstrap Token [bootstrap-token] configured RBAC rules to allow certificate rotation for all node client certificates in the cluster [bootstrap-token] Creating the "cluster-info" ConfigMap in the "kube-public" namespace [kubelet-finalize] Updating "/etc/kubernetes/kubelet.conf" to point to a rotatable kubelet client certificate and key [addons] Applied essential addon: CoreDNS [addons] Applied essential addon: kube-proxy Your Kubernetes control-plane has initialized successfully! To start using your cluster, you need to run the following as a regular user: mkdir -p $HOME/.kube sudo cp -i /etc/kubernetes/admin.conf $HOME/.kube/config sudo chown $(id -u):$(id -g) $HOME/.kube/config Alternatively, if you are the root user, you can run: export KUBECONFIG=/etc/kubernetes/admin.conf You should now deploy a pod network to the cluster. Run "kubectl apply -f [podnetwork].yaml" with one of the options listed at: https://kubernetes.io/docs/concepts/cluster-administration/addons/ Then you can join any number of worker nodes by running the following on each as root: kubeadm join 192.168.172.129:6443 --token 6igmn8.d4zk3hmr0rr0j7k2 \ --discovery-token-ca-cert-hash sha256:78f0796dee6bedf5f7250843be190cc3b63b97c5bccb91839f74a1e8b07efac6
问题: running with swap on is not supported. Please disable swap
root@fly-virtual-machine:/etc/docker# kubeadm init \
>  --image-repository registry.aliyuncs.com/google_containers \
>  --kubernetes-version v1.22.2 \
>  --pod-network-cidr=192.168.0.0/16 \
>  --apiserver-advertise-address=192.168.172.129
[init] Using Kubernetes version: v1.22.2
[preflight] Running pre-flight checks
error execution phase preflight: [preflight] Some fatal errors occurred:
    [ERROR Swap]: running with swap on is not supported. Please disable swap
[preflight] If you know what you are doing, you can make a check non-fatal with `--ignore-preflight-errors=...`
To see the stack trace of this error execute with --v=5 or higher
参考上文: 关闭Swap
问题: [kubelet-check] Initial timeout of 40s passed.
[wait-control-plane] Waiting for the kubelet to boot up the control plane as static Pods from directory "/etc/kubernetes/manifests". This can take up to 4m0s [kubelet-check] Initial timeout of 40s passed. Unfortunately, an error has occurred: timed out waiting for the condition This error is likely caused by: - The kubelet is not running - The kubelet is unhealthy due to a misconfiguration of the node in some way (required cgroups disabled) If you are on a systemd-powered system, you can try to troubleshoot the error with the following commands: - 'systemctl status kubelet' - 'journalctl -xeu kubelet' Additionally, a control plane component may have crashed or exited when started by the container runtime. To troubleshoot, list all containers using your preferred container runtimes CLI. Here is one example how you may list all Kubernetes containers running in docker: - 'docker ps -a | grep kube | grep -v pause' Once you have found the failing container, you can inspect its logs with: - 'docker logs CONTAINERID' error execution phase wait-control-plane: couldn't initialize a Kubernetes cluster To see the stack trace of this error execute with --v=5 or higher
通过journalctl -n 20 | grep kubelet命令查看日志

原因定位: 使用kubectl访问api-server失败,node “XXX“ not found
问题解决: node "XXX" not found
(1)使用kubectl
kubectl get node
The connection to the server 192.168.172.129:6443 was refused - did you specify the right host or port?
(2)查看kubelet日志
journalctl -xeu kubelet
kubelet.go:2183] node "fly-k8s" not found
(3) 说明node节点无法找到 fly-k8s,查看kubelet配置的ip
cat /etc/kubernetes/kubelet.conf

(4)查看宿主机ip
ifconfig
(5)两者一致,说明ip是正确的,这说明宿主机的/ets/hosts 配置有问题。如果ip不一致,则需要修改kubelet、kubeadm、api-server对应的ip
cat /etc/hosts
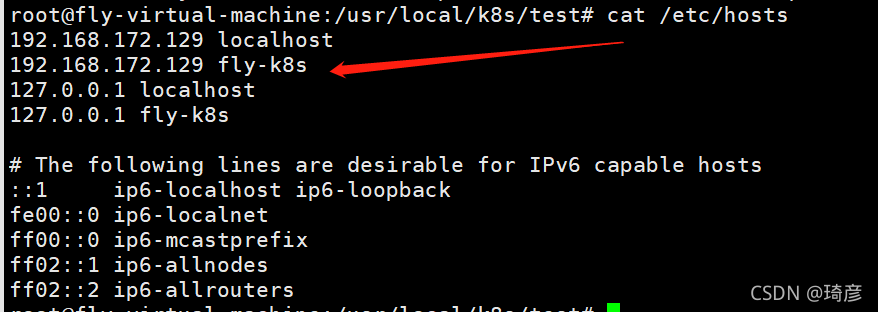
通过命令vim /etc/hosts 修改为 fly-k8s
(6)检测kubectl是否可以连接api-server
root@fly-virtual-machine:/usr/local/k8s/test# kubectl get node
NAME STATUS ROLES AGE VERSION
fly-k8s Ready control-plane,master 64m v1.22.2
补充: kubeadm init --config
使用kubeadm config print init-defaults可以打印集群初始化默认的使用的配置 从默认的配置中可以看到,可以使用imageRepository定制在集群初始化时拉取k8s所需镜像的地址。
基于默认配置定制, 我们还可以使用kubeadm初始化集群所需的配置文件kubeadm.yaml
vim kubeadm.yaml
apiVersion: kubeadm.k8s.io/v1beta2
kind: InitConfiguration
localAPIEndpoint:
advertiseAddress: 192.168.56.113
bindPort: 6443
nodeRegistration:
taints:
- effect: PreferNoSchedule
key: node-role.kubernetes.io/master
---
apiVersion: kubeadm.k8s.io/v1beta2
kind: ClusterConfiguration
kubernetesVersion: v1.15.3
networking:
podSubnet: 10.244.0.0/16
使用kubeadm默认配置初始化的集群,会在master节点打上node-role.kubernetes.io/master:NoSchedule的污点,阻止master节点接受调度运行工作负载。
这里测试环境只有两个节点,所以将这个taint修改为node-role.kubernetes.io/master:PreferNoSchedule。
在开始初始化集群之前可以使用kubeadm config images pull预先在各个节点上拉取所k8s需要的docker镜像。
接下来使用kubeadm初始化集群
kubeadm init --config kubeadm.yaml --ignore-preflight-errors=Swap
复制 kubeconfig配置文件
mkdir -p $HOME/.kube
$ sudo cp -i /etc/kubernetes/admin.conf $HOME/.kube/config
$ sudo chown $(id -u):$(id -g) $HOME/.kube/config
去除master节点的污点
$ kubectl taint nodes --all node-role.kubernetes.io/master-
当创建单机版的 k8s 时,这个时候 master 节点是默认不允许调度 pod 的,需要执行
kubectl taint nodes --all node-role.kubernetes.io/master-命令将 master 标记为可调度.
安装calico cni 插件
Quickstart for Calico on Kubernetes
$ kubectl create -f https://docs.projectcalico.org/manifests/tigera-operator.yaml
$ kubectl create -f https://docs.projectcalico.org/manifests/custom-resources.yaml
验证集群状态
执行命令kubectl get cs查看一下集群状态,确认个组件都处于healthy状态 如下所示表示正常
[root@master-1 ~]# kubectl get cs
NAME STATUS MESSAGE ERROR
controller-manager Healthy ok
scheduler Healthy ok
etcd-0 Healthy {"health":"true"}
问题: scheduler/controller-manager: dial tcp 127.0.0.1:10251: connect: connection refused
部署完master节点以后,执行kubectl get cs命令来检测组件的运行状态时,报如下错误:
root@fly-virtual-machine:/etc/netplan# kubectl get cs
Warning: v1 ComponentStatus is deprecated in v1.19+
NAME STATUS MESSAGE ERROR
scheduler Unhealthy Get "http://127.0.0.1:10251/healthz": dial tcp 127.0.0.1:10251: connect: connection refused
etcd-0 Healthy {"health":"true","reason":""}
controller-manager Healthy ok
root@fly-virtual-machine:/etc/netplan# vim /etc/kubernetes/manifests/kube-scheduler.yaml
root@fly-virtual-machine:/etc/netplan# systemctl restart kubelet.service
原因分析
出现这种情况,是/etc/kubernetes/manifests/下的kube-controller-manager.yaml和kube-scheduler.yaml设置的默认端口是0导致的,解决方式是注释掉对应的port即可,操作如下:

然后在master节点上重启kubelet,systemctl restart kubelet.service,然后重新查看就正常了
port=0是做什么用的? 关闭非安全端口
Kubernetes还原
集群初始化如果遇到问题,可以使用下面的命令进行清理
kubeadm reset
ifconfig cni0 down
ip link delete cni0
ifconfig flannel.1 down
ip link delete flannel.1
rm -rf /var/lib/cni/
Kubernetes测试
部署 Deployment
kubectl apply -f <https://k8s.io/examples/application/deployment.yaml> apiVersion: apps/v1 kind: Deployment metadata: name: nginx-deployment spec: selector: matchLabels: app: nginx replicas: 2 # tells deployment to run 2 pods matching the template template: metadata: labels: app: nginx spec: containers: - name: nginx image: nginx:1.14.2 ports: - containerPort: 80
部署 NodePort
apiVersion: v1
kind: Service
metadata:
  name: my-nginx
spec:
  selector:
    app: nginx
  type: NodePort
  ports:
    - protocol: TCP
      port: 80
通过kubectl get services查看nginx服务对外暴露的端口, 浏览器访问如下


