Linux下vmware下载:
地址-Linux vmware : http://www.vmware.com/products/workstation/workstation-evaluation
安装依赖:
|
1
2
|
yum -y
install
perl gcc kernel-devel libX11 libXinerama libXcursor libXtst
yum
install
kernel-headers.x86_64 -y
|
安装桌面:
|
1
2
|
yum groupinstall
"Desktop"
"Desktop Platform"
yum groupinstall
"X Window System"
"Graphics Creation Tools"
|
vmware安装:
手动一步步安装:
赋予vmware软件可执行权限:
|
1
|
chmod
+x VMware-Workstation-Full-12.5.7-5813279.x86_64.bundle
|
安装过程会出现如下一些选项:
1、安装过程中的一段协议:
2.6 Open Source Software. Notwithstanding anything herein to the
contrary, Open Source Software is licensed to You under such OSS's own
applicable license terms, which can be found in the
open_source_licenses.txt file, the Documentation or as applicable, the
corresponding source files for the Software available at
www.vmware.com/download/open_source.html. These OSS license terms
are consistent with the license granted in Section 2 (License Grant), and
may contain additional rights benefiting You. The OSS license terms shall
take precedence over this EULA to the extent that this EULA imposes
greater restrictions on You than the applicable OSS license terms. To the
extent the license for any Open Source Software requires VMware to
make available to You the corresponding source code and/or modifications
(the "Source Files"), You may obtain a copy of the applicable Source
Files from VMware's website at
www.vmware.com/download/open_source.html or by sending a written
request, with Your name and address to: VMware, Inc., 3401 Hillview
Avenue, Palo Alto, CA 94304, United States of America. All requests
should clearly specify: Open Source Files Request, Attention: General
Counsel. This offer to obtain a copy of the Source Files is valid for three
years from the date You acquired this Software.
3. RESTRICTIONS; OWNERSHIP.
...............more............
解决:按"q"键退出浏览说明.
2、Do you agree? [yes/no]: 输入:yes
3、下面是安装的过程选项:
1.3 "Guest Operating Systems" means instances of third-party operating
Do you agree? [yes/no]: yes
Would you like to check for product updates on startup? [yes]: no
Would you like to help make VMware software better by sending
anonymous system data and usage statistics to VMware? [yes]: yes
Please enter the user that will initially connect to Workstation
Server. Without setting this correctly, you will not be able to share
VMs with other users. Additional users and administrators can be
configured later in Workstation by selecting "Shared VMs" and clicking
"Permissions". [root]: root
Please choose a directory for your shared virtual machines.
[/var/lib/vmware/Shared VMs]: /data/vmware/vm1 #虚拟机存放的目录,自己建的方便找
Please enter the port to use for https access to Workstation Server.
(HTTPS port:) [443]: 443
Enter license key. (optional) You can enter this information later.:
The product is ready to be installed. Press Enter to begin
installation or Ctrl-C to cancel. 按"Enter"继续安装;按"Ctrl-C"退出
Installing VMware Workstation 12.5.7
Configuring...
[######################################################################] 100%
Installation was successful.
#安装完成.
第二种安装方法:
VMware命令行含义:
--console #以命令行模式安装,默认为gui模式 。
--eulas-agreed #自动同意安装协议,如果不使用,需要按q和yes。
--required #显示安装协议后,并自动安装。
-s vmware-workstation serialNumber #输入vmware序列号
|
1
|
.
/VMware-Workstation-Full-12
.5.7-5813279.x86_64.bundle --console --eulas-agreed --required -s vmware-workstation serialNumber MA491-6NL5Q-AZAM0-ZH0N2-AAJ5A
|
安装完成启动vmware报错处理:
报错:C header files matching your running kernel were not found
处理:
查看yum源安装的以下两个包的版本
|
1
2
|
#yum list | grep kernel-devel
#yum list | grep kernel-headers
|
uuname -a 查看系统内核的版本是否相同
如果不相同,卸载yum安装的版本:
|
1
2
|
yum remove kernel-headers -y
yum
install
kernel-devel -y
|
挂载安装系统的光盘或者iso镜像,去Packages安装这两个包:
mount /dev/cdrom /mnt/
cd /mnt/cd Packages/
[root@localhost Packages]# ls | grep kernel
abrt-addon-kerneloops-2.0.8-21.el6.centos.x86_64.rpm
dracut-kernel-004-335.el6.noarch.rpm
kernel-2.6.32-431.el6.x86_64.rpm
kernel-abi-whitelists-2.6.32-431.el6.noarch.rpm
kernel-debug-2.6.32-431.el6.x86_64.rpm
kernel-debug-devel-2.6.32-431.el6.x86_64.rpm
kernel-devel-2.6.32-431.el6.x86_64.rpm
kernel-doc-2.6.32-431.el6.noarch.rpm
kernel-firmware-2.6.32-431.el6.noarch.rpm
kernel-headers-2.6.32-431.el6.x86_64.rpm
libreport-plugin-kerneloops-2.0.9-19.el6.centos.x86_64.rpm
[root@localhost Packages]# rpm -ivh kernel-headers-2.6.32-431.el6.x86_64.rpm
Preparing... ########################################### [100%]
1:kernel-headers ########################################### [100%]
[root@localhost Packages]# rpm -ivh kernel-devel-2.6.32-431.el6.x86_64.rpm
Preparing... ########################################### [100%]
1:kernel-devel ########################################### [100%]
报错:not fountd gcc
因为卸载了kernel-devel包,也就卸载了gcc,yum安装下:
|
1
|
yum
install
gcc -y
|
远程到图形话下点击vmware ,会提示输入序列号:
VMware Workstation 12专业版永久序列号(任选其一)
5A02H-AU243-TZJ49-GTC7K-3C61N
VF5XA-FNDDJ-085GZ-4NXZ9-N20E6
UC5MR-8NE16-H81WY-R7QGV-QG2D8
ZG1WH-ATY96-H80QP-X7PEX-Y30V4
AA3E0-0VDE1-0893Z-KGZ59-QGAVF
listen 输入正确会看到如图所示:

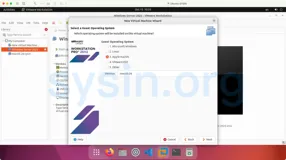
后续的步骤其实就和在windown下的一样了,创建一个虚拟机,安装系统....操作:

本文转自青衫解衣 51CTO博客,原文链接:http://blog.51cto.com/215687833/1958589