
动画
前面已经知道如何显示图片,只需要改变图片(位置),就可以做出动画的效果了。
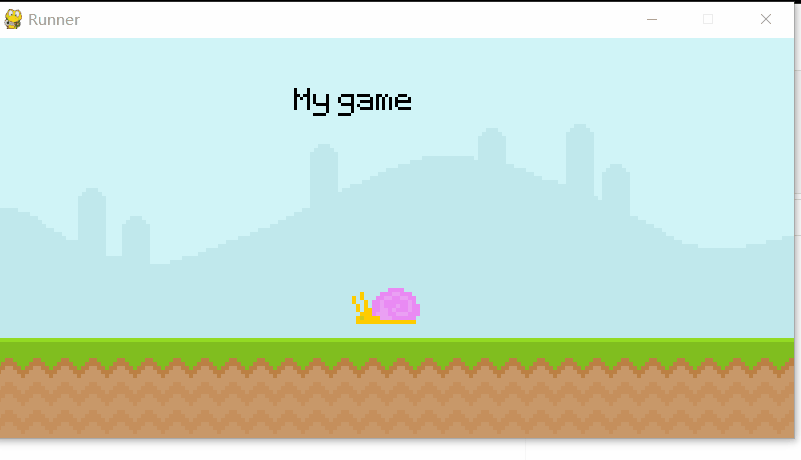
首先和前面一样,我们把一只蜗牛显示在窗口中:
snail_surface = pygame.image.load('graphics/snail/snail1.png')
...
screen.blit(snail_surface,(600,250))
 [外链图片转存失败,源站可能有防盗链机制,建议将图片保存下来直接上传(img-rWyPFMCL-1661269394793)(assets/snail_static.png)]
只需要修改蜗牛的位置,就可以让蜗牛动起来了:
snail_surface = pygame.image.load('graphics/snail/snail1.png')
snail_x_pos = 600
...

snail_x_pos -= 1
screen.blit(snail_surface,(snail_x_pos,250))
 [外链图片转存失败,源站可能有防盗链机制,建议将图片保存下来直接上传(img-rbPi9DhS-1661269394795)(assets/snail_move.gif)]
很“快”,蜗牛会跑出屏幕外。如果你想让蜗牛一直跑下去,可以用一个if语句,当蜗牛跑出去时,重置蜗牛位置:
if snail_pos_x < -100 : snail_pos_x = 800
这样蜗牛就会一直跑下去了。
拖影
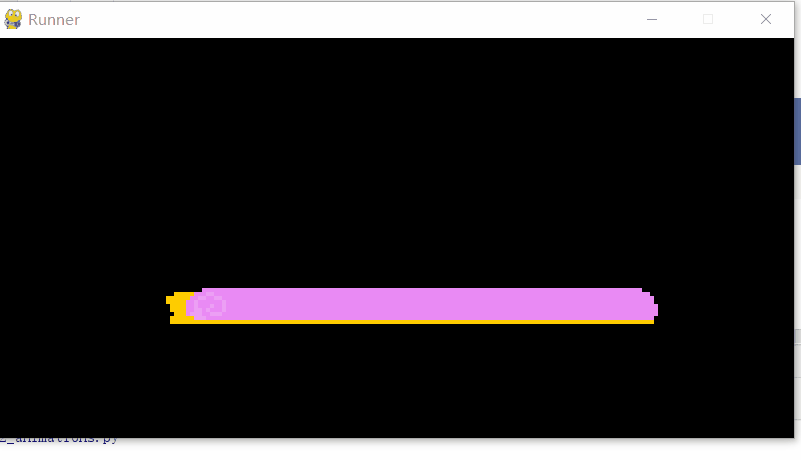 [外链图片转存失败,源站可能有防盗链机制,建议将图片保存下来直接上传(img-tx9icZsf-1661269394797)(assets/tuoying.gif)]
如果我们把背景注释掉,会发现,蜗牛的移动形成了一个轨迹。
实际上,Pygame每次都会在原来的基础上绘制一次(而不会清空之前的图像),如果没有重新绘制背景将之前的蜗牛遮盖掉,就会出现这种情况。
convert
sky_surface = pygame.image.load('graphics/Sky.png').convert()
ground_surface  = pygame.image.load('graphics/ground.png').convert()
test_font = pygame.font.Font('font/Pixeltype.ttf',50)
text_surface = test_font.render("My game",False,'Black')

snail_surface = pygame.image.load('graphics/snail/snail1.png').convert_alpha()
在加载png后用.convert() 可以将图片转化成Pygame更适合处理的形式,加快运行速度。
对于物体,使用.convert_alpha(),否则会出现奇怪的边框。
长方形
长方形(Rectangles)
作用:
提供surface精确位置;
基本的碰撞

[外链图片转存失败,源站可能有防盗链机制,建议将图片保存下来直接上传(img-8hweJcLr-1661269394798)(assets/rect.png)]
可以使用pygame.Rect() 创建长方形,但是一般我们是从图片中创建。这里新建一个人物,并从中创建长方形:
player_surf = pygame.image.load('graphics/Player/player_walk_1.png').convert_alpha()
player_rect = player_surf.get_rect(midbottom=(80,300))
然后,我们就可以通过长方形来修改图片位置:
    ...
    player_rect.left += 1
    screen.blit(player_surf,player_rect)
类似地,我们把之前的蜗牛也用长方形来控制:
snail_surface = pygame.image.load('graphics/snail/snail1.png').convert_alpha()
snail_rect = snail_surface.get_rect(midbottom=(600,300))

    ...
    snail_rect.x -= 4
    if snail_rect.right <= 0: snail_rect.left = 800
    screen.blit(snail_surface,snail_rect)
长方形的碰撞检测
Collsion
两个长方形之间碰撞检测:
rect1.colliderect(rect2)
长方形和点的碰撞检测,这很适合检测鼠标和长方形的碰撞。
rect1.collidepoint((x,y))
获取鼠标位置的方式:

1.通过pygame.mouse
通过get_pos()获取鼠标位置(x,y),
通过get_pressed() 获取鼠标(左,中,右)是否按下。
mouse_pos = pygame.mouse.get_pos()
if player_rect.collidepoint(mouse_pos):
    print(pygame.mouse.get_pressed())
2.通过event
if event.type == pygame.MOUSEMOTION:
    print(event.pos)
长方形的绘制
pygame.draw.xx 可以绘制各种图形,包括长方形,圆形,直线等。可以去官网文档查看,这里只展示长方形:
pygame.draw.rect(screen,'Pink',score_rect)
pygame.draw.rect(screen,'Pink',score_rect,10)
颜色

Pygame支持RGB及其16进制形式显示颜色。

RGB 即(Red,Green,Blue) 三原色数组,值为0-255.
hexadecimal(16进制形式)为 #rrggbb
在绘图时,可以通过rgb或其16进制形式指定颜色。
pygame.draw.rect(screen,'#c0e8ec',score_rect)
角色
1.键盘输入

1.pygame.key
pygame.key.get_pressed()会返回一个字典,记录每个键的是否被按。
keys = pygame.key.get_pressed()
if keys[pygame.K_SPACE]:
    print("JUMP")
2.event loop
if event.type == pygame.KEYDOWN:
    if event.key == pygame.K_SPACE:
        print("JUMP")
pygame.keys 适合与类相关的控制,
事件循环适合更一般的事情,例如关闭游戏。
2. 跳跃和掉落(重力)
设置和现实中类似的重力,跌落时会加速下降,
player_gravity = 0
...
    player_gravity += 1
    player_rect.y += player_gravity
(这里用词有误,实际上重力是不变的,这里的player_gravity实际是玩家在y轴移动的距离。)
跳跃是掉落的相反方向:
if event.type == pygame.KEYDOWN:
    if event.key == pygame.K_SPACE and player_rect.bottom>=300:
        player_gravity -= 20
3. 地板
我们不想人物一直掉落,他应该在掉到地板的时候就停止掉落:
if player_rect.bottom >= 300:
    player_rect.bottom = 300
    player_gravity = 0
附上完整代码:
import pygame
from sys import  exit

# 初始化 引擎
pygame.init()
# 设置屏幕
screen = pygame.display.set_mode((800,400)) # 宽度800,高度400
pygame.display.set_caption('Runner') # 设置标题
# 时钟
clock = pygame.time.Clock()
# surface
sky_surface = pygame.image.load('graphics/Sky.png').convert()
ground_surface  = pygame.image.load('graphics/ground.png').convert()
test_font = pygame.font.Font('font/Pixeltype.ttf',50)
score_surf = test_font.render("My game", False, 'Black')
score_rect = score_surf.get_rect(center=(400,50))

snail_surface = pygame.image.load('graphics/snail/snail1.png').convert_alpha()
snail_rect = snail_surface.get_rect(midbottom=(600,300))

player_surf = pygame.image.load('graphics/Player/player_walk_1.png').convert_alpha()
player_rect = player_surf.get_rect(midbottom=(80,300))
player_gravity = 0

while True:
    # 获取用户输入
    for event in pygame.event.get():
        # 用户点击退出,关闭游戏
        if event.type == pygame.QUIT:
            pygame.quit()
            exit()
        if event.type == pygame.KEYDOWN:
            if event.key == pygame.K_SPACE and player_rect.bottom>=300:
                player_gravity -= 20
    # 绘图,更新
    screen.blit(sky_surface, (0, 0))  # 将test_surface放到screen上。(0,0):放置后test_surface的左上角位于screen的(0,0)处
    screen.blit(ground_surface,(0,300))

    pygame.draw.rect(screen,'#c0e8ec',score_rect)
    pygame.draw.rect(screen,'#c0e8ec',score_rect,10)

    screen.blit(score_surf, score_rect)

    snail_rect.x -= 4
    if snail_rect.right <= 0: snail_rect.left = 800
    screen.blit(snail_surface,snail_rect)

    player_gravity += 1
    player_rect.y += player_gravity
    if player_rect.bottom >= 300:
        player_rect.bottom = 300
        player_gravity = 0
    screen.blit(player_surf,player_rect)


    pygame.display.update()
    clock.tick(60) # 不超过60 fps


