前言
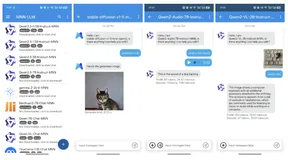
在上一篇文章中完成了对记事本的功能增强,本篇文章中就着重来说一下UI方面的内容。先看看本篇文章的效果图


你也可以下载体验一下。

正文
我的MVVM-Demo的启动也是有白屏的,我们先观察一下啥样。
你多观察一下,会发现有一个短暂的白屏。

一、启动白屏优化
首先我们处理白屏的问题,首先我想的是更改一下启动页的样式,之前是一片白,现在我改成绿色的,绿才有安全感,要想代码过得去,样式就得带点绿,手动滑稽。
那么首先在colors.xml中增加一个颜色值:
<color name="green">#2EAD4D</color>
1. 样式文件
这里我们需要重新设计一下一个启动页的样式,在写样式之前,先写样式文件,在drawable下新增一个splash_bg.xml,里面的代码如下:
<?xml version="1.0" encoding="utf-8"?>
<layer-list xmlns:android="http://schemas.android.com/apk/res/android">
    <item android:drawable="@color/green"/>
    <item>
        <bitmap
            android:gravity="center"
            android:src="@drawable/ic_mvvm_logo_white" />
    </item>
</layer-list>
这里的图标没有的可以去我源码里面去拿,然后在themes.xml中新增一个样式。
  <style name="SplashThemePlus" parent="Theme.MaterialComponents.DayNight.NoActionBar">
        <item name="colorPrimary">@color/green</item>
        <item name="colorPrimaryVariant">@color/green</item>
        <item name="statusBarBackground">@color/green</item>
        <item name="android:statusBarColor">@color/green</item>
        <item name="android:windowBackground">@drawable/splash_bg</item>
    </style>
然后设置到AndroidManifest.xml中,设置一下:

2. 修改页面
下面修改activity_splash.xml中的代码:
<?xml version="1.0" encoding="utf-8"?>
<androidx.constraintlayout.widget.ConstraintLayout xmlns:android="http://schemas.android.com/apk/res/android"
    xmlns:app="http://schemas.android.com/apk/res-auto"
    xmlns:tools="http://schemas.android.com/tools"
    android:layout_width="match_parent"
    android:layout_height="match_parent"
    tools:context=".ui.activity.SplashActivity">
    <TextView
        android:id="@+id/textView2"
        android:layout_width="wrap_content"
        android:layout_height="wrap_content"
        android:text="Model · View · ViewModel"
        android:textColor="@color/white"
        android:textSize="24sp"
        android:textStyle="bold"
        app:layout_constraintBottom_toBottomOf="parent"
        app:layout_constraintEnd_toEndOf="parent"
        app:layout_constraintStart_toStartOf="parent"
        app:layout_constraintTop_toTopOf="parent"
        app:layout_constraintVertical_bias="0.9" />
    <TextView
        android:id="@+id/textView"
        android:layout_width="wrap_content"
        android:layout_height="wrap_content"
        android:text="初学者-Study"
        android:textColor="@color/white"
        android:textSize="18sp"
        app:layout_constraintBottom_toBottomOf="parent"
        app:layout_constraintEnd_toEndOf="parent"
        app:layout_constraintStart_toStartOf="parent"
        app:layout_constraintTop_toBottomOf="@+id/textView2"
        app:layout_constraintVertical_bias="0.35000002" />
</androidx.constraintlayout.widget.ConstraintLayout>
这里只有两个TextView。下面回到SplashActivity,修改代码如下:
@AndroidEntryPoint
public class SplashActivity extends BaseActivity {
    @Inject
    MVUtils mvUtils;
    @Override
    protected void onCreate(Bundle savedInstanceState) {
        super.onCreate(savedInstanceState);
        setContentView(ActivitySplashBinding.inflate(getLayoutInflater()).getRoot());
        new Handler().postDelayed(() -> jumpActivityFinish(mvUtils.getBoolean(Constant.IS_LOGIN) ? MainActivity.class : LoginActivity.class),400);
    }
}
代码比之前要更简洁一些了。运行一下:

还记得之前的页面的主要颜色是Android这个版本默认的紫色,现在都改成绿色,自行改动,改起来很简单,改完之后,运行一遍看看,检查一下,感觉改成绿色比原来这个紫色要好看很多。
二、适配深色模式
在Android10.0中推出了深色模式,深色模式有以下的优点:更好的用户体验、减少耗电量为弱视以及对强光敏感的用户提高可视性。
那么我们的App怎么去适配这个模式呢?首先我们观察一下项目的res文件夹,切换到Project模式。

你会发现这里有一个value-night文件夹,它里面只有一个themes.xml,简单明了的说就是当你的手机系统打开了深色模式的开关,你的App就会自动去使用values-night下的资源文件,包括样式,颜色,文字。这里面有很重要的一点,那就是你的资源ID在普通模式下和深色模式下需要一致,内容可以不一致,也可以一致。
如果你不想去适配深色模式,你希望深色模式和正常模式都一样,很简单,你把values下的内容再复制一份到values-night中,将values-night中的内容全部覆盖掉。
下面来说一下适配的要点。
1. 颜色
深色模式下最重要的一点就是设置颜色和主题样式,当前我们是给了一个green的色值作为主题颜色,下面我们改一下,这将是一个比较繁琐的工作,但是做完之后,你会觉得很Nice…
我改是直接拿这个MVVM-Demo去进行改动的,改动后的源码也会提交的GitHub上,因此在后面的内容中我不会每一个地方都讲一遍,毕竟实在是太多了,而且改起来比较繁琐,这里也奉劝一下,如果你的项目一开始没有做这个适配的话,而你的颜色值样式什么的都没有很规范的话,不建议你直接在自己的项目进行操作,要花很多时间去改。
预防针我已经打过了,下面进行正式的改动,首先呢?是颜色,也就是colors.xml,深色模式下会使用values-night中的资源文件,因此我们需要在values-night下面也创建一个colors.xml。

下面我简单用两张图说明一下:


第一张图是正常模式,第二张图是深色模式。两个资源的name一样,value不一样,也就是说正常情况下你的颜色是绿色,深色模式下就是黑色。
而在你的themes.xml中使用的就是这个colors.xml中的色值。
2. 样式
有了颜色之后,根据颜色设置的样式也会有相应的改变,而你要做的就是先通过你values下的themes.xml去设置好需要的颜色,然后再把这个文件themes.xml复制到values-night下,覆盖掉原有的themes.xml即可。下面我把values-night下的themes.xml的代码贴一下:
<resources xmlns:tools="http://schemas.android.com/tools">
    <!-- Base application theme. -->
    <style name="Theme.MVVMDemo" parent="Theme.MaterialComponents.DayNight.NoActionBar">
        <!-- Primary brand color. -->
        <item name="colorPrimary">@color/color_primary</item>
        <item name="colorPrimaryVariant">@color/color_primary_variant</item>
        <item name="colorOnPrimary">@color/color_on_primary</item>
        <!-- Secondary brand color. -->
        <item name="colorSecondary">@color/color_secondary</item>
        <item name="colorSecondaryVariant">@color/color_secondary_variant</item>
        <item name="colorOnSecondary">@color/color_on_secondary</item>
        <!-- Status bar color. -->
        <item name="android:statusBarColor" tools:targetApi="l">?attr/colorPrimaryVariant</item>
        <item name="android:forceDarkAllowed" tools:targetApi="q">true</item>
        <!-- Customize your theme here. -->
    </style>
    <!-- Base application theme. -->
    <style name="HomeTheme" parent="Theme.MaterialComponents.DayNight.NoActionBar">
        <!-- Primary brand color. -->
        <item name="colorPrimary">@color/color_primary</item>
        <item name="colorPrimaryVariant">@color/color_primary_variant</item>
        <item name="colorOnPrimary">@color/color_on_primary</item>
        <!-- Secondary brand color. -->
        <item name="colorSecondary">@color/color_secondary_variant</item>
        <item name="colorSecondaryVariant">@color/color_secondary_variant</item>
        <item name="colorOnSecondary">@color/white</item>
        <!-- Status bar color. -->
        <item name="android:statusBarColor" tools:targetApi="l">?attr/colorPrimaryVariant</item>
        <!-- Customize your theme here. -->
    </style>
    <style name="SplashTheme" parent="Theme.MaterialComponents.DayNight.NoActionBar">
        <item name="colorPrimary">@color/color_primary</item>
        <item name="android:statusBarColor">@color/color_primary</item>
        <!-- Secondary brand color. -->
        <item name="colorSecondary">@color/color_secondary_variant</item>
        <item name="colorSecondaryVariant">@color/color_secondary_variant</item>
        <item name="colorOnSecondary">@color/white</item>
    </style>
    <style name="SplashThemePlus" parent="Theme.MaterialComponents.DayNight.NoActionBar">
        <item name="colorPrimary">@color/color_primary</item>
        <item name="colorPrimaryVariant">@color/color_primary_variant</item>
        <item name="statusBarBackground">@color/color_primary</item>
        <item name="android:statusBarColor">@color/color_primary</item>
        <item name="android:windowBackground">@drawable/splash_bg</item>
    </style>
    <!--主页面样式-->
    <style name="MainTheme" parent="Theme.AppCompat.Light.NoActionBar">
        <!-- Customize your theme here. -->
        <item name="colorPrimary">@color/color_primary</item>
        <item name="colorPrimaryDark">@color/color_primary</item>
        <item name="colorAccent">@color/white</item>
        <item name="android:statusBarColor">@android:color/transparent</item>
    </style>
    <!--图片页面样式-->
    <style name="ImageTheme" parent="Theme.MaterialComponents.DayNight.NoActionBar">
        <item name="android:background">@android:color/transparent</item>
        <item name="android:statusBarColor" tools:targetApi="lollipop">@android:color/transparent
        </item>
        <item name="android:windowTranslucentStatus">false</item>
        <item name="android:windowTranslucentNavigation">true</item>
    </style>
    <!-- 圆角图片 -->
    <style name="roundedImageStyle">
        <item name="cornerFamily">rounded</item>
        <item name="cornerSize">24dp</item>
    </style>
    <!-- 圆角图片 -->
    <style name="roundedImageStyle_6">
        <item name="cornerFamily">rounded</item>
        <item name="cornerSize">6dp</item>
    </style>
    <!-- 圆形图片 -->
    <style name="circleImageStyle">
        <item name="cornerFamily">rounded</item>
        <item name="cornerSize">50%</item>
    </style>
    <style name="loading_dialog" parent="android:style/Theme.Dialog">
        <item name="android:windowFrame">@null</item>
        <item name="android:windowNoTitle">true</item>
        <item name="android:windowBackground">@drawable/shape_bg_radius_24</item>
        <item name="android:windowIsFloating">true</item>
        <item name="android:windowContentOverlay">@null</item>
    </style>
    <!--自定义对话框-->
    <style name="dialog" parent="@android:style/Theme.Dialog">
        <item name="android:windowFrame">@null</item>
        <item name="android:windowIsFloating">true</item>
        <item name="android:windowIsTranslucent">true</item>
        <item name="android:windowBackground">@android:color/transparent</item>
        <item name="android:backgroundDimEnabled">true</item>
        <item name="android:windowNoTitle">true</item>
    </style>
    <!--对话框弹出和消失动画-->
    <style name="dialog_from_bottom_anim">
        <item name="android:windowEnterAnimation">@anim/dialog_from_bottom_anim_in</item>
        <item name="android:windowExitAnimation">@anim/dialog_from_bottom_anim_out</item>
    </style>
    <style name="dialog_from_top_anim">
        <item name="android:windowEnterAnimation">@anim/dialog_from_top_anim_in</item>
        <item name="android:windowExitAnimation">@anim/dialog_from_top_anim_out</item>
    </style>
    <style name="dialog_scale_anim">
        <item name="android:windowEnterAnimation">@anim/dialog_scale_anim_in</item>
        <item name="android:windowExitAnimation">@anim/dialog_scale_anim_out</item>
    </style>
    <style name="dialog_from_right_anim">
        <item name="android:windowEnterAnimation">@anim/dialog_from_right_anim_in</item>
        <item name="android:windowExitAnimation">@anim/dialog_from_right_anim_out</item>
    </style>
    <style name="BottomSheetDialogStyle" parent="Theme.Design.BottomSheetDialog">
        <item name="android:windowFrame">@null</item>
        <item name="android:windowIsFloating">true</item>
        <item name="android:windowIsTranslucent">true</item>
        <item name="android:background">@android:color/transparent</item>
        <item name="android:backgroundDimEnabled">true</item>
    </style>
    <style name="BottomSheetDialogStyle_Light" parent="Theme.Design.BottomSheetDialog">
        <item name="android:windowFrame">@null</item>
        <item name="android:windowIsFloating">true</item>
        <item name="android:windowIsTranslucent">true</item>
        <item name="android:background">@android:color/transparent</item>
        <item name="android:backgroundDimEnabled">false</item>
    </style>
</resources>
下面我们用一个xml来举例说明
3. 修改背景
就拿登录页面的xml来说明,现在是这样的。

我们在设置页面的背景颜色的时候就要想到它在默认情况下和在深色模式的区别。

将鼠标悬停在这个颜色值上会出现一个弹窗,告诉你这个页面在默认和深色模式下的背景颜色的色值,通过这个你就知道你的改动有没有效果。其他的颜色就同理了,当然了也有一些颜色是不变的,比如这个登录按钮的登录两个字,现在是白色,在深色模式下它也是白色。

不过这里你要是不去设置颜色值的话,就需要在theme.xml去设置了。像这种常规的文字颜色,背景颜色改动起来其实是很简单的。那么我们难度上升一下,item颜色要怎么去改。
4. 菜单适配
这张图我想你应该不陌生,如果你是一篇一篇看过来的话,这是深色模式下的样子。

上面的头像那个部分实际上我只改动了背景颜色,因为默认是绿色。下面的菜单Item,需要改动了。这里的改动其实不在nav_menu.xml中

而在NavigationView中,如下图所示:

通过itemIconTint改图标颜色,通过itemTextColor改文字颜色即可。
5. BottomNavigationView
在App的HomeActivity中是通过BottomNavigationView去进行底部导航的,那么它的item有一个选中的效果,还有未选中的效果,同时还需要适配深色模式,这要怎么搞呢?
首先在res下创建一个color文件夹,在这个文件夹里我们可以创建用于控制颜色变化的资源,比如新建一个bvn_color_selector.xml,里面的代码如下:
<?xml version="1.0" encoding="utf-8"?>
<selector xmlns:android="http://schemas.android.com/apk/res/android">
    <item android:color="@color/green" android:state_checked="true"/>
    <item android:color="@color/bnv_check_color" android:state_checked="false"/>
</selector>

那么我们只要在activity_home.xml中使用它就行了,如下图所示:

同时我还把背景颜色改掉了。
6. TabLayout

这里我们只需要改一下文字颜色和下划线颜色,你可以能会问,没有改背景颜色,这取决于它的父布局,你只需要改父布局的背景颜色就行了。
7. FloatingActionButton
浮动按钮的改动有一点特殊,如果你的样式主题中是NoActionBar,那么你直接通过tint去改变图标颜色是不行的,而是通过页面的样式的colorOnSecondary属性去设置的图标颜色,这里在深色模式下改成白的。

同样你需要改一下按钮的背景颜色,如下图所示

8. 深色模式判断
有时候我们需要根据当前是否为深色模式去设置一些参数,比如记事本页面的状态栏,在默认情况下是黑色的深色模式,在深色模式下需要状态栏浅色模式,这里就需要判断一下,我们可以写一个方法在BaseActivity中。方法代码如下:
  protected boolean isNight() {
        UiModeManager uiModeManager = (UiModeManager) context.getSystemService(Context.UI_MODE_SERVICE);
        return uiModeManager.getNightMode() == UiModeManager.MODE_NIGHT_YES;
    }
这个方法你同样可以写在BaseFragment中,然后去NoteActivity和EditActivity中调用。

9. WebView设置
在WebView中也可以设置是否为夜间模式。

10. 地图设置
之前我们在App中设置了地图,那么同样也是可以根据这个判断去设置当前地图的样式。

这样即可。下面我们来看一下深色模式的效果图。