安装步骤
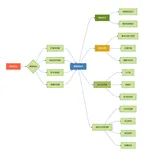
- 选择4核8G(master)、8核16G(node1)、8核16G(node2) 三台机器,按量付费进行实验,CentOS7.9
- 安装Docker
- 安装Kubernetes
- 安装KubeSphere前置环境
- 安装KubeSphere
安装Docker
sudo yum remove docker*
sudo yum install -y yum-utils
#配置docker的yum地址
sudo yum-config-manager \
--add-repo \
http://mirrors.aliyun.com/docker-ce/linux/centos/docker-ce.repo
#安装指定版本
sudo yum install -y docker-ce-20.10.7 docker-ce-cli-20.10.7 containerd.io-1.4.6
# 启动&开机启动docker
systemctl enable docker --now
# docker加速配置
sudo mkdir -p /etc/docker
sudo tee /etc/docker/daemon.json <<-'EOF'
{
  "registry-mirrors": ["https://82m9ar63.mirror.aliyuncs.com"],
  "exec-opts": ["native.cgroupdriver=systemd"],
  "log-driver": "json-file",
  "log-opts": {
    "max-size": "100m"
  },
  "storage-driver": "overlay2"
}
EOF
sudo systemctl daemon-reload
sudo systemctl restart docker
安装Kubernetes
1、基本环境
每个机器使用内网ip互通
每个机器配置自己的hostname,不能用localhost
#设置每个机器自己的hostname
hostnamectl set-hostname xxx
# 将 SELinux 设置为 permissive 模式(相当于将其禁用)
sudo setenforce 0
sudo sed -i 's/^SELINUX=enforcing$/SELINUX=permissive/' /etc/selinux/config
#关闭swap
swapoff -a
sed -ri 's/.*swap.*/#&/' /etc/fstab
#允许 iptables 检查桥接流量
cat <<EOF | sudo tee /etc/modules-load.d/k8s.conf
br_netfilter
EOF
cat <<EOF | sudo tee /etc/sysctl.d/k8s.conf
net.bridge.bridge-nf-call-ip6tables = 1
net.bridge.bridge-nf-call-iptables = 1
EOF
sudo sysctl --system
2、安装kubelet、kubeadm、kubectl
#配置k8s的yum源地址
cat <<EOF | sudo tee /etc/yum.repos.d/kubernetes.repo
[kubernetes]
name=Kubernetes
baseurl=http://mirrors.aliyun.com/kubernetes/yum/repos/kubernetes-el7-x86_64
enabled=1
gpgcheck=0
repo_gpgcheck=0
gpgkey=http://mirrors.aliyun.com/kubernetes/yum/doc/yum-key.gpg
   http://mirrors.aliyun.com/kubernetes/yum/doc/rpm-package-key.gpg
EOF
#安装 kubelet,kubeadm,kubectl
sudo yum install -y kubelet-1.20.9 kubeadm-1.20.9 kubectl-1.20.9
#启动kubelet
sudo systemctl enable --now kubelet
#所有机器配置master域名
echo "172.31.0.4  k8s-master" >> /etc/hosts
3、初始化master节点
1、初始化
kubeadm init \
--apiserver-advertise-address=172.31.0.4 \
--control-plane-endpoint=k8s-master \
--image-repository registry.cn-hangzhou.aliyuncs.com/lfy_k8s_images \
--kubernetes-version v1.20.9 \
--service-cidr=10.96.0.0/16 \
--pod-network-cidr=192.168.0.0/16
2、记录关键信息
记录master执行完成后的日志
Your Kubernetes control-plane has initialized successfully!
To start using your cluster, you need to run the following as a regular user:
  mkdir -p $HOME/.kube
  sudo cp -i /etc/kubernetes/admin.conf $HOME/.kube/config
  sudo chown $(id -u):$(id -g) $HOME/.kube/config
Alternatively, if you are the root user, you can run:
  export KUBECONFIG=/etc/kubernetes/admin.conf
You should now deploy a pod network to the cluster.
Run "kubectl apply -f [podnetwork].yaml" with one of the options listed at:
  https://kubernetes.io/docs/concepts/cluster-administration/addons/
You can now join any number of control-plane nodes by copying certificate authorities
and service account keys on each node and then running the following as root:
  kubeadm join k8s-master:6443 --token 3vckmv.lvrl05xpyftbs177 \
    --discovery-token-ca-cert-hash sha256:1dc274fed24778f5c284229d9fcba44a5df11efba018f9664cf5e8ff77907240 \
    --control-plane
Then you can join any number of worker nodes by running the following on each as root:
kubeadm join k8s-master:6443 --token 3vckmv.lvrl05xpyftbs177 \
    --discovery-token-ca-cert-hash sha256:1dc274fed24778f5c284229d9fcba44a5df11efba018f9664cf5e8ff77907240
3、安装Calico网络插件
curl https://docs.projectcalico.org/manifests/calico.yaml -O
kubectl apply -f calico.yaml
4、加入worker节点
安装KubeSphere前置环境
1、nfs文件系统
1、安装nfs-server
# 在每个机器。
yum install -y nfs-utils
# 在master 执行以下命令
echo "/nfs/data/ *(insecure,rw,sync,no_root_squash)" > /etc/exports
# 执行以下命令,启动 nfs 服务;创建共享目录
mkdir -p /nfs/data
# 在master执行
systemctl enable rpcbind
systemctl enable nfs-server
systemctl start rpcbind
systemctl start nfs-server
# 使配置生效
exportfs -r
#检查配置是否生效
exportfs
2、配置nfs-client(选做)
showmount -e 172.31.0.4
mkdir -p /nfs/data
mount -t nfs 172.31.0.4:/nfs/data /nfs/data
3、配置默认存储
配置动态供应的默认存储类
## 创建了一个存储类
apiVersion: storage.k8s.io/v1
kind: StorageClass
metadata:
  name: nfs-storage
  annotations:
    storageclass.kubernetes.io/is-default-class: "true"
provisioner: k8s-sigs.io/nfs-subdir-external-provisioner
parameters:
  archiveOnDelete: "true"  ## 删除pv的时候,pv的内容是否要备份
---
apiVersion: apps/v1
kind: Deployment
metadata:
  name: nfs-client-provisioner
  labels:
    app: nfs-client-provisioner
  # replace with namespace where provisioner is deployed
  namespace: default
spec:
  replicas: 1
  strategy:
    type: Recreate
  selector:
    matchLabels:
      app: nfs-client-provisioner
  template:
    metadata:
      labels:
        app: nfs-client-provisioner
    spec:
      serviceAccountName: nfs-client-provisioner
      containers:
        - name: nfs-client-provisioner
          image: registry.cn-hangzhou.aliyuncs.com/lfy_k8s_images/nfs-subdir-external-provisioner:v4.0.2
          # resources:
          #    limits:
          #      cpu: 10m
          #    requests:
          #      cpu: 10m
          volumeMounts:
            - name: nfs-client-root
              mountPath: /persistentvolumes
          env:
            - name: PROVISIONER_NAME
              value: k8s-sigs.io/nfs-subdir-external-provisioner
            - name: NFS_SERVER
              value: 172.31.0.4 ## 指定自己nfs服务器地址
            - name: NFS_PATH
              value: /nfs/data  ## nfs服务器共享的目录
      volumes:
        - name: nfs-client-root
          nfs:
            server: 172.31.0.4
            path: /nfs/data
---
apiVersion: v1
kind: ServiceAccount
metadata:
  name: nfs-client-provisioner
  # replace with namespace where provisioner is deployed
  namespace: default
---
kind: ClusterRole
apiVersion: rbac.authorization.k8s.io/v1
metadata:
  name: nfs-client-provisioner-runner
rules:
  - apiGroups: [""]
    resources: ["nodes"]
    verbs: ["get", "list", "watch"]
  - apiGroups: [""]
    resources: ["persistentvolumes"]
    verbs: ["get", "list", "watch", "create", "delete"]
  - apiGroups: [""]
    resources: ["persistentvolumeclaims"]
    verbs: ["get", "list", "watch", "update"]
  - apiGroups: ["storage.k8s.io"]
    resources: ["storageclasses"]
    verbs: ["get", "list", "watch"]
  - apiGroups: [""]
    resources: ["events"]
    verbs: ["create", "update", "patch"]
---
kind: ClusterRoleBinding
apiVersion: rbac.authorization.k8s.io/v1
metadata:
  name: run-nfs-client-provisioner
subjects:
  - kind: ServiceAccount
    name: nfs-client-provisioner
    # replace with namespace where provisioner is deployed
    namespace: default
roleRef:
  kind: ClusterRole
  name: nfs-client-provisioner-runner
  apiGroup: rbac.authorization.k8s.io
---
kind: Role
apiVersion: rbac.authorization.k8s.io/v1
metadata:
  name: leader-locking-nfs-client-provisioner
  # replace with namespace where provisioner is deployed
  namespace: default
rules:
  - apiGroups: [""]
    resources: ["endpoints"]
    verbs: ["get", "list", "watch", "create", "update", "patch"]
---
kind: RoleBinding
apiVersion: rbac.authorization.k8s.io/v1
metadata:
  name: leader-locking-nfs-client-provisioner
  # replace with namespace where provisioner is deployed
  namespace: default
subjects:
  - kind: ServiceAccount
    name: nfs-client-provisioner
    # replace with namespace where provisioner is deployed
    namespace: default
roleRef:
  kind: Role
  name: leader-locking-nfs-client-provisioner
  apiGroup: rbac.authorization.k8s.io
#确认配置是否生效
kubectl get sc
2、metrics-server
集群指标监控组件
安装KubeSphere
面向云原生应用的容器混合云,支持 Kubernetes 多集群管理的 PaaS 容器云平台解决方案 | KubeSphere
1、下载核心文件
如果下载不到,请复制附录的内容
wget https://github.com/kubesphere/ks-installer/releases/download/v3.1.1/kubesphere-installer.yaml
wget https://github.com/kubesphere/ks-installer/releases/download/v3.1.1/cluster-configuration.yaml
2、修改cluster-configuration
在 cluster-configuration.yaml中指定我们需要开启的功能
参照官网“启用可插拔组件”
3、执行安装
kubectl apply -f kubesphere-installer.yaml
kubectl apply -f cluster-configuration.yaml
4、查看安装进度
kubectl logs -n kubesphere-system $(kubectl get pod -n kubesphere-system -l app=ks-install -o jsonpath='{.items[0].metadata.name}') -f
访问任意机器的 30880端口
账号 : admin
密码 : P@88w0rd
解决etcd监控证书找不到问题
kubectl -n kubesphere-monitoring-system create secret generic kube-etcd-client-certs --from-file=etcd-client-ca.crt=/etc/kubernetes/pki/etcd/ca.crt --from-file=etcd-client.crt=/etc/kubernetes/pki/apiserver-etcd-client.crt --from-file=etcd-client.key=/etc/kubernetes/pki/apiserver-etcd-client.key
附录
1、kubesphere-installer.yaml
---
apiVersion: apiextensions.k8s.io/v1beta1
kind: CustomResourceDefinition
metadata:
  name: clusterconfigurations.installer.kubesphere.io
spec:
  group: installer.kubesphere.io
  versions:
  - name: v1alpha1
    served: true
    storage: true
  scope: Namespaced
  names:
    plural: clusterconfigurations
    singular: clusterconfiguration
    kind: ClusterConfiguration
    shortNames:
    - cc
---
apiVersion: v1
kind: Namespace
metadata:
  name: kubesphere-system
---
apiVersion: v1
kind: ServiceAccount
metadata:
  name: ks-installer
  namespace: kubesphere-system
---
apiVersion: rbac.authorization.k8s.io/v1
kind: ClusterRole
metadata:
  name: ks-installer
rules:
- apiGroups:
  - ""
  resources:
  - '*'
  verbs:
  - '*'
- apiGroups:
  - apps
  resources:
  - '*'
  verbs:
  - '*'
- apiGroups:
  - extensions
  resources:
  - '*'
  verbs:
  - '*'
- apiGroups:
  - batch
  resources:
  - '*'
  verbs:
  - '*'
- apiGroups:
  - rbac.authorization.k8s.io
  resources:
  - '*'
  verbs:
  - '*'
- apiGroups:
  - apiregistration.k8s.io
  resources:
  - '*'
  verbs:
  - '*'
- apiGroups:
  - apiextensions.k8s.io
  resources:
  - '*'
  verbs:
  - '*'
- apiGroups:
  - tenant.kubesphere.io
  resources:
  - '*'
  verbs:
  - '*'
- apiGroups:
  - certificates.k8s.io
  resources:
  - '*'
  verbs:
  - '*'
- apiGroups:
  - devops.kubesphere.io
  resources:
  - '*'
  verbs:
  - '*'
- apiGroups:
  - monitoring.coreos.com
  resources:
  - '*'
  verbs:
  - '*'
- apiGroups:
  - logging.kubesphere.io
  resources:
  - '*'
  verbs:
  - '*'
- apiGroups:
  - jaegertracing.io
  resources:
  - '*'
  verbs:
  - '*'
- apiGroups:
  - storage.k8s.io
  resources:
  - '*'
  verbs:
  - '*'
- apiGroups:
  - admissionregistration.k8s.io
  resources:
  - '*'
  verbs:
  - '*'
- apiGroups:
  - policy
  resources:
  - '*'
  verbs:
  - '*'
- apiGroups:
  - autoscaling
  resources:
  - '*'
  verbs:
  - '*'
- apiGroups:
  - networking.istio.io
  resources:
  - '*'
  verbs:
  - '*'
- apiGroups:
  - config.istio.io
  resources:
  - '*'
  verbs:
  - '*'
- apiGroups:
  - iam.kubesphere.io
  resources:
  - '*'
  verbs:
  - '*'
- apiGroups:
  - notification.kubesphere.io
  resources:
  - '*'
  verbs:
  - '*'
- apiGroups:
  - auditing.kubesphere.io
  resources:
  - '*'
  verbs:
  - '*'
- apiGroups:
  - events.kubesphere.io
  resources:
  - '*'
  verbs:
  - '*'
- apiGroups:
  - core.kubefed.io
  resources:
  - '*'
  verbs:
  - '*'
- apiGroups:
  - installer.kubesphere.io
  resources:
  - '*'
  verbs:
  - '*'
- apiGroups:
  - storage.kubesphere.io
  resources:
  - '*'
  verbs:
  - '*'
- apiGroups:
  - security.istio.io
  resources:
  - '*'
  verbs:
  - '*'
- apiGroups:
  - monitoring.kiali.io
  resources:
  - '*'
  verbs:
  - '*'
- apiGroups:
  - kiali.io
  resources:
  - '*'
  verbs:
  - '*'
- apiGroups:
  - networking.k8s.io
  resources:
  - '*'
  verbs:
  - '*'
- apiGroups:
  - kubeedge.kubesphere.io
  resources:
  - '*'
  verbs:
  - '*'
- apiGroups:
  - types.kubefed.io
  resources:
  - '*'
  verbs:
  - '*'
---
kind: ClusterRoleBinding
apiVersion: rbac.authorization.k8s.io/v1
metadata:
  name: ks-installer
subjects:
- kind: ServiceAccount
  name: ks-installer
  namespace: kubesphere-system
roleRef:
  kind: ClusterRole
  name: ks-installer
  apiGroup: rbac.authorization.k8s.io
---
apiVersion: apps/v1
kind: Deployment
metadata:
  name: ks-installer
  namespace: kubesphere-system
  labels:
    app: ks-install
spec:
  replicas: 1
  selector:
    matchLabels:
      app: ks-install
  template:
    metadata:
      labels:
        app: ks-install
    spec:
      serviceAccountName: ks-installer
      containers:
      - name: installer
        image: kubesphere/ks-installer:v3.1.1
        imagePullPolicy: "Always"
        resources:
          limits:
            cpu: "1"
            memory: 1Gi
          requests:
            cpu: 20m
            memory: 100Mi
        volumeMounts:
        - mountPath: /etc/localtime
          name: host-time
      volumes:
      - hostPath:
          path: /etc/localtime
          type: ""
        name: host-time