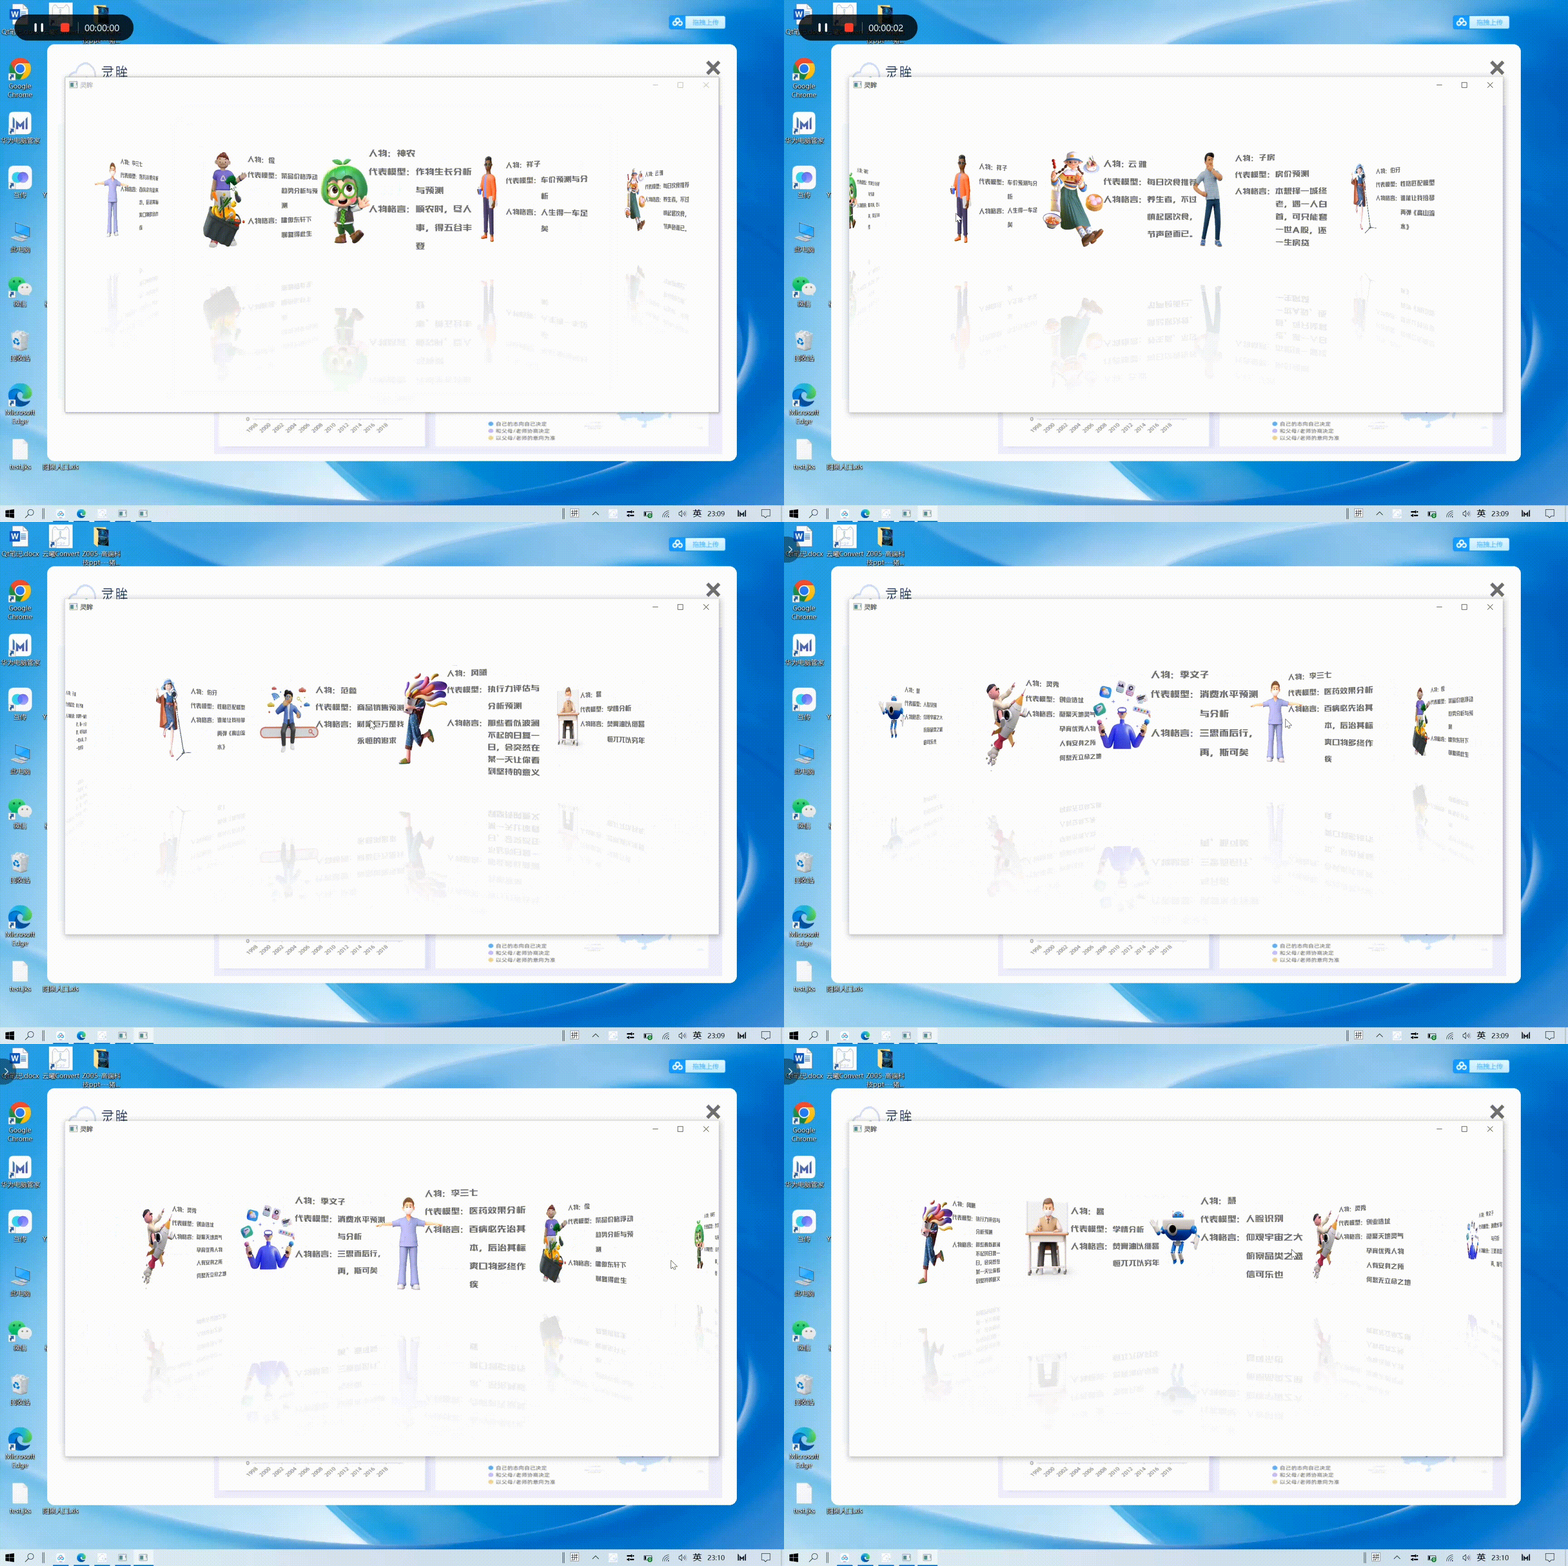
Qt功能优化:Qt 3D画廊
一、效果图
如下图所示:
二、使用步骤
1. .pro部分
代码如下:
TEMPLATE = app

QT += qml quick
CONFIG += c++11

SOURCES += main.cpp

RESOURCES += qml.qrc \
    image.qrc


# Additional import path used to resolve QML modules in Qt Creator's code model
QML_IMPORT_PATH =

# Additional import path used to resolve QML modules just for Qt Quick Designer
QML_DESIGNER_IMPORT_PATH =

# The following define makes your compiler emit warnings if you use
# any feature of Qt which as been marked deprecated (the exact warnings
# depend on your compiler). Please consult the documentation of the
# deprecated API in order to know how to port your code away from it.
DEFINES += QT_DEPRECATED_WARNINGS

# You can also make your code fail to compile if you use deprecated APIs.
# In order to do so, uncomment the following line.
# You can also select to disable deprecated APIs only up to a certain version of Qt.
#DEFINES += QT_DISABLE_DEPRECATED_BEFORE=0x060000    # disables all the APIs deprecated before Qt 6.0.0

# Default rules for deployment.
qnx: target.path = /tmp/$${TARGET}/bin
else: unix:!android: target.path = /opt/$${TARGET}/bin
!isEmpty(target.path): INSTALLS += target
2. .qml部分
Demo.qml
代码如下:
import QtQuick 2.0
import QtGraphicalEffects 1.0

Rectangle {
    id:coverflow

    property ListModel model
    property int itemCount: 5

    PathView{
        id:pathView
        model:coverflow.model
        delegate: Item {
            id:delegateItem
            width: 530
            height: 420
            z:PathView.iconZ
            scale:PathView.iconScale

            Image{
                id:image
                source: url
                width: delegateItem.width
                height: delegateItem.height
            }
            ShaderEffect {
                anchors.top: image.bottom
                width: image.width
                height: image.height;
                anchors.left: image.left
                property variant source: image;
                property size sourceSize: Qt.size(0.5 / image.width, 0.5 / image.height);
                fragmentShader:
                        "varying highp vec2 qt_TexCoord0;
                        uniform lowp sampler2D source;
                        uniform lowp vec2 sourceSize;
                        uniform lowp float qt_Opacity;
                        void main() {

                            lowp vec2 tc = qt_TexCoord0 * vec2(1, -1) + vec2(0, 1);
                            lowp vec4 col = 0.25 * (texture2D(source, tc + sourceSize) + texture2D(source, tc- sourceSize)
                            + texture2D(source, tc + sourceSize * vec2(1, -1))
                            + texture2D(source, tc + sourceSize * vec2(-1, 1)));
                            gl_FragColor = col * qt_Opacity * (1.0 - qt_TexCoord0.y) * 0.2;
                        }"
            }


            transform: Rotation{
                origin.x:image.width/2.0
                origin.y:image.height/2.0
                axis{x:0;y:1;z:0}
                angle: delegateItem.PathView.iconAngle
            }
        }
        path:coverFlowPath
        pathItemCount: coverflow.itemCount
        anchors.fill: parent

        preferredHighlightBegin: 0.5
        preferredHighlightEnd: 0.5

    }

    Path{
        id:coverFlowPath
        startX: 0
        startY: coverflow.height/3

        PathAttribute{name:"iconZ";value: 0}
        PathAttribute{name:"iconAngle";value: 70}
        PathAttribute{name:"iconScale";value: 0.6}
        PathLine{x:coverflow.width/2;y:coverflow.height/3}

        PathAttribute{name:"iconZ";value: 100}
        PathAttribute{name:"iconAngle";value: 0}
        PathAttribute{name:"iconScale";value: 1.0}

        PathLine{x:coverflow.width;y:coverflow.height/3}
        PathAttribute{name:"iconZ";value: 0}
        PathAttribute{name:"iconAngle";value: -70}
        PathAttribute{name:"iconScale";value: 0.6}
        PathPercent{value:1.0}

    }

}
main.qml
代码如下:
import QtQuick 2.8
import QtQuick.Window 2.2

Window {
    visible: true
    width:1800
    height: 880
    title: qsTr("灵眸")


    ListModel{
        id:model
        ListElement{url:"qrc:/image/1.png"}
        ListElement{url:"qrc:/image/2.png"}
        ListElement{url:"qrc:/image/3.png"}
        ListElement{url:"qrc:/image/4.png"}
        ListElement{url:"qrc:/image/6.png"}
        ListElement{url:"qrc:/image/7.png"}
        ListElement{url:"qrc:/image/8.png"}
        ListElement{url:"qrc:/image/9.png"}
        ListElement{url:"qrc:/image/10.png"}
        ListElement{url:"qrc:/image/11.png"}
        ListElement{url:"qrc:/image/12.png"}
        ListElement{url:"qrc:/image/13.png"}
        ListElement{url:"qrc:/image/14.png"}

    }

    CoverFlow{
        anchors.fill:parent
        model:model
    }


}
3. .cpp部分
main.cpp
代码如下:
#include <QGuiApplication>
#include <QQmlApplicationEngine>

int main(int argc, char *argv[])
{
    QGuiApplication app(argc, argv);

    QQmlApplicationEngine engine;
    engine.load(QUrl(QStringLiteral("qrc:/main.qml")));
    if (engine.rootObjects().isEmpty())
        return -1;

    return app.exec();
}
总结
以上是部分Qt关于功能优化——Qt功能优化:Qt 3D画廊的完整版代码部分,另附Qt功能优化:Qt 3D画廊完整素材和代码压缩包,用户也可直接关注微信公众号:云曦智划,回复“3D画廊”,即可免费获取。同时,所有相关的Qt界面优化的部分,均在下方专栏——Qt功能优化中,大家如果感兴趣可以进行观看并使用,希望通过这些文章能够使大家的Qt软件更加美观和完美 !!!
另,如果大家有时间的话,也可以在个人主页中的专栏部分,查看我的Qt实战专栏与Qt界面优化专栏哦,里面分别存放有Qt相关的实战软件和相对实用的附属功能,大家感兴趣可以看看(๑><๑)
另附Qt实战:云曦聊天室篇和Qt界面优化:鼠标双击特效两篇相关文章,大家可以下滑到文章下方专栏处,查看相关专栏中的其它文章,希望能帮助到大家,感谢大家支持~( ̄▽ ̄~)~
