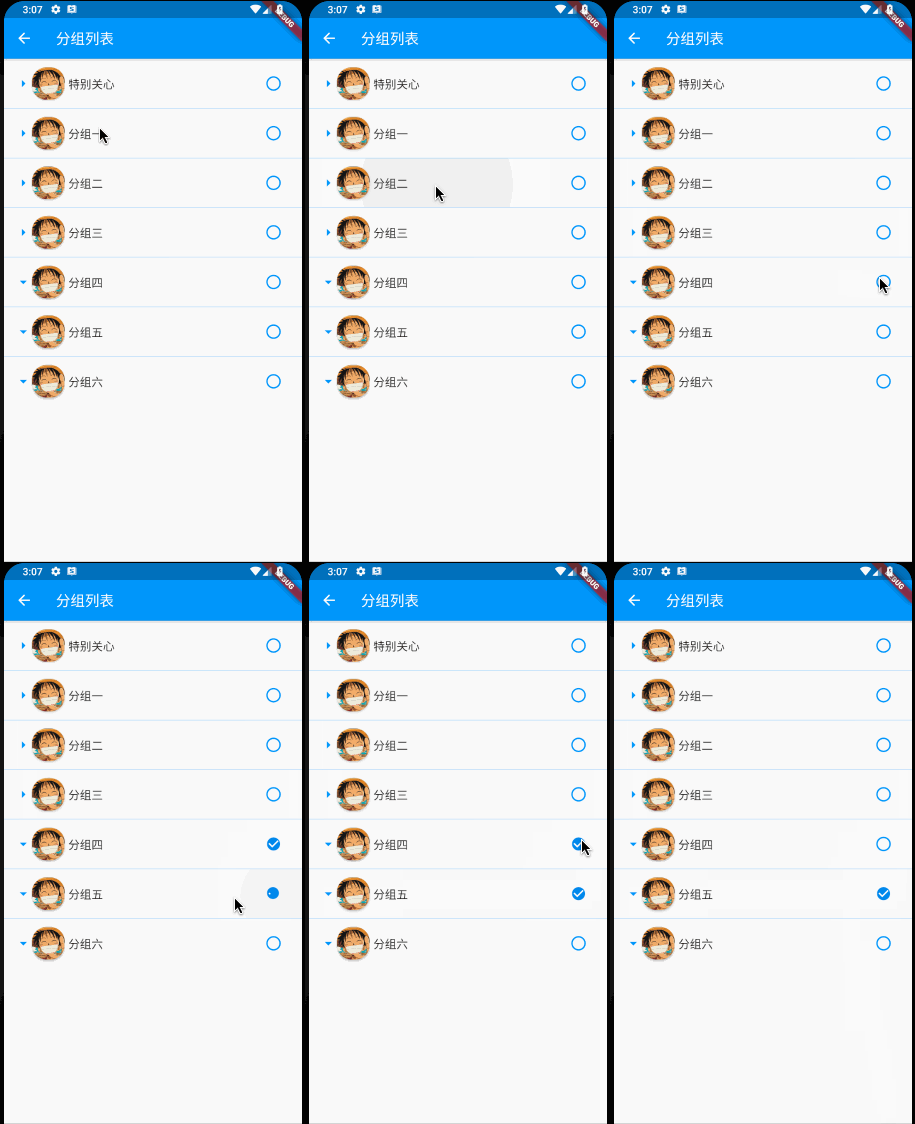
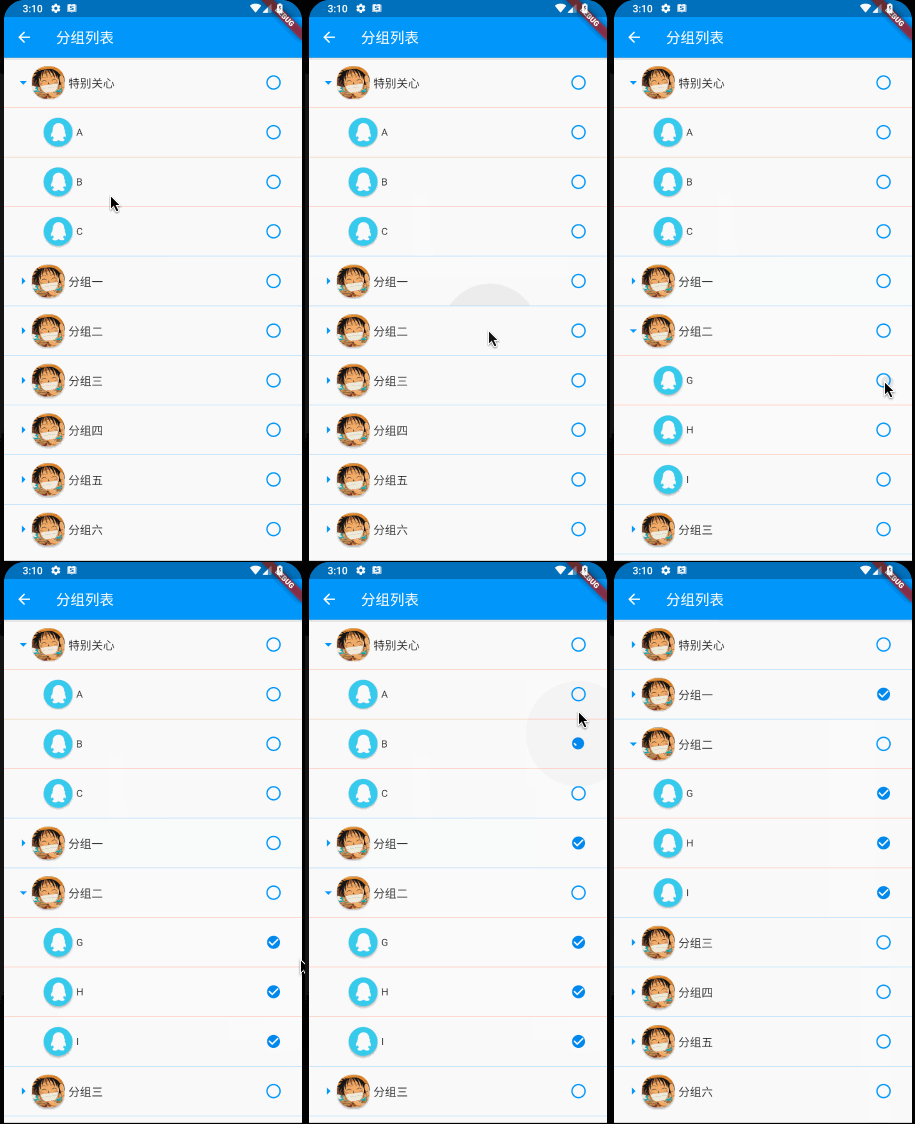
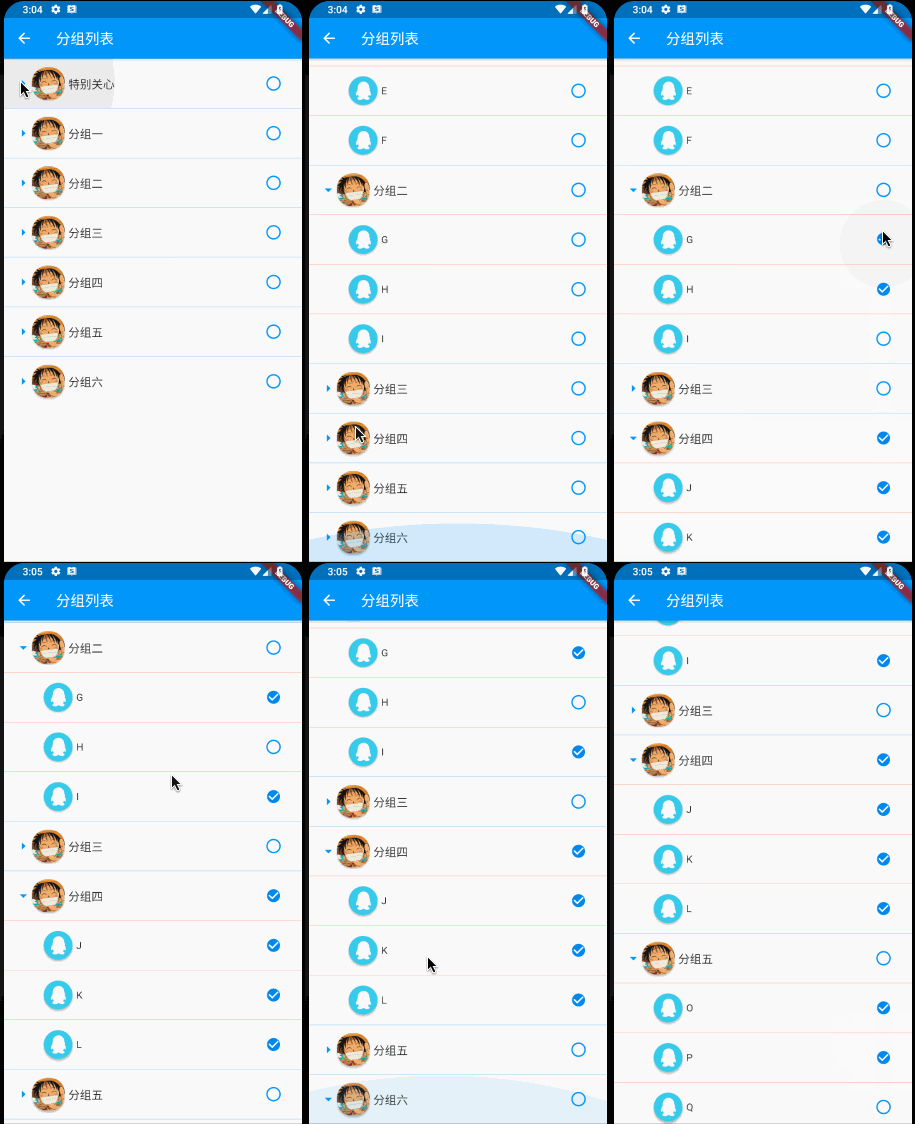
小菜在实践过程中,想实现一个可选的二级分组列表,pub.dev 插件库中已经有很多类似功能的插件,小菜还是准备从自己角度尝试实现一个简单的二级分组列表;
- 列表分为两级,默认均折叠
- 一级列表和二级列表均可选中和取消
- 二级列表数据可以主动添加
分组列表的实现有很多方式,小菜准备用最基本的两个 ListView 嵌套的思路来进行展示,默认是展示第一级列表信息,在点击展开操作时,展示对应的二级列表;
GroupList
1. Bean 数据结构
小菜先准备好数据实体类,一级列表 CategoryBean 中包含对应的二级列表 SubCategoryBean,其中两个实体中均包含一个 isChecked 字段用于保存当前 item 是否选中状态;
class CategoryBean {
  String name;
  String url;
  bool _isChecked = false;
  List<SubCategoryBean> itemList;

  bool get isChecked => _isChecked ?? false;

  set isChecked(bool value) => _isChecked = value;

  CategoryBean({this.name, this.url, this.itemList});
}

class SubCategoryBean {
  String name;
  String url;
  bool _isChecked = false;

  SubCategoryBean({this.name, this.url});

  bool get isChecked => _isChecked ?? false;

  set isChecked(bool value) => _isChecked = value;
}
2. 一级列表
小菜先展示一级列表,可根据使用场景确认是否使用 SliverListView,小菜测试过程中仅采用基本的 ListView;其中单项选择框,小菜采用了之前自定义的 ACECheckbox;其中注意,在 ACECheckbox 点击回调时应注意更改一级实体 Bean 中 isChecked 状态;
return Scaffold(
    appBar: AppBar(title: Text('分组列表')),
    body: ListView.builder(
        itemCount: widget.listData.length,
        itemBuilder: (context, index) {
          return GroupItemWidget(widget.listData[index]);
        }));

class _GroupItemWidgetState extends State<GroupItemWidget> {
  bool _isExpand = false;

  @override
  Widget build(BuildContext context) {
    return InkWell(
        child: Column(children: <Widget>[
          Divider(height: 0.5, color: Colors.blue),
          Padding(
              padding: EdgeInsets.symmetric(horizontal: 15.0, vertical: 10.0),
              child: Row(children: <Widget>[
                Icon(_isExpand ? Icons.arrow_drop_down : Icons.arrow_right, color: Colors.blue),
                _userIcon(false),
                SizedBox(width: 5.0),
                Expanded(child: Text('${widget.bean.name}', style: TextStyle(fontSize: 16.0))),
                _rightCheckBox(widget.bean, 0)
              ])),
          _subCategoryList(widget.bean)
        ]),
        onTap: () {
          _isExpand = !_isExpand;
          setState(() {});
        });
  }

  _userIcon(isCircle) {
    double size = isCircle ? 40.0 : 45.0;
    return PhysicalModel(
        color: Colors.transparent,
        shape: isCircle ? BoxShape.circle : BoxShape.rectangle,
        clipBehavior: Clip.antiAlias,
        elevation: 2.0,
        borderRadius: BorderRadius.all(Radius.circular(20.0)),
        child: Container(width: size, height: size, child: Image.asset(isCircle ? 'images/icon_qq.png' : 'images/icon_hzw01.jpg')));
  }

  _rightCheckBox(bean, type, {subIndex}) {
    bool _isChecked = type == 0 ? bean.isChecked : bean.itemList[subIndex].isChecked;
    return ACECheckbox(
        value: _isChecked,
        type: ACECheckBoxType.circle,
        unCheckColor: Colors.blue,
        onChanged: (value) {
          setState(() => _isChecked = value);
          if (type == 0) {
            bean.isChecked = _isChecked;
            List.generate(bean.itemList.length, (index) => bean.itemList[index].isChecked = _isChecked);
          }
        });
  }
}
3. 二级列表
当点击一级列表 item 时,展现二级列表;而实际上只是在一级 item 中添加一个新的列表数据,仅视觉效果上是展开二级列表;当再次点击一级列表 item 时把新加的二级列表替换为空的 Container 布局即可;
_subCategoryList(CategoryBean bean) {
  Widget _widget;
  if (!_isExpand ||
      bean == null ||
      bean.itemList == null ||
      bean.itemList.length == 0) {
    _widget = Container();
  } else {
    _widget = ListView.builder(
        itemCount: bean.itemList.length,
        itemBuilder: (context, index) => Row(children: <Widget>[ Flexible(child: _subCategoryItem(bean, index)) ]));
  }
  return _widget;
}

_subCategoryItem(CategoryBean bean, index) {
  return Column(children: <Widget>[
    Divider(height: 0.5, color: Colors.deepOrange),
    Padding(
        padding: EdgeInsets.symmetric(horizontal: 15.0, vertical: 10.0),
        child: Row(children: <Widget>[
          SizedBox(width: 40.0),
          _userIcon(true),
          SizedBox(width: 5.0),
          Expanded(child: Text(bean.itemList[index].name ?? 'SubName')),
          _rightCheckBox(bean, 1, subIndex: index)
        ]))
  ]);
}
4. ACECheckbox 选中 & 取消
小菜最想处理的是列表 item 的选中和取消状态;小菜首先在实体 Bean 中添加一个 isChecked 状态用于记录当前选中状态;
当一级列表选中时,无论展开或折叠,二级列表中各元素也全部选中,小菜通过 List.generate 遍历二级列表更改 isChecked 状态;
当二级列表 item 部分选中时,对应的一级列表取消选中状态;同时当把二级列表中所有 items 均选中时,对应一级列表也要选中;小菜通过遍历判断二级列表中选中数量来调整一级 item 对应的 isChecked 状态;
_rightCheckBox(bean, type, {subIndex}) {
  bool _isChecked = type == 0 ? bean.isChecked : bean.itemList[subIndex].isChecked;
  return ACECheckbox(
      value: _isChecked,
      type: ACECheckBoxType.circle,
      unCheckColor: Colors.blue,
      onChanged: (value) {
        setState(() => _isChecked = value);
        if (type == 0) {
          bean.isChecked = _isChecked;
          List.generate(bean.itemList.length, (index) => bean.itemList[index].isChecked = _isChecked);
        } else {
          bean.itemList[subIndex].isChecked = _isChecked;
          int checkedSize = 0;
          List.generate(bean.itemList.length, (index) {
            if (bean.itemList[index].isChecked == false) {
              bean.isChecked = false;
            } else {
              checkedSize += 1;
            }
            if (checkedSize == bean.itemList.length) {
              bean.isChecked = true;
            }
          });
        }
      });
}
5. 数据动态添加
小菜预期的目标是,首次数据只展示一级列表数据,再点击一级列表 item 时才会请求二级列表数据,并动态添加到数据列表中;这样的优势便是减少数据请求,简化数据格式;小菜默认在 分组五 中不设置二级列表数据,在点击时动态添加;
return InkWell(
    child: Column(children: <Widget>[
      Divider(height: 0.5, color: Colors.blue),
      Padding(
          padding: EdgeInsets.symmetric(horizontal: 15.0, vertical: 10.0),
          child: Row(children: <Widget>[
            Icon(_isExpand ? Icons.arrow_drop_down : Icons.arrow_right, color: Colors.blue),
            _userIcon(false), SizedBox(width: 5.0),
            Expanded(child: Text('${widget.bean.name}', style: TextStyle(fontSize: 16.0))),
            _rightCheckBox(widget.bean, 0)
          ])),
      _subCategoryList(widget.bean)
    ]),
    onTap: () {
      _isExpand = !_isExpand;
      setState(() {});
      if (widget.bean.name == '分组五' &&
          (widget.bean.itemList == null || widget.bean.itemList.length == 0)) {
        widget.bean.itemList = [
          SubCategoryBean(name: 'O'),
          SubCategoryBean(name: 'P'),
          SubCategoryBean(name: 'Q')
        ];
      }
    });
6. 滑动冲突
小菜通过两个 ListView 来实现二级分组列表,涉及到手势冲突,在二级列表展开时,手势只能在一级列表处触发,二级列表不会整体滑动且上下有主题色水波纹;小菜之前也曾处理过,只需要在 ListView 中设置 primary: false & shrinkWrap: true 等即可;
_widget = ListView.builder(
    primary: false,
    shrinkWrap: true,
    itemCount: bean.itemList.length,
    itemBuilder: (context, index) => Row(children: <Widget>[ Flexible(child: _subCategoryItem(bean, index)) ]));
小菜对 GroupList 二级分组列表的练习暂时告一段落,但真正应用到实际中还应配合具体的数据请求以及页面操作进行调整,以上仅为一个简单的测试 Demo;如有错误,请多多指导!
来源: 阿策小和尚


