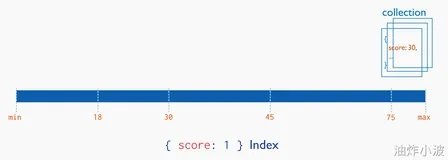
MongoDB的索引和关系型数据库的索引概念和功能是相同的:
(1)不使用索引的搜索可以称为全表扫面,也就是说,服务器必须找完整个表才能查询整个结果;
(2)建立索引后搜索,查询在索引中搜索,在索引的条目中找到条目以后,就可以直接跳转到目标文档的位置;这样的搜索比全表的搜索的速度要提高好几个数量级;
先向集合blog中添加1000000个文档:
|
1
2
3
4
5
6
7
8
|
>
for
(i=0;i<1000000;i++){
... db.
users
.insert(
... {
"i"
:i,
...
"username"
:
"user"
+1,
...
"age"
:Math.floor(Math.random()*120),
...
"created"
:new Date()});}
WriteResult({
"nInserted"
: 1 })
>
|
在上述的集合中随机查询一个文档,使用explain函数来查看搜索过程中的信息:
|
1
2
3
4
5
6
7
8
9
10
11
12
13
14
15
16
17
18
|
> db.
users
.
find
({
"username"
:
"user101"
}).explain()
{
"cursor"
:
"BasicCursor"
,
"isMultiKey"
:
false
,
"n"
: 1,
"nscannedObjects"
: 1000000,
"nscanned"
: 1000000,
"nscannedObjectsAllPlans"
: 1000000,
"nscannedAllPlans"
: 1000000,
"scanAndOrder"
:
false
,
"indexOnly"
:
false
,
"nYields"
: 7812,
"nChunkSkips"
: 0,
"millis"
: 344,
"server"
:
"localhost.localdomain:27017"
,
"filterSet"
:
false
}
>
|
其中millies指明搜索花费的毫秒数为344毫秒;
其中n代表扫描全表后的搜索后的结果数为1,搜索并不知道username为user101的数量到底有几个,为优化查询将查询的结果限制为1个,这样在找到第一个文档后便停止搜索:
|
1
2
3
4
5
6
7
8
9
10
11
12
13
14
15
16
17
18
|
> db.
users
.
find
({
"username"
:
"user101"
}).limit(1).explain()
{
"cursor"
:
"BasicCursor"
,
"isMultiKey"
:
false
,
"n"
: 1,
"nscannedObjects"
: 102,
"nscanned"
: 102,
"nscannedObjectsAllPlans"
: 102,
"nscannedAllPlans"
: 102,
"scanAndOrder"
:
false
,
"indexOnly"
:
false
,
"nYields"
: 0,
"nChunkSkips"
: 0,
"millis"
: 0,
"server"
:
"localhost.localdomain:27017"
,
"filterSet"
:
false
}
>
|
可以看到millis为0,因为扫描文档的数量极大减少了,查询几乎瞬间完成;
但是这个方法有缺陷,如果找users999999,仍然几乎扫描整个集合。
|
1
2
3
4
5
6
7
8
9
10
11
12
13
14
15
16
17
18
|
> db.
users
.
find
({
"username"
:
"user999999"
}).limit(1).explain()
{
"cursor"
:
"BasicCursor"
,
"isMultiKey"
:
false
,
"n"
: 1,
"nscannedObjects"
: 1000000,
"nscanned"
: 1000000,
"nscannedObjectsAllPlans"
: 1000000,
"nscannedAllPlans"
: 1000000,
"scanAndOrder"
:
false
,
"indexOnly"
:
false
,
"nYields"
: 7812,
"nChunkSkips"
: 0,
"millis"
: 321,
"server"
:
"localhost.localdomain:27017"
,
"filterSet"
:
false
}
>
|
花费几乎和搜索整个集合的的时间millis差不多为321,而且随着文档数量增加,查询花费的时间越长;
在username字段上创建索引:
|
1
2
3
4
5
6
7
8
|
> db.
users
.ensureIndex({
"username"
:1})
{
"createdCollectionAutomatically"
:
false
,
"numIndexesBefore"
: 1,
"numIndexesAfter"
: 2,
"ok"
: 1
}
>
|
再次查询users999999的用户:
|
1
2
3
4
5
6
7
8
9
10
11
12
13
14
15
16
17
18
19
20
21
22
23
24
25
26
|
> db.
users
.
find
({
"username"
:
"user999999"
}).limit(1).explain()
{
"cursor"
:
"BtreeCursor username_1"
,
"isMultiKey"
:
false
,
"n"
: 1,
"nscannedObjects"
: 1,
"nscanned"
: 1,
"nscannedObjectsAllPlans"
: 1,
"nscannedAllPlans"
: 1,
"scanAndOrder"
:
false
,
"indexOnly"
:
false
,
"nYields"
: 0,
"nChunkSkips"
: 0,
"millis"
: 85,
"indexBounds"
: {
"username"
: [
[
"user999999"
,
"user999999"
]
]
},
"server"
:
"localhost.localdomain:27017"
,
"filterSet"
:
false
}
>
|
花费的时间millis为85,比没有创建索引前的321要少很多;
当然索引会加快查询的速度,但是也有弊端,每次添加、删除、更新一个文档,MongoDB不仅要更新文档,还要更新文档上的索引;
每个集合只能有64个集合,挑选合适的字段建立索引非常重要。
本文转自 bannerpei 51CTO博客,原文链接:http://blog.51cto.com/281816327/1600482,如需转载请自行联系原作者