
注:本文是【ASP.NET Web API系列教程】的一部分,如果您是第一次看本博客文章,请先看前面的内容。
Part 4: Adding an Admin View
第4部分:添加Admin视图
本文引自:http://www.asp.net/web-api/overview/creating-web-apis/using-web-api-with-entity-framework/using-web-api-with-entity-framework,-part-4
Add an Admin View
添加Admin视图
Now we’ll turn to the client side, and add a page that can consume data from the Admin controller. The page will allow users to create, edit, or delete products, by sending AJAX requests to the controller.
现在我们转入客户端,并添加一个能够对Admin控制器而来的数据进行定制的页面。通过给控制器发送AJAX请求的方式,该页面将允许用户创建、编辑,或删除产品。
In Solution Explorer, expand the Controllers folder and open the file named HomeController.cs. This file contains an MVC controller. Add a method named Admin:
在“解决方案资源管理器”中,展开Controllers文件夹,并打开名为HomeController.cs的文件。这个文件是一个MVC控制器。添加一个名称为Admin的方法:
public ActionResult Admin()
{
    string apiUri= Url.HttpRouteUrl("DefaultApi", new { controller = "admin", });
    ViewBag.ApiUrl = new Uri(Request.Url, apiUri).AbsoluteUri.ToString();
    return View();
}
The HttpRouteUrl method creates the URI to the web API, and we store this in the view bag for later.
HttpRouteUrl方法创建了发送给Web API的URI,我们随后把它存储在视图包(view bag)中。
Next, position the text cursor within the Admin action method, then right-click and select Add View. This will bring up the Add View dialog.
下一步,把文本光标定位到Admin动作方法的内部,然后右击,并选择“添加视图”。这会带出“添加视图”对话框(见图2-20)。
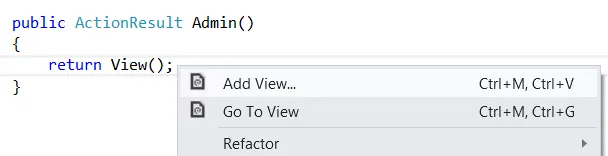
图2-20. 添加视图
In the Add View dialog, name the view "Admin". Select the check box labeled Create a strongly-typed view. Under Model Class, select "Product (ProductStore.Models)". Leave all the other options as their default values.
在“添加视图”对话框中,将此视图命名为“Admin”。选中标签为“创建强类型视图”的复选框。在“模型类”下面,选择“Product (ProductStore.Models)”。保留所有其它选项为其默认值(如图2-21)。
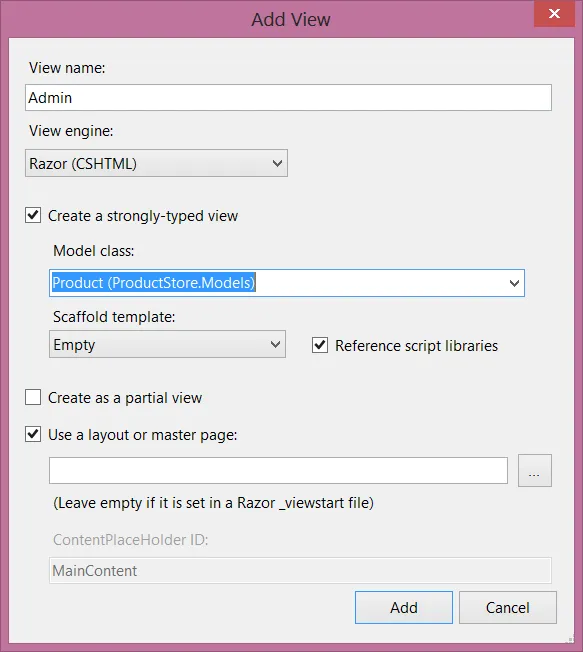
图2-21. “添加视图”对话框的设置
Clicking Add adds a file named Admin.cshtml under Views/Home. Open this file and add the following HTML. This HTML defines the structure of the page, but no functionality is wired up yet.
点击“添加”,会把一个名称为Admin.cshtml的文件添加到Views/Home下。打开这个文件,并添加以下HTML。这个HTML定义了页面的结构,但尚未连接功能。
<div class="content">
    <div class="float-left">
        <ul id="update-products">
            <li>
                <div><div class="item">Product ID</div><span></span></div>
                <div><div class="item">Name</div> <input type="text" /></div>
                <div><div class="item">Price ($)</div> <input type="text" /></div>
                <div><div class="item">Actual Cost ($)</div> <input type="text" /></div>
                <div>
                    <input type="button" value="Update" />
                    <input type="button" value="Delete Item" />
                </div>
         </li>
        </ul>
    </div>
    <div class="float-right">
    <h2>Add New Product</h2>
    <form id="product">
        @Html.ValidationSummary(true)
        <fieldset>
            <legend>Contact</legend>
            @Html.EditorForModel()
            <p>
                <input type="submit" value="Save" />
            </p>
        </fieldset>
    </form>
    </div>
</div>
Create a Link to the Admin Page
创建到Admin页面的链接
In Solution Explorer, expand the Views folder and then expand the Shared folder. Open the file named _Layout.cshtml. Locate the ul element with id = "menu", and an action link for the Admin view:
在“解决方案资源管理器”中,展开Views文件夹,然后展开Shared文件夹。打开名称为_Layout.cshtml的文件。定位到id = "menu"的ul元素,和一个用于Admin视图的动作链接:
<li>@Html.ActionLink("Admin", "Admin", "Home")</li>
In the sample project, I made a few other cosmetic changes, such as replacing the string “Your logo here”. These don’t affect the functionality of the application. You can download the project and compare the files.
在这个例子项目中,我做了几个其它装饰性的修改,如替换了字符串“Your logo here(这是你的logo)”。这些不会影响此应用程序的功能。你可以下载这个项目并比较此文件。
Run the application and click the “Admin” link that appears at the top of the home page. The Admin page should look like the following:
运行该应用程序,并点击出现在首页顶部的这个“Admin”链接。Admin页面看上去应当像这样(见图2-22):

图2-22. Admin页面
Right now, the page doesn't do anything. In the next section, we'll use Knockout.js to create a dynamic UI.
此刻,这个页面不做任何事情。在下一小节中,我们将使用Knockout.js来创建一个动态UI。
Add Authorization
添加授权
The Admin page is currently accessible to anyone visiting the site. Let's change this to restrict permission to administrators.
Admin此刻可以被任何访问网站的人所访问。让我们做点修改,把许可限制到管理员。
Start by adding an "Administrator" role and an administrator user. In Solution Explorer, expand the Filters folder and open the file named InitializeSimpleMembershipAttribute.cs. Locate the SimpleMembershipInitializer constructor. After the call to WebSecurity.InitializeDatabaseConnection, add the following code:
先从添加“Administrator(管理员)”角色和administrator用户开始。在“解决方案资源管理器”中,展开Filters文件夹,并打开名称为InitializeSimpleMembershipAttribute.cs的文件,定位到SimpleMembershipInitializer构造器。在对WebSecurity.InitializeDatabaseConnection的调用之后,添加以下代码:
const string adminRole = "Administrator";
const string adminName = "Administrator";

if (!Roles.RoleExists(adminRole))
{
    Roles.CreateRole(adminRole);
}

if (!WebSecurity.UserExists(adminName))
{
    WebSecurity.CreateUserAndAccount(adminName, "password");
    Roles.AddUserToRole(adminName, adminRole);
}
This is a quick-and-dirty way to add the "Administrator" role and create a user for the role.
这是添加“Administrator”角色并为该角色创建用户的一种快速而直接的方式。
In Solution Explorer, expand the Controllers folder and open the HomeController.cs file. Add the Authorize attribute to the Admin method.
在“解决方案资源管理器”中,展开Controllers文件夹,并打开HomeController.cs文件。把Authorize(授权)注解属性添加到Admin方法上:
[Authorize(Roles="Administrator")]
public ActionResult Admin()
{
    return View();
}
Open the AdminController.cs file and add the Authorize attribute to the entire AdminController class.
打开AdminController.cs文件,并把Authorize注解属性添加到整个AdminController类上:
[Authorize(Roles="Administrator")]
public class AdminController : ApiController
{
    // ...
MVC and Web API both define Authorize attributes, in different namespaces. MVC uses System.Web.Mvc.AuthorizeAttribute, while Web API uses System.Web.Http.AuthorizeAttribute.
MVC和Web API都定义了Authorize注解属性,但位于不同的命名空间。MVC使用的是System.Web.Mvc.AuthorizeAttribute,而Web API使用System.Web.Http.AuthorizeAttribute。
Now only administrators can view the Admin page. Also, if you send an HTTP request to the Admin controller, the request must contain an authentication cookie. If not, the server sends an HTTP 401 (Unauthorized) response. You can see this in Fiddler by sending a GET request to http://localhost:port/api/admin.
现在,只有管理员才可以查看Admin页面。而且,如果对Admin控制器发送一个HTTP请求,该请求必须包含一个认证cookie。否则,服务器会发送一个HTTP 401(未授权)响应。在Fiddler中,通过发送一个http://localhost:port/api/admin的GET请求,便会看到这种情况。
看完此文如果觉得有所收获,请给个推荐


