ActiveMQ系列:结合Spring,基于配置文件的使用ActiveMQ
前面有介绍与基础部分,有兴趣的可以移步:
初步认识了ActiveMQ:https://blog.csdn.net/qq_26975307/article/details/98875098,
结合JavaSE进行初尝试:https://blog.csdn.net/qq_26975307/article/details/98968854,
详细讲讲JMS:https://blog.csdn.net/qq_26975307/article/details/99408962,
JMS的可靠性:https://phubing.blog.csdn.net/article/details/99412285
此篇开始结合Spring,基于配置文件的使用ActiveMQ
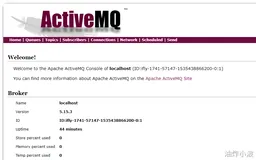
1、先了解下ActiveMQ的Broker
1.1、是什么
ActiveMQ的Broker(在Java中内嵌式的Broker,相当于一个ActiveMQ的实例)
Broker其实就是实现了用代码的形式启动ActiveMQ将MQ嵌入到Java代码中,以便随时用随时启动,在用的时候再去启动
这样能节省了资源,也保证了可靠性。
从activemq脚本可以看出启动ActiveMQ实际是启动,bin文件夹下的其实activemq.jar 包中有一个类为Main,这就是active的启动入口,Main主要是加载lib目录和ClassPath,初始化 类加载器,委托给ShellCommand,由ShellCommand根据命令描述去执行,如果是Version和HELP, 则打印信息,若是启动命令,则通过XBeanBrokerFactory创建BrokerService,这个过程主要利用的Spring的bean容器机制,然后启动BrokerService,主要启动持久化适配器,JMX连接,上下文关系器,最后启动所有网络连接,及TcpTransport连接TransportConnector,默认使用的是openwire:tcp,所以我们就看一下TcpTransportServer,TcpTransportServer有TcpTransportFactory创建并配置OpenWire协议转换器,启动TcpTransportServer,就是从ServerSocketFactory获取ServerSocket,并绑定ip和port,监听连接 ,并设置ServerSocket的监听器org.apache.activemq.transport.nio.SelectorManager.Listener,这个用的是java nio
1.2、嵌入式Broker
用ActiveMQ Broker作为独立的消息服务器来构建JAVA应用。
ActiveMQ也支持在vm中通信基于嵌入式的broker,能够无缝的集成其它java应用
顺带一提:
如果程序中出现:
Caused by: java. lang. ClassNotFoundException: com. fasterxml. jackson. databind. ObjectMapper
请引入以下 jar 包
<dependency>
    <groupId>com.fasterxml.jackson.core</groupId>
    <artifactId>jackson-databind</artifactId>
    <version>2.9.5</version>
</dependency>
2、结合Spring,基于配置文件的使用ActiveMQ
2.1、配置 resources 文件
<?xml version="1.0" encoding="UTF-8"?>
<beans xmlns="http://www.springframework.org/schema/beans"
       xmlns:xsi="http://www.w3.org/2001/XMLSchema-instance"
       xmlns:context="http://www.springframework.org/schema/context"
       xmlns:p="http://www.springframework.org/schema/p"
       xmlns:aop="http://www.springframework.org/schema/aop"
       xmlns:tx="http://www.springframework.org/schema/tx"
       xsi:schemaLocation="http://www.springframework.org/schema/beans
       http://www.springframework.org/schema/beans/spring-beans.xsd
       http://www.springframework.org/schema/context
       https://www.springframework.org/schema/context/spring-context.xsd
       http://www.springframework.org/schema/aop
       https://www.springframework.org/schema/context/spring-aop.xsd
       http://www.springframework.org/schema/tx
       https://www.springframework.org/schema/context/spring-tx.xsd">
    <!--开启包的自动扫描-->
    <context:component-scan base-package="com.phubing"></context:component-scan>
    <!--配置生产者(也即获得Connection工厂)-->
    <bean id="jmsFactory" class="org.apache.activemq.pool.PooledConnectionFactory" destroy-method="stop">
        <property name="connectionFactory">
            <!--真正可以产生Connection的ConnectionFactory,由对应的JMS服务厂商提供-->
            <bean class="org.apache.activemq.ActiveMQConnectionFactory">
                <property name="brokerURL" value="tcp://192.168.177.130:61616"></property>
            </bean>
        </property>
        <property name="maxConnections" value="100"></property>
    </bean>
    <!--这个是队列,点对点的(创建)-->
    <!--Spring经典的构造注入方式-->
    <bean id="destinationQueue" class="org.apache.activemq.command.ActiveMQQueue">
        <constructor-arg index="0" value="spring-active-queue"></constructor-arg>
    </bean>
    <bean id="destinationTopic" class="org.apache.activemq.command.ActiveMQTopic">
        <constructor-arg index="0" value="spring-active-topic"></constructor-arg>
    </bean>
    <!--Spring提供的JMS工具类他可以进行消息发送、接收等等-->
    <bean id="jmsTemplate" class="org.springframework.jms.core.JmsTemplate">
        <!--告诉Template操作的是哪个链接,操作的是基于上述链接的队列还是主题-->
        <property name="connectionFactory" ref="jmsFactory"></property>
        <property name="defaultDestination" ref="destinationQueue"></property>
        <!--做了一些底层的强制转换与适配-->
        <property name="messageConverter">
            <bean class="org.springframework.jms.support.converter.SimpleMessageConverter"></bean>
        </property>
    </bean>
</beans>
在Spring中切换 Queue 与 Topic 非常简单,只需要把上述文件中的(destinationQueue)
<!--Spring提供的JMS工具类他可以进行消息发送、接收等等-->
    <bean id="jmsTemplate" class="org.springframework.jms.core.JmsTemplate">
        <!--告诉Template操作的是哪个链接,操作的是基于上述链接的队列还是主题-->
        <property name="connectionFactory" ref="jmsFactory"></property>
        <property name="defaultDestination" ref="destinationQueue"></property>
        <!--做了一些底层的强制转换与适配-->
        <property name="messageConverter">
            <bean class="org.springframework.jms.support.converter.SimpleMessageConverter"></bean>
        </property>
    </bean>
改为:
<!--Spring提供的JMS工具类他可以进行消息发送、接收等等-->
    <bean id="jmsTemplate" class="org.springframework.jms.core.JmsTemplate">
        <!--告诉Template操作的是哪个链接,操作的是基于上述链接的队列还是主题-->
        <property name="connectionFactory" ref="jmsFactory"></property>
        <property name="defaultDestination" ref="destinationTopic"></property>
        <!--做了一些底层的强制转换与适配-->
        <property name="messageConverter">
            <bean class="org.springframework.jms.support.converter.SimpleMessageConverter"></bean>
        </property>
    </bean>
即可
2.2、SpringMQ_Produce 消息生产者
package com.phubing.springmq_queue;
import org.apache.xbean.spring.context.ClassPathXmlApplicationContext;
import org.springframework.beans.factory.annotation.Autowired;
import org.springframework.context.ApplicationContext;
import org.springframework.jms.core.JmsTemplate;
import org.springframework.jms.core.MessageCreator;
import org.springframework.stereotype.Service;
import javax.jms.JMSException;
import javax.jms.Message;
import javax.jms.Session;
import javax.jms.TextMessage;
/**
 * @ClassName SpringMQ_Produce
 * @Description TODO
 * @Author phubing
 * @Date 2019-08-06 22:30
 * @Version 1.0
 **/
@Service
public class SpringMQ_Produce {
    @Autowired
    private JmsTemplate jmsTemplate;
    public static void main(String[] args) {
        ApplicationContext ctx = new ClassPathXmlApplicationContext("applicationContext.xml");
        //只要通过xml注入的,默认首字母小写即可得到该bean(开启了包扫描并且加了@Service),相当于new
        SpringMQ_Produce produce = (SpringMQ_Produce) ctx.getBean("springMQ_Produce");
        //使用Lambda表达式写法
    produce.jmsTemplate.send((session) -> {
            TextMessage textMessage = session.createTextMessage("spring和ActiveMQ整合case,自动配置消费者");
            return textMessage;
        });
        System.out.println("发送成功");
        /*
    第二种写法
        produce.jmsTemplate.send(new MessageCreator() {
            @Override
            public Message createMessage(Session session) throws JMSException {
                TextMessage textMessage = session.createTextMessage("spring和ActiveMQ整合case****");
                return textMessage;
            }
        });
        */
    }
}
2.3、SpringMQ_Consumer 消息消费者
package com.phubing.springmq_queue;
import org.apache.xbean.spring.context.ClassPathXmlApplicationContext;
import org.springframework.beans.factory.annotation.Autowired;
import org.springframework.context.ApplicationContext;
import org.springframework.jms.core.JmsTemplate;
import org.springframework.stereotype.Service;
/**
 * @ClassName SpringMQ_Produce
 * @Description TODO
 * @Author phubing
 * @Date 2019-08-06 22:30
 * @Version 1.0
 **/
@Service
public class SpringMQ_Consumer {
    @Autowired
    private JmsTemplate jmsTemplate;
    public static void main(String[] args) {
        ApplicationContext ctx = new ClassPathXmlApplicationContext("applicationContext.xml");
        //只要通过xml注入的,默认首字母小写即可得到该bean(开启了包扫描并且加了@Service),相当于new
        SpringMQ_Consumer consumer = (SpringMQ_Consumer) ctx.getBean("springMQ_Consumer");
        String convert = (String) consumer.jmsTemplate.receiveAndConvert();
        System.out.println("消费者收到的消息:"+convert);
    }
}
3、使用 MessageListener 监听生产者,生产者启动,消费者也自行启动
3.1、application.xml 文件增加
增加 jmsContainer 的 DefaultMessageListener 需要实现 Messagelistener 接口的实现类
<bean id="myMessageListener" class="com.phubing.springmq_queue.MyMessagelistener">
</bean>
或者在实现 Messagelistener 接口的实现类上增加 @Component
package com.phubing.springmq_queue;
import org.springframework.stereotype.Component;
import javax.jms.Message;
import javax.jms.MessageListener;
import javax.jms.TextMessage;
/**
 * @ClassName MyMessagelistener
 * @Description TODO
 * @Author phubing
 * @Date 2019-08-12 22:02
 * @Version 1.0
* 让容器识别此类,有哪些方法?
*   1、在Spring配置文件中配置bean进行注入
*
* 假设又有别的类,岂不是越来越多配置到xml中?
 *  2、使用注解component(首先得开启包扫描)
*
* */
@Component
public class MyMessagelistener implements MessageListener {
    @Override
    public void onMessage(Message message) {
        if(null != message && message instanceof TextMessage){
            TextMessage textMessage = (TextMessage) message;
            try {
                System.out.println(textMessage.getText());
            }catch (Exception e){
                e.printStackTrace();
            }
        }else{
        }
    }
}
启动生产者观察控制台情况
未完待续......(下篇结合Springboot,基于 application.yml 使用ActiveMQ)